This week over on YouTube and IGTV, I’m chatting with runner and fellow geek Alex Quevedo (@alexquevedo6) about how he fell in love with running and how he combines his love for logging miles with his passion for Star Wars, Marvel, gaming and more. I hope you enjoy!
star wars
A Very Special Bonus Episode of “Running and…”
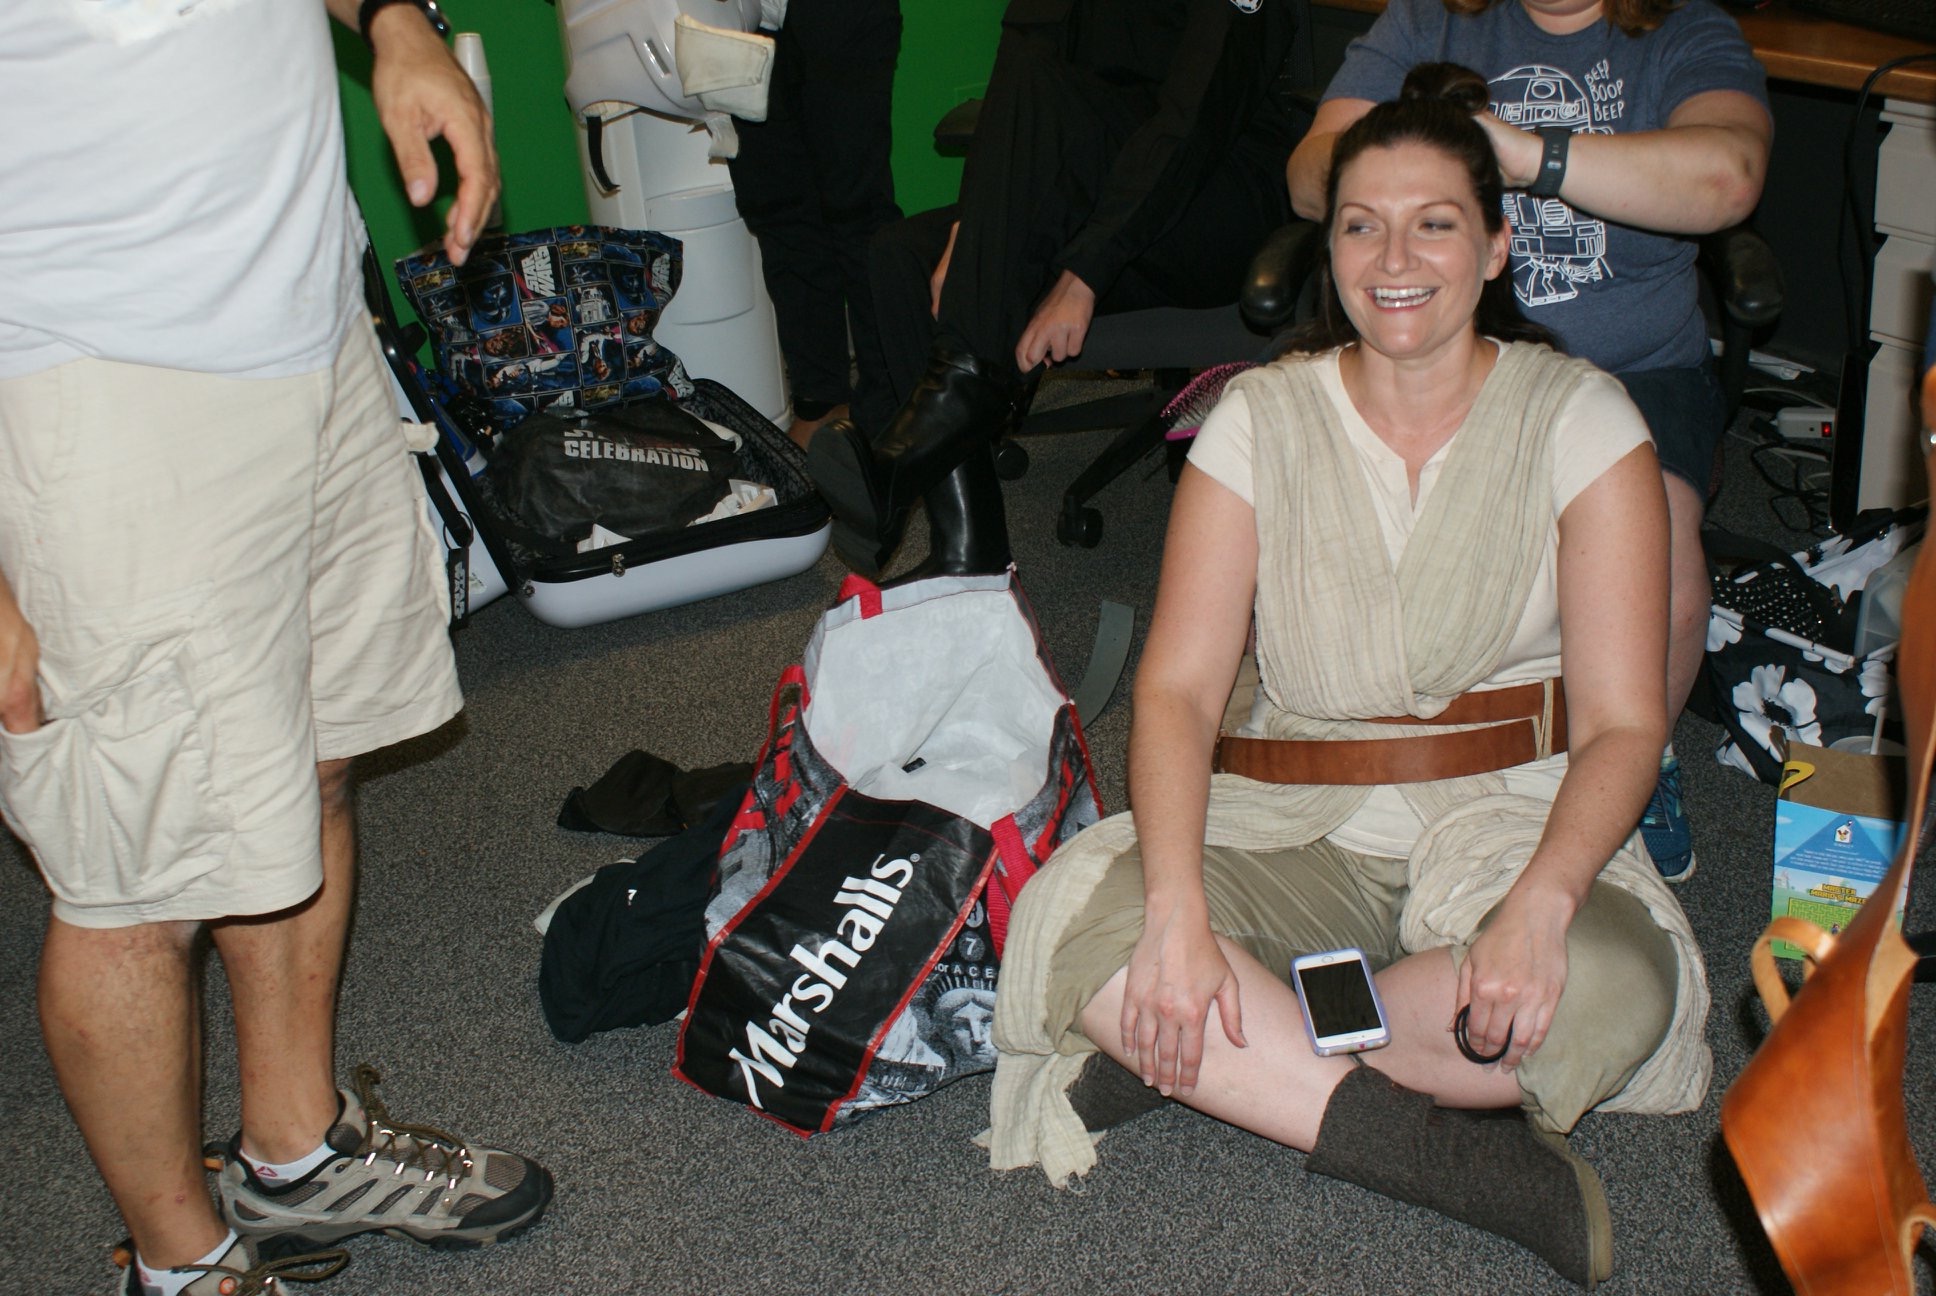
After a great chat about running and physical therapy with Tiffanie (@Star_wars_runnah), our conversation soon turned to our number one shared interest beyond running: Star Wars.
This is a little bonus video of what happens when you put two Star Wars fans together after nearly 8 months of quarantine with no one to show off their toys and talk Star Wars with.
Running and… Physical Therapy
It’s time for Running and… Physical Therapy!
In Episode 2, I’m chatting with Tiffanie (aka @star_wars_runnah) about how her job as a physical therapist for children 3 years old and under has helped her stay grounded and healthy throughout a 20+ year running career that includes a handful of Boston Marathons and even more Star Wars costumes.
What – or who – else do you want to see on Running and? Let me know in the comments!
Building Resistance Rey: The Pants
A long time ago, in a galaxy far, far away… I started my Resistance Rey build.
I was excited for this build mainly because it was my “wouldn’t it be nice” cosplay that magically came true by like 85% when Wendy of Chic and Geeks hooked me up with the vest, gauntlets, arm wraps and bag for this costume for an unbeatable price over the summer.
But, as it tends to do, life happened. I commissioned a shirt that took a bit longer than I’d expected (10 weeks, yikes) so I kind of hung around blaming my cosplay laziness on the delayed shirt. WELL. When I learned – with about 2 weeks before NYCC – that the shirt would arrive in time for the con, I went into ConCrunch mode on the pants night after night. Here’s how I modded them!
Thanks to the advice of the lovely ladies in the Rey Cosplay Community on Facebook, I started with a pair of Gloria Vanderbilt Anita Sateen Straight-Leg Pants in Toasted Brown.
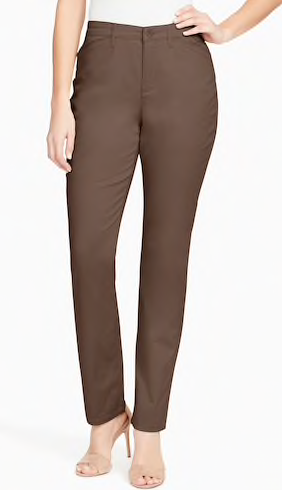
I know: they look VERY brown. But trust me. Much like EVERY SINGLE THING REY OWNS, the color changes depending on the light and they’re actually quite greige/olive in some lights.
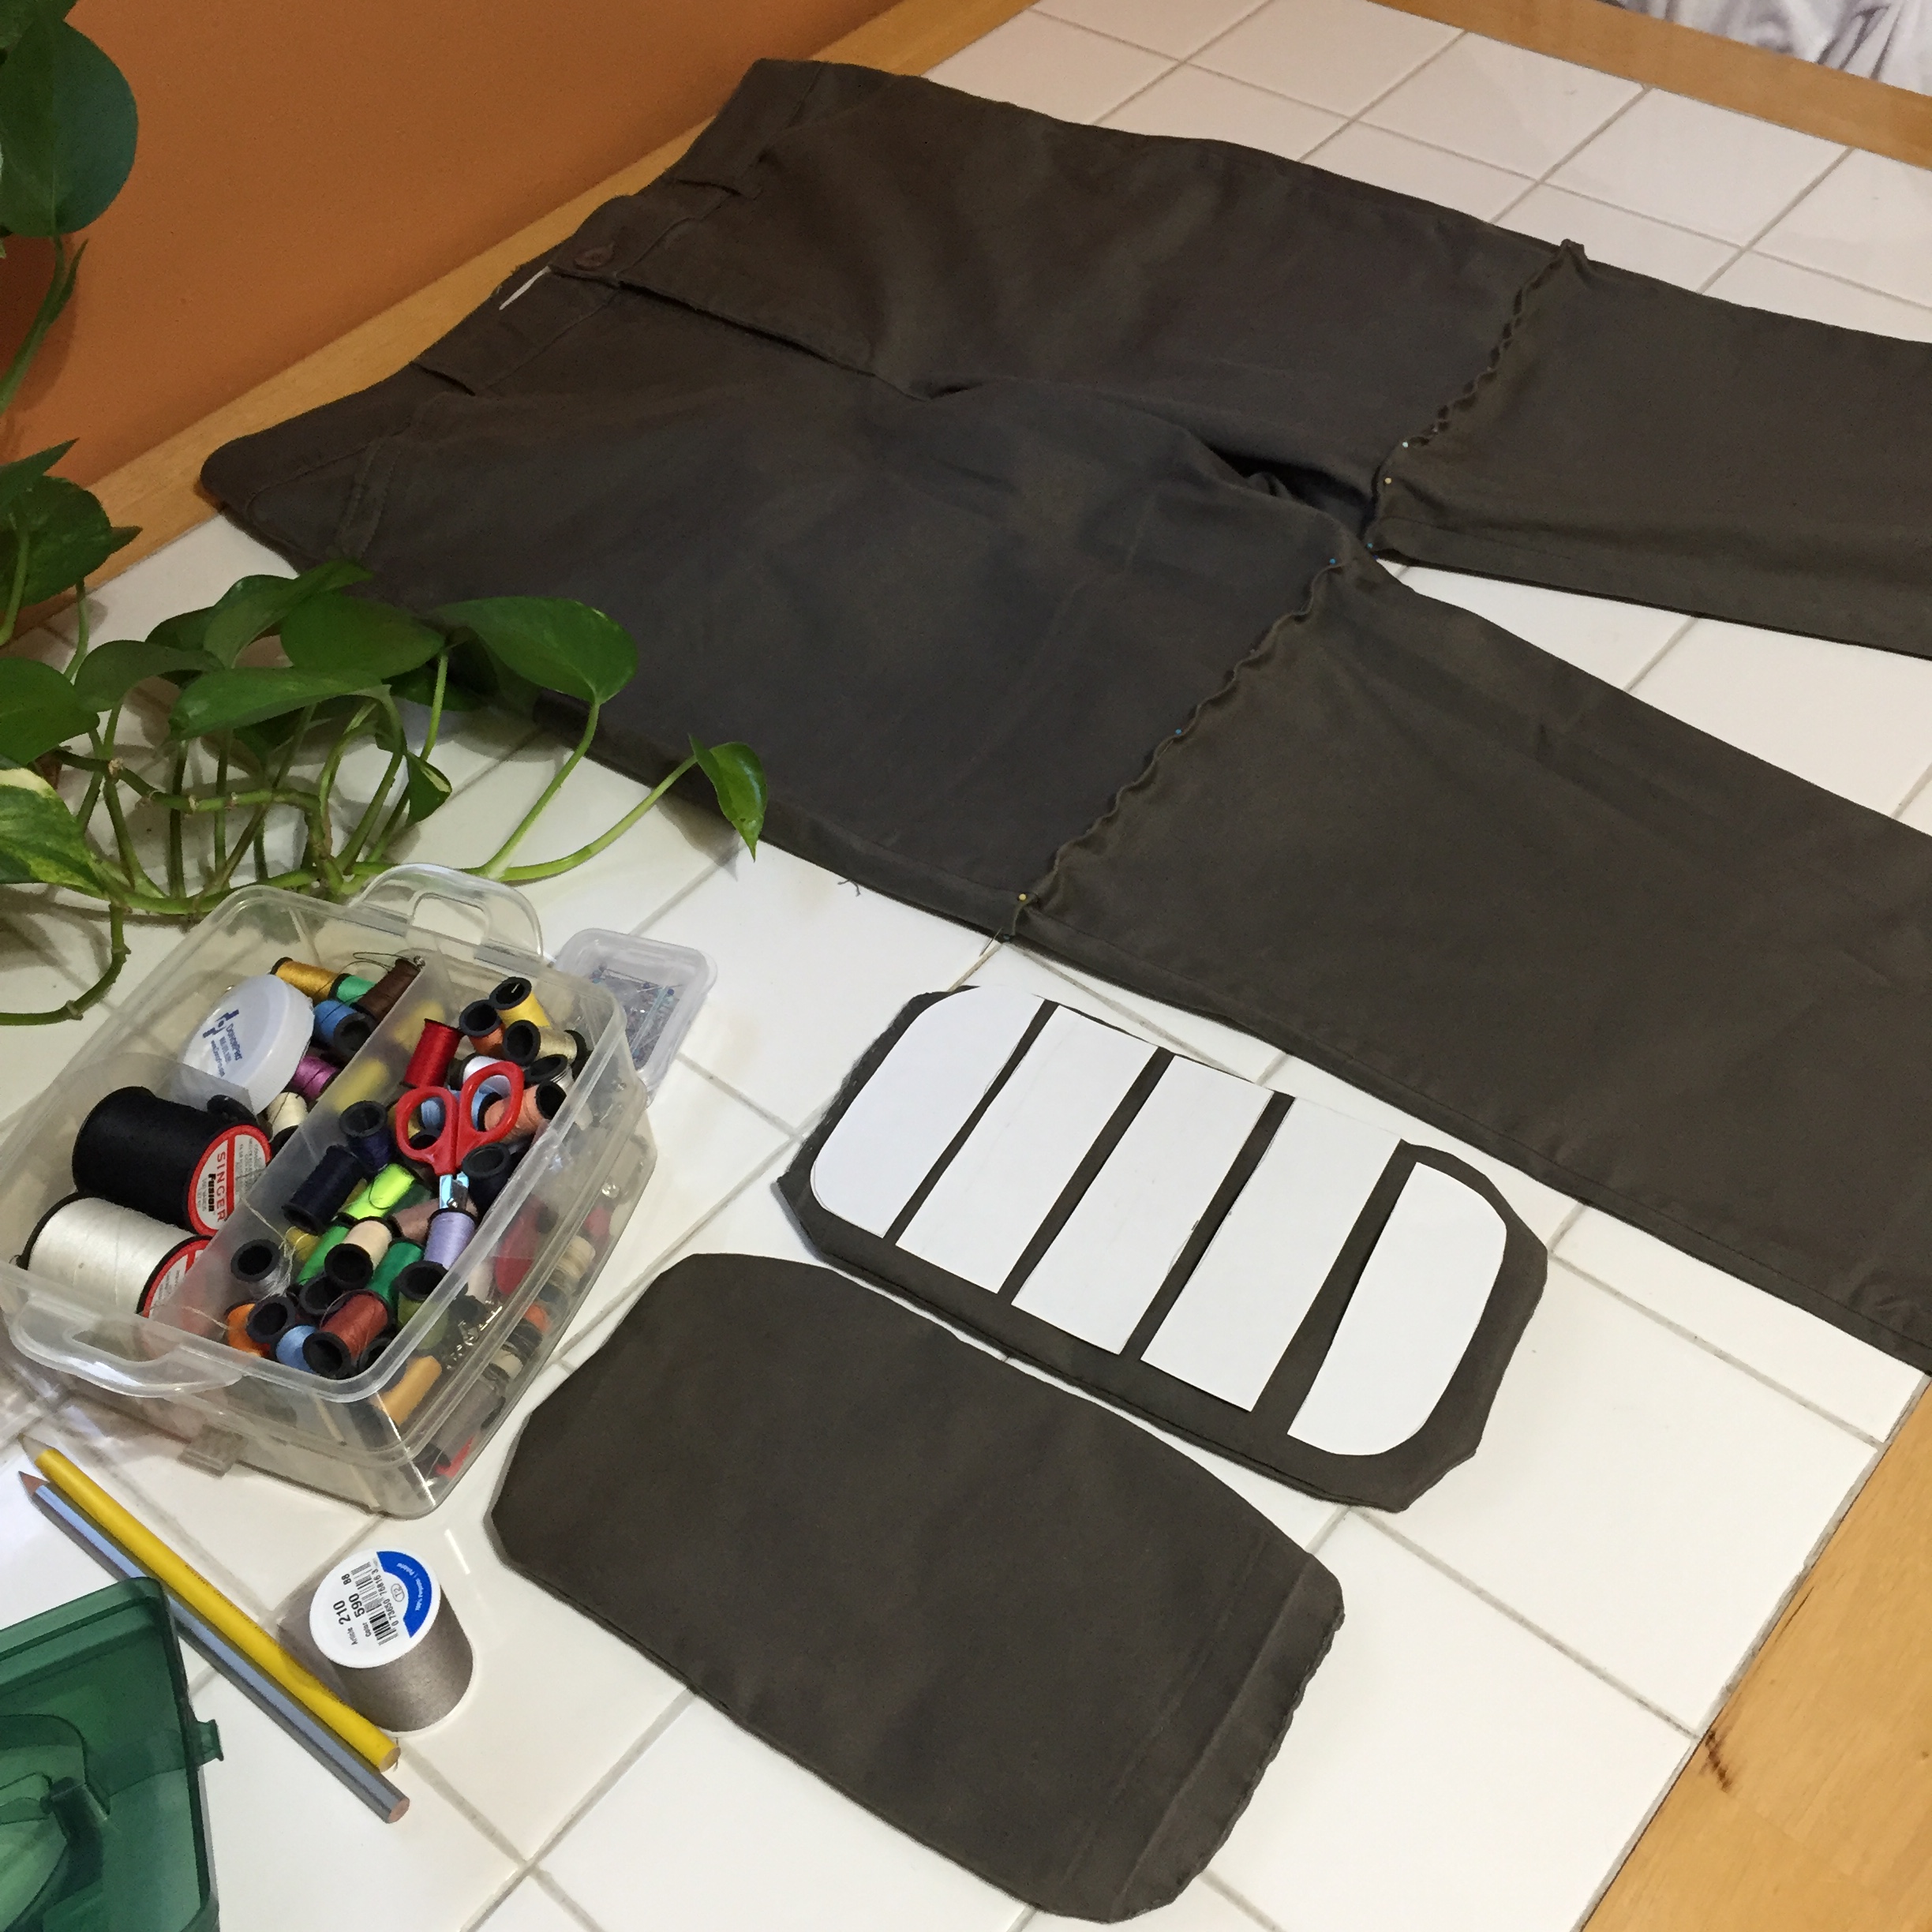
To start, I put the pants and marked where they should come down to just past my knees, leaving room for the knee slit:

This was the most stressful task, and I put it off way longer than I had to. But cutting those pants was so FINAL! I mean sure, I could go back to Kohls and get a new pair but that wasn’t the point. So I measured like three times and cut even lower than I thought I’d need to, and figured I’d hem them up if I had to.

My plan was to use the leftover leg pieces to create the kneepads that I’d then stuff with batting and sew on separately, last. Of course, I ended up cutting not enough off of the leg and had to remove the seams on the bottom to get an extra inch or two of fabric (as you can see above).
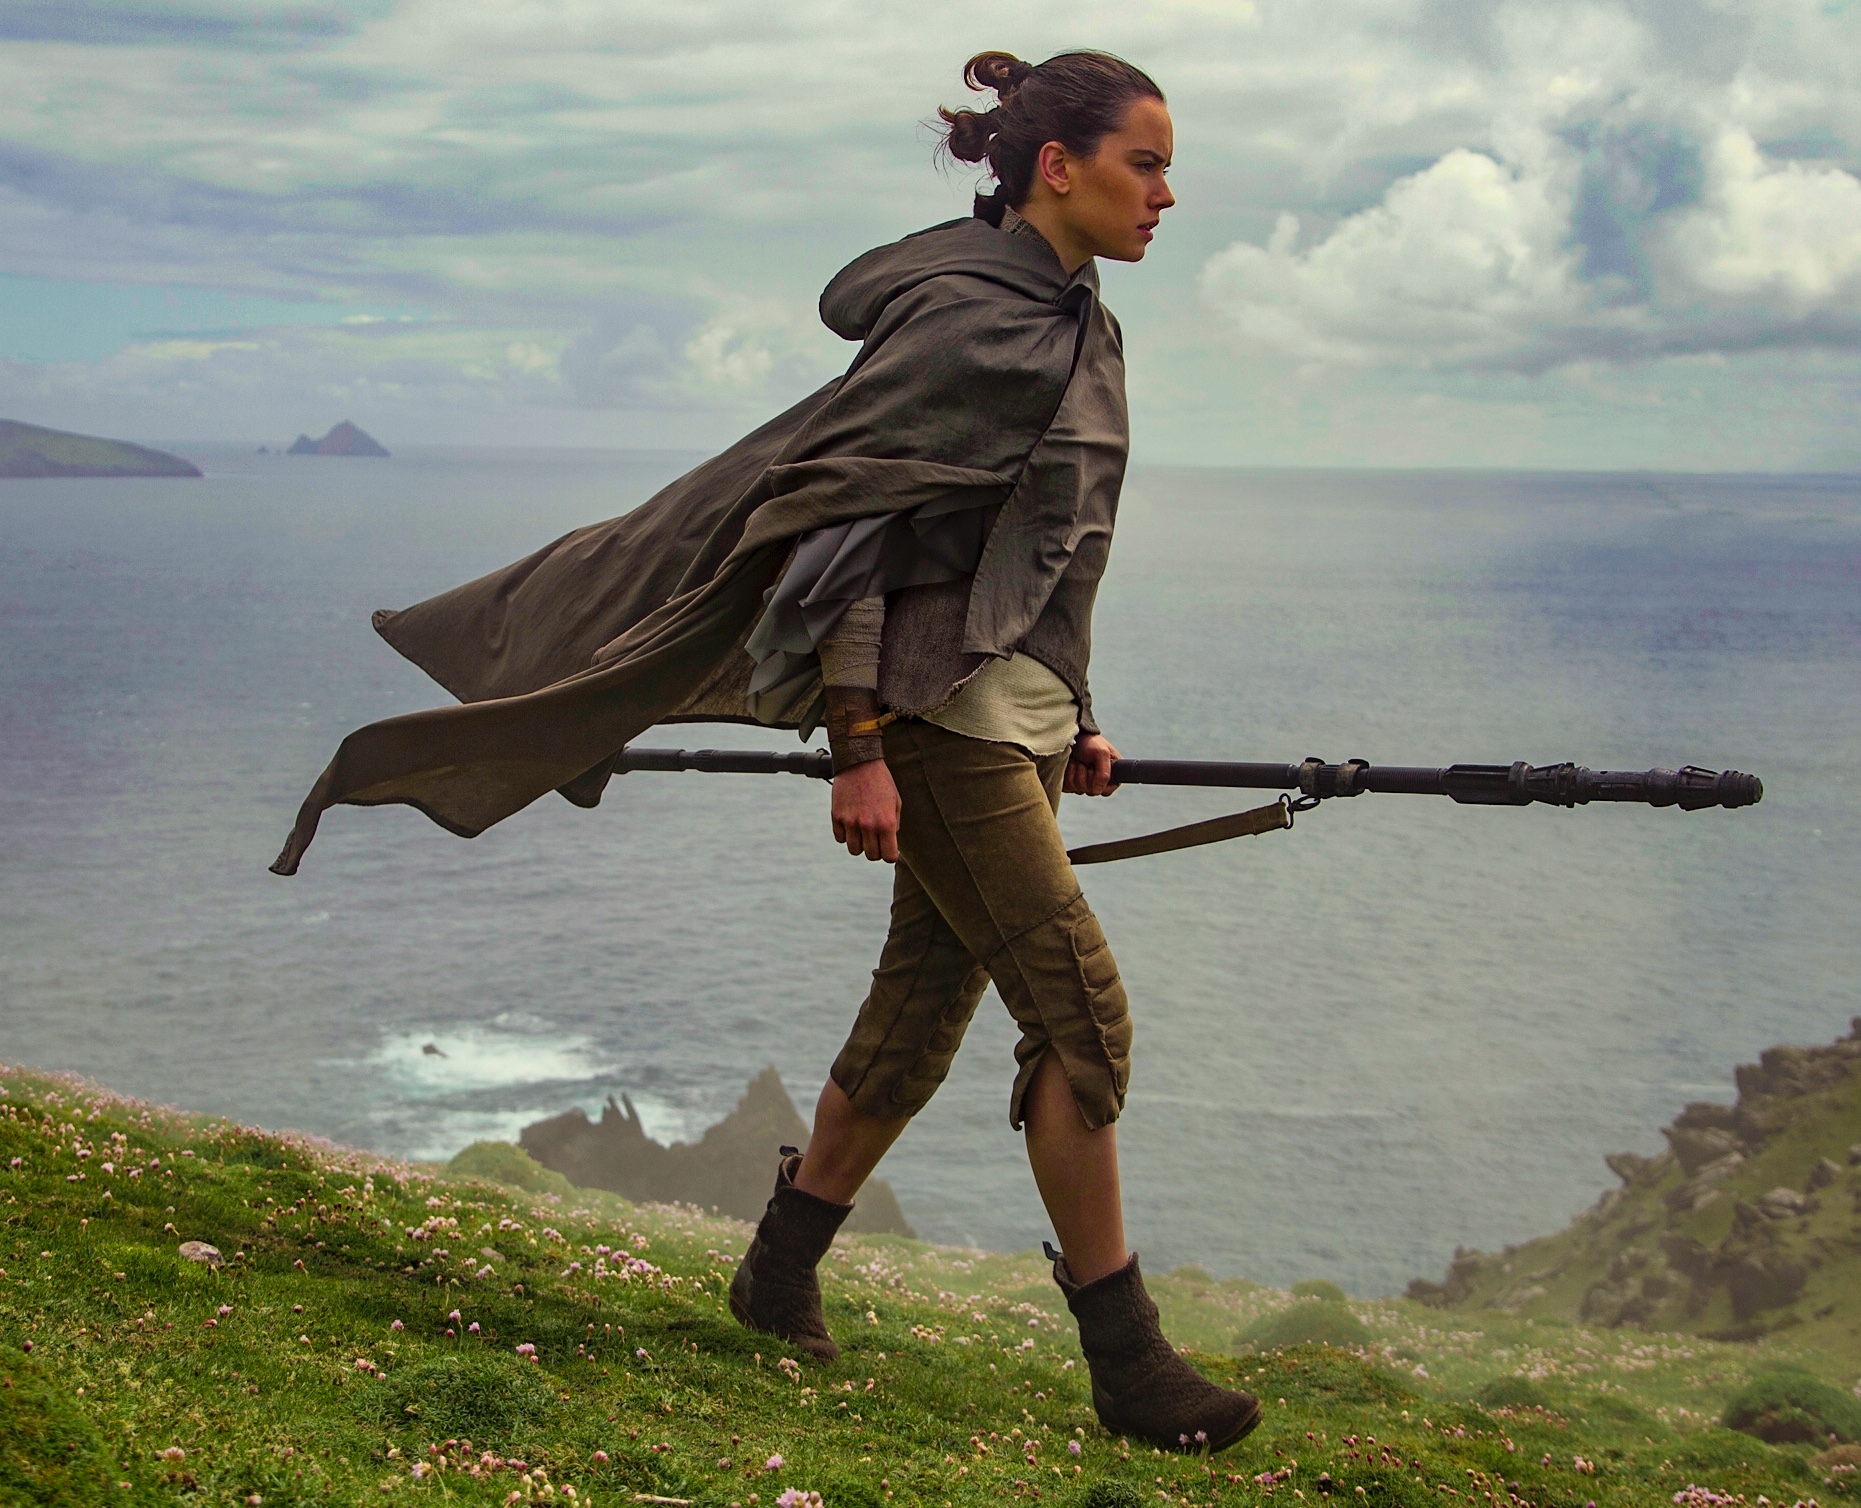
To get the shape of the kneepad, I wish I had a more scientific method but I honestly just obsessed over movie screenshots and photos of the actual costume and eyeballed it against my own leg.
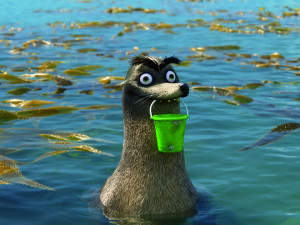
The Rey group on Facebook has a bunch of super great templates and stencils that people who are much smarter than me can scale to the size they need based on their heights and create amazingly accurate, perfectly smooth-seamed kneepads. I, on the other hand, take the Gerald approach: smile with blind confidence because I HAVE A BUCKET.
So I took some thicker card stock and traced the outline of the oval-ish knee pads the CRL required, and then did some pencil sketching to figure out what size the blocks should be inside, while also allowing for space between each section. Keep in mind I was going to be hand-stitching all of this because I also don’t own a sewing machine. So… yeah.
#IAmGerald.
Once I had the kneepad templates done, I cut out the 4 kneepad pieces from the remaining pants fabric, ironed them to get the seams out, sewed them together cruddy side in, and left one corner open so I could stuff in a few layers of low-loft batting (look at me throwing actual correct terms around!). Then I stitched up the top and voila: two semi-oval-ish-if-you-squint kneepads. I also cut the templates so that I had the sections ready to hand stitch, too.
Hey, the good thing about Rey’s outfits is that they’re technically all handmade and scavenged, so they don’t have to be Imperial Perfect (TM).
Next came the thigh seam and whipstitching around the hem and knee slit and kneepad making.
Alternatively titled: the week I watched 32 hours of YouTube videos on “how to pintuck” and “how to whipstitch”. Once I was confident in my ability (and reassured myself a hundred times that IT’S JUST THREAD AND YOU CAN ALWAYS RIP IT OUT AND START AGAIN), I marked off where the thigh seam should lay and pinned it out around both legs, front and back (see the pin job in the pic above). Then I turned on The Great British Bake Off and stitched my heart out for about 10 hours over the next 6 days.
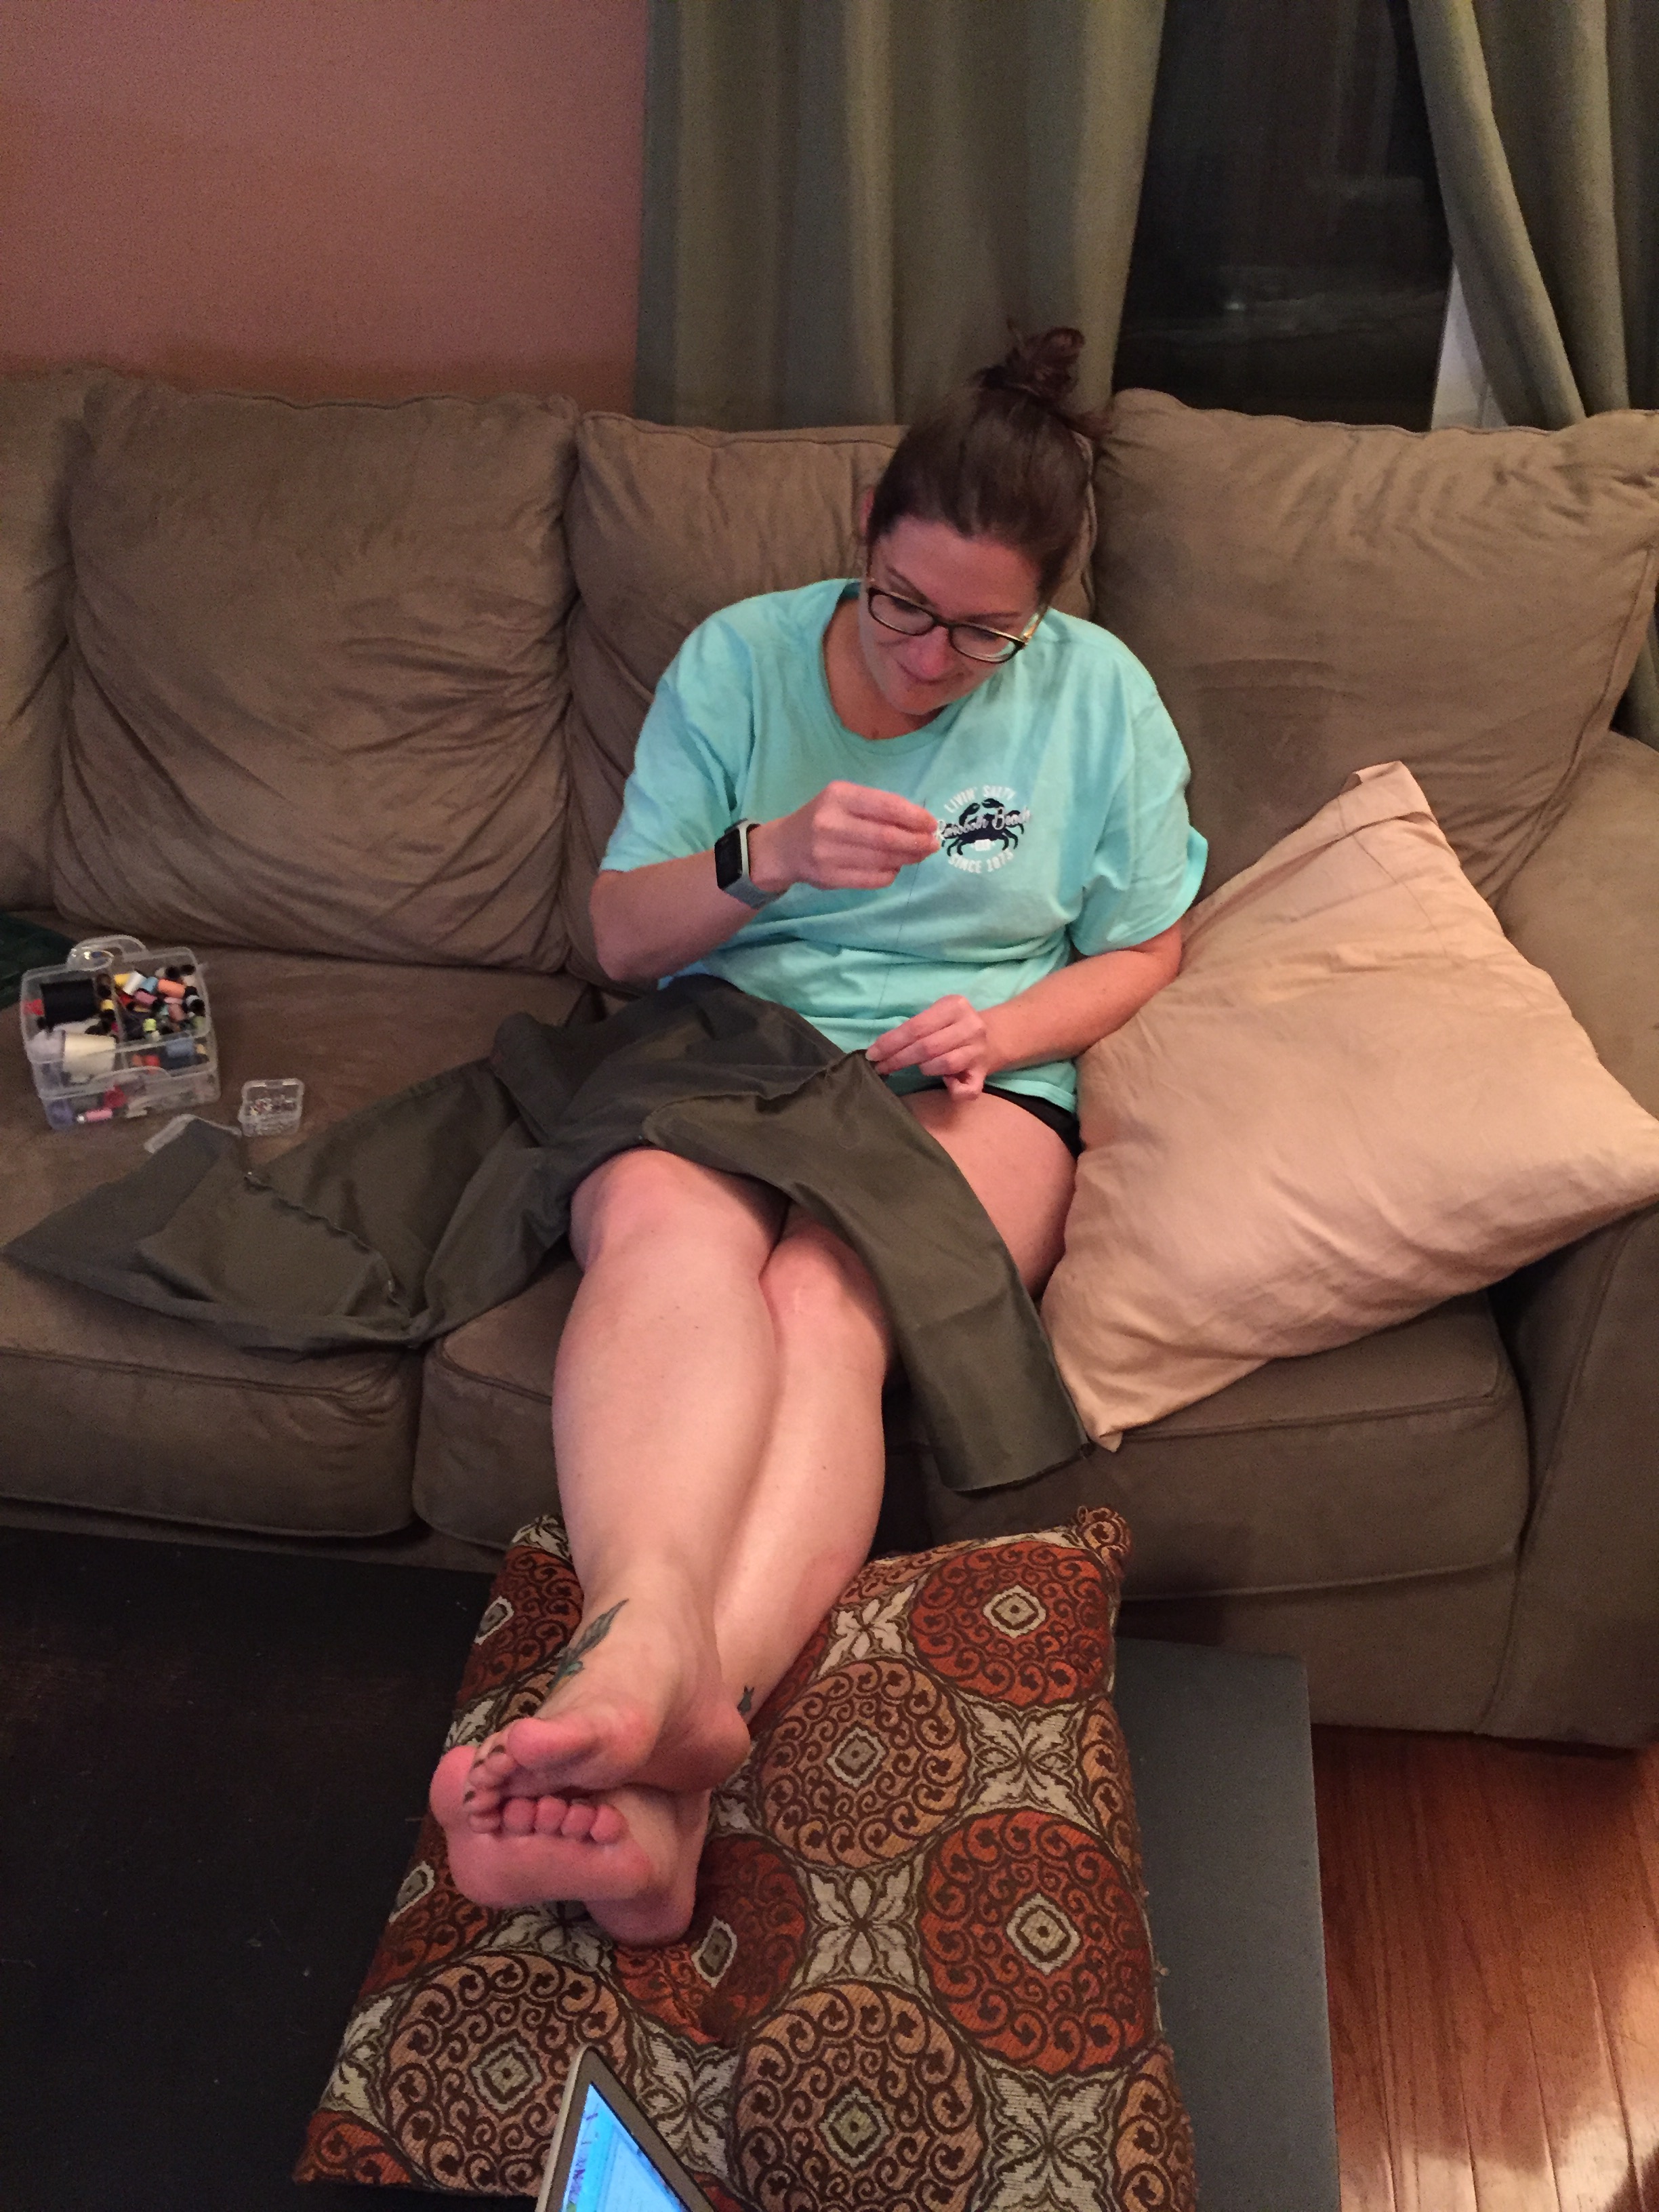
Not pictured: all the blood I shed while doing this work.
Slowly but surely over the evenings, I finished the thigh seam and all of the stitching around the hems and knee slit, and one kneepad.
That’s when I realized that the kneepad looked a little… sad.
Well that’s because I didn’t use enough batting.
What’s a seal with no sewing skills and a lot of ingenuity (and a bucket) to do?
Finish the other kneepad with the same amount of batting, then cut tiny slits in the backs of each section of both pads and SHOVE EXTRA BATTING IN WITH A CHOPSTICK then stitch each hole shut again, and delicately attach each kneepad by hand while The Last Jedi plays in the background and between sobbing breaks every time Leia is on screen.
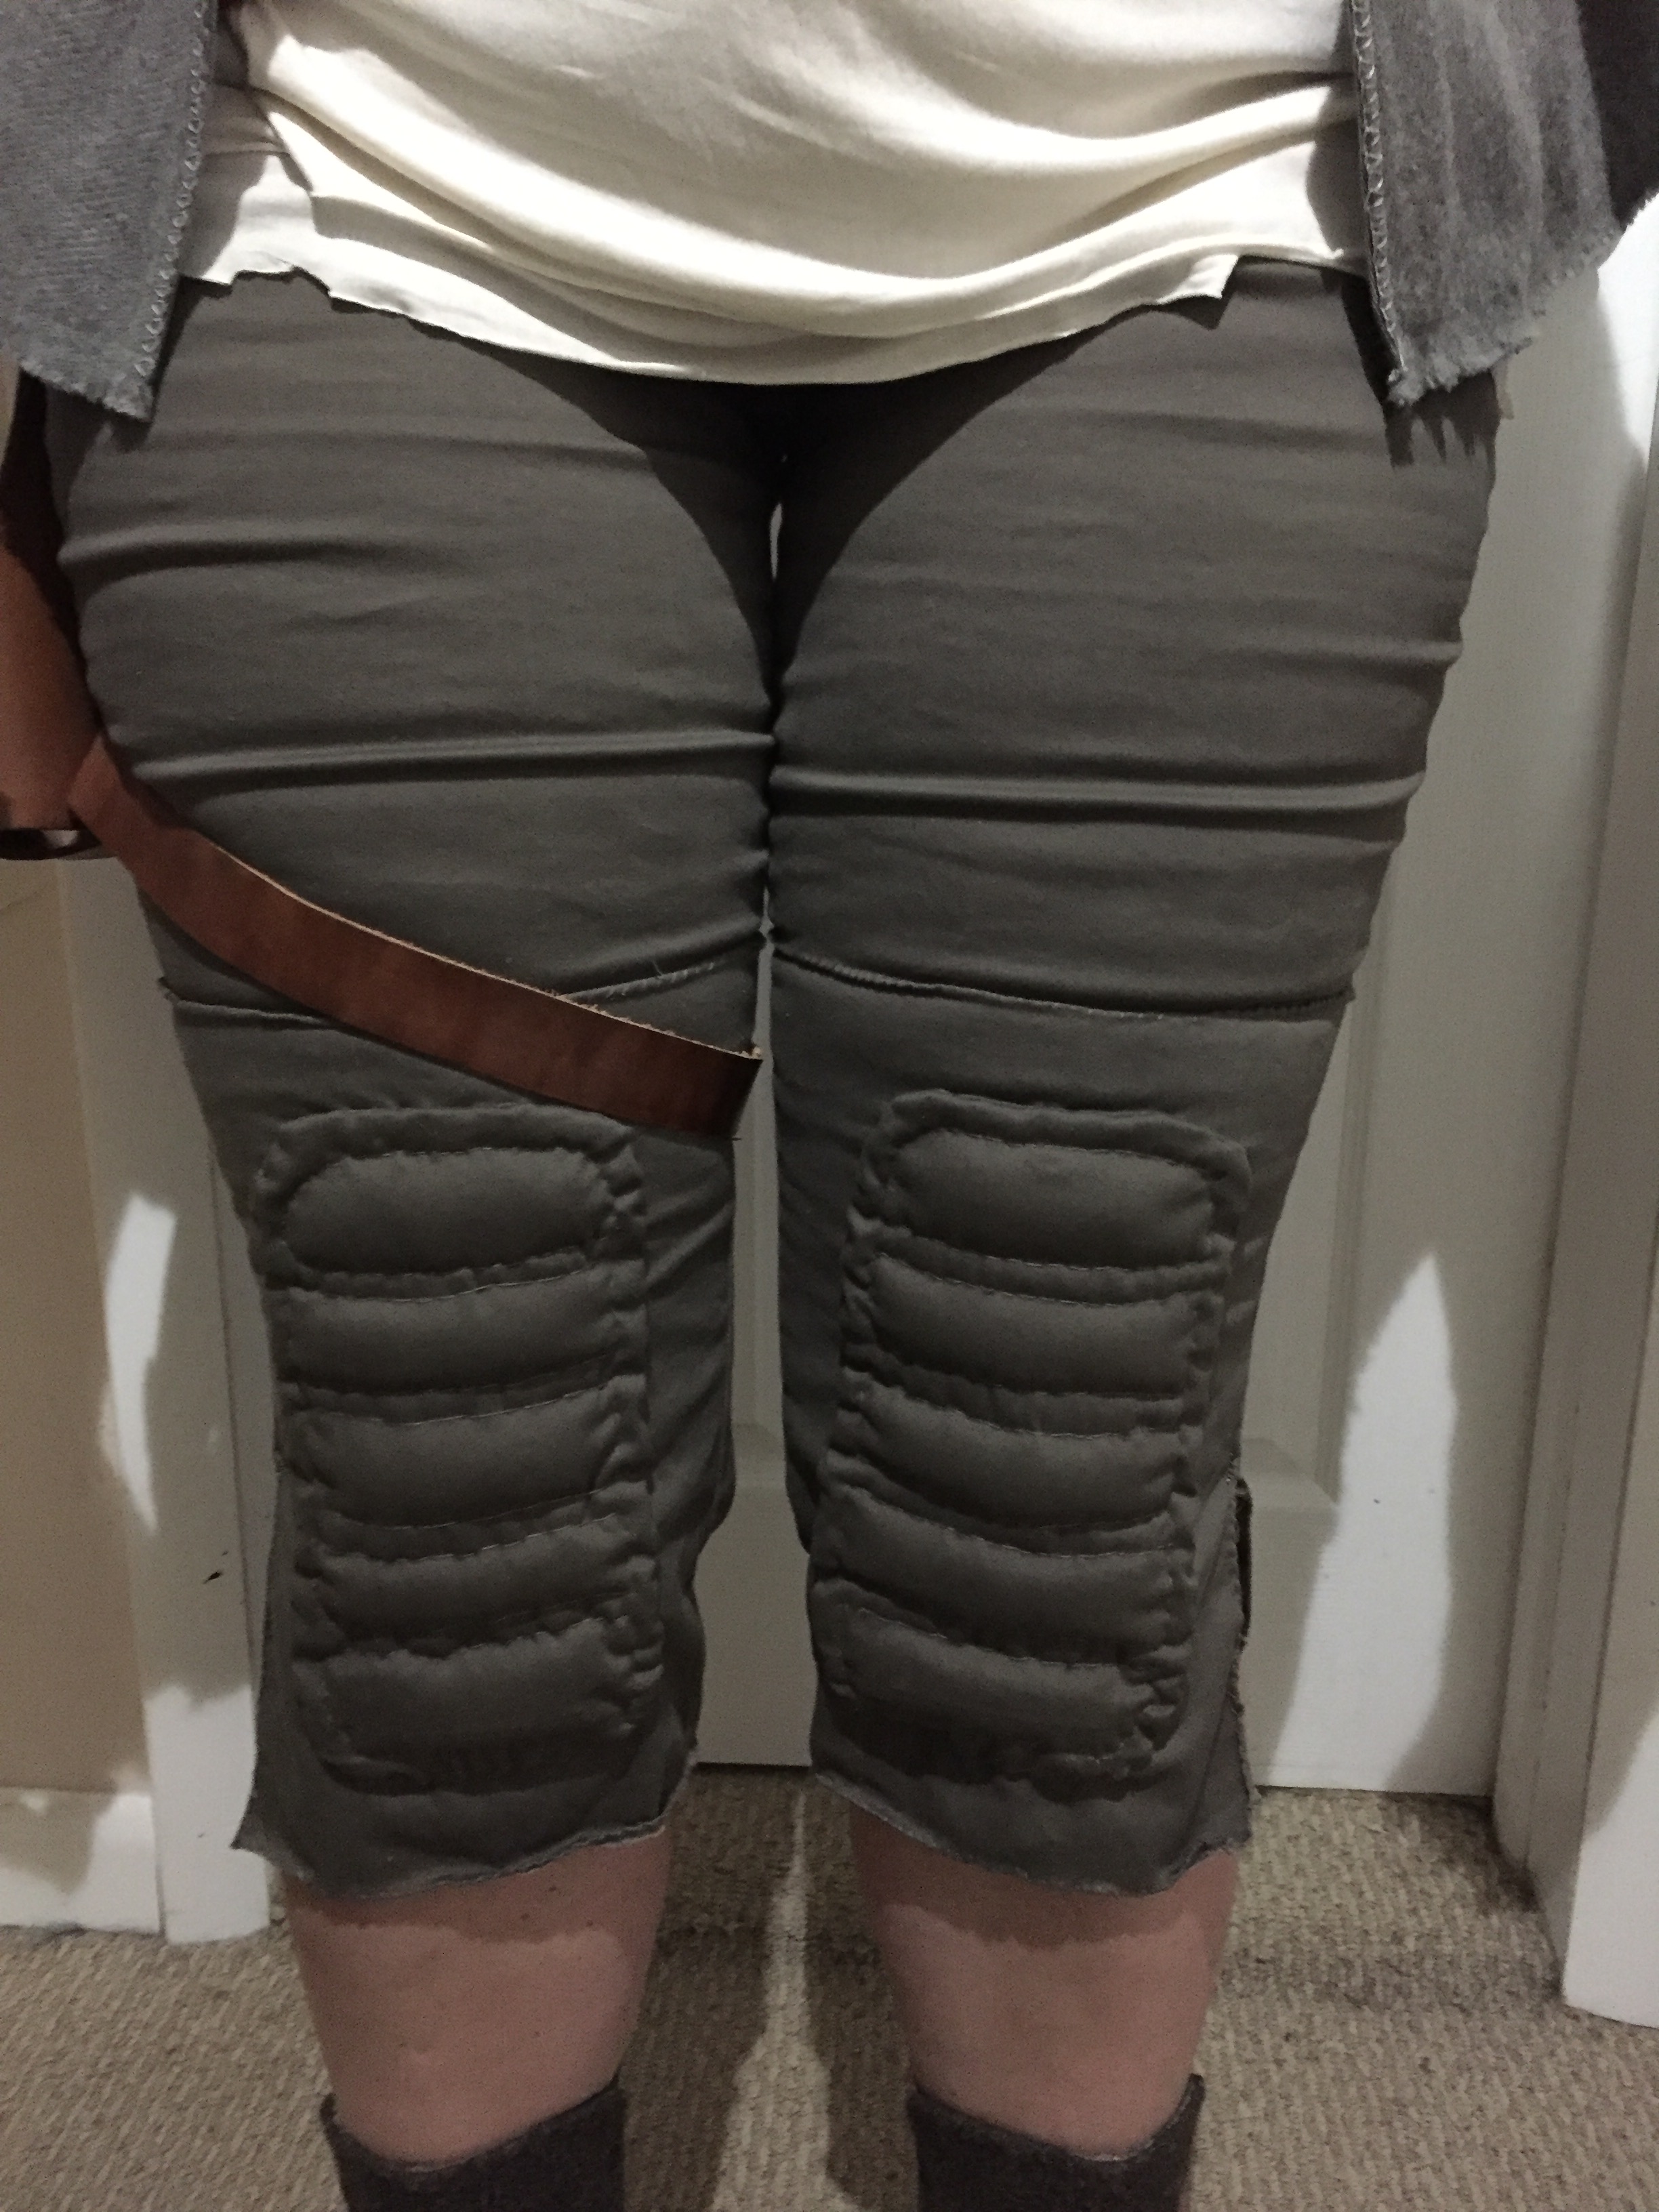
Reader, it worked.

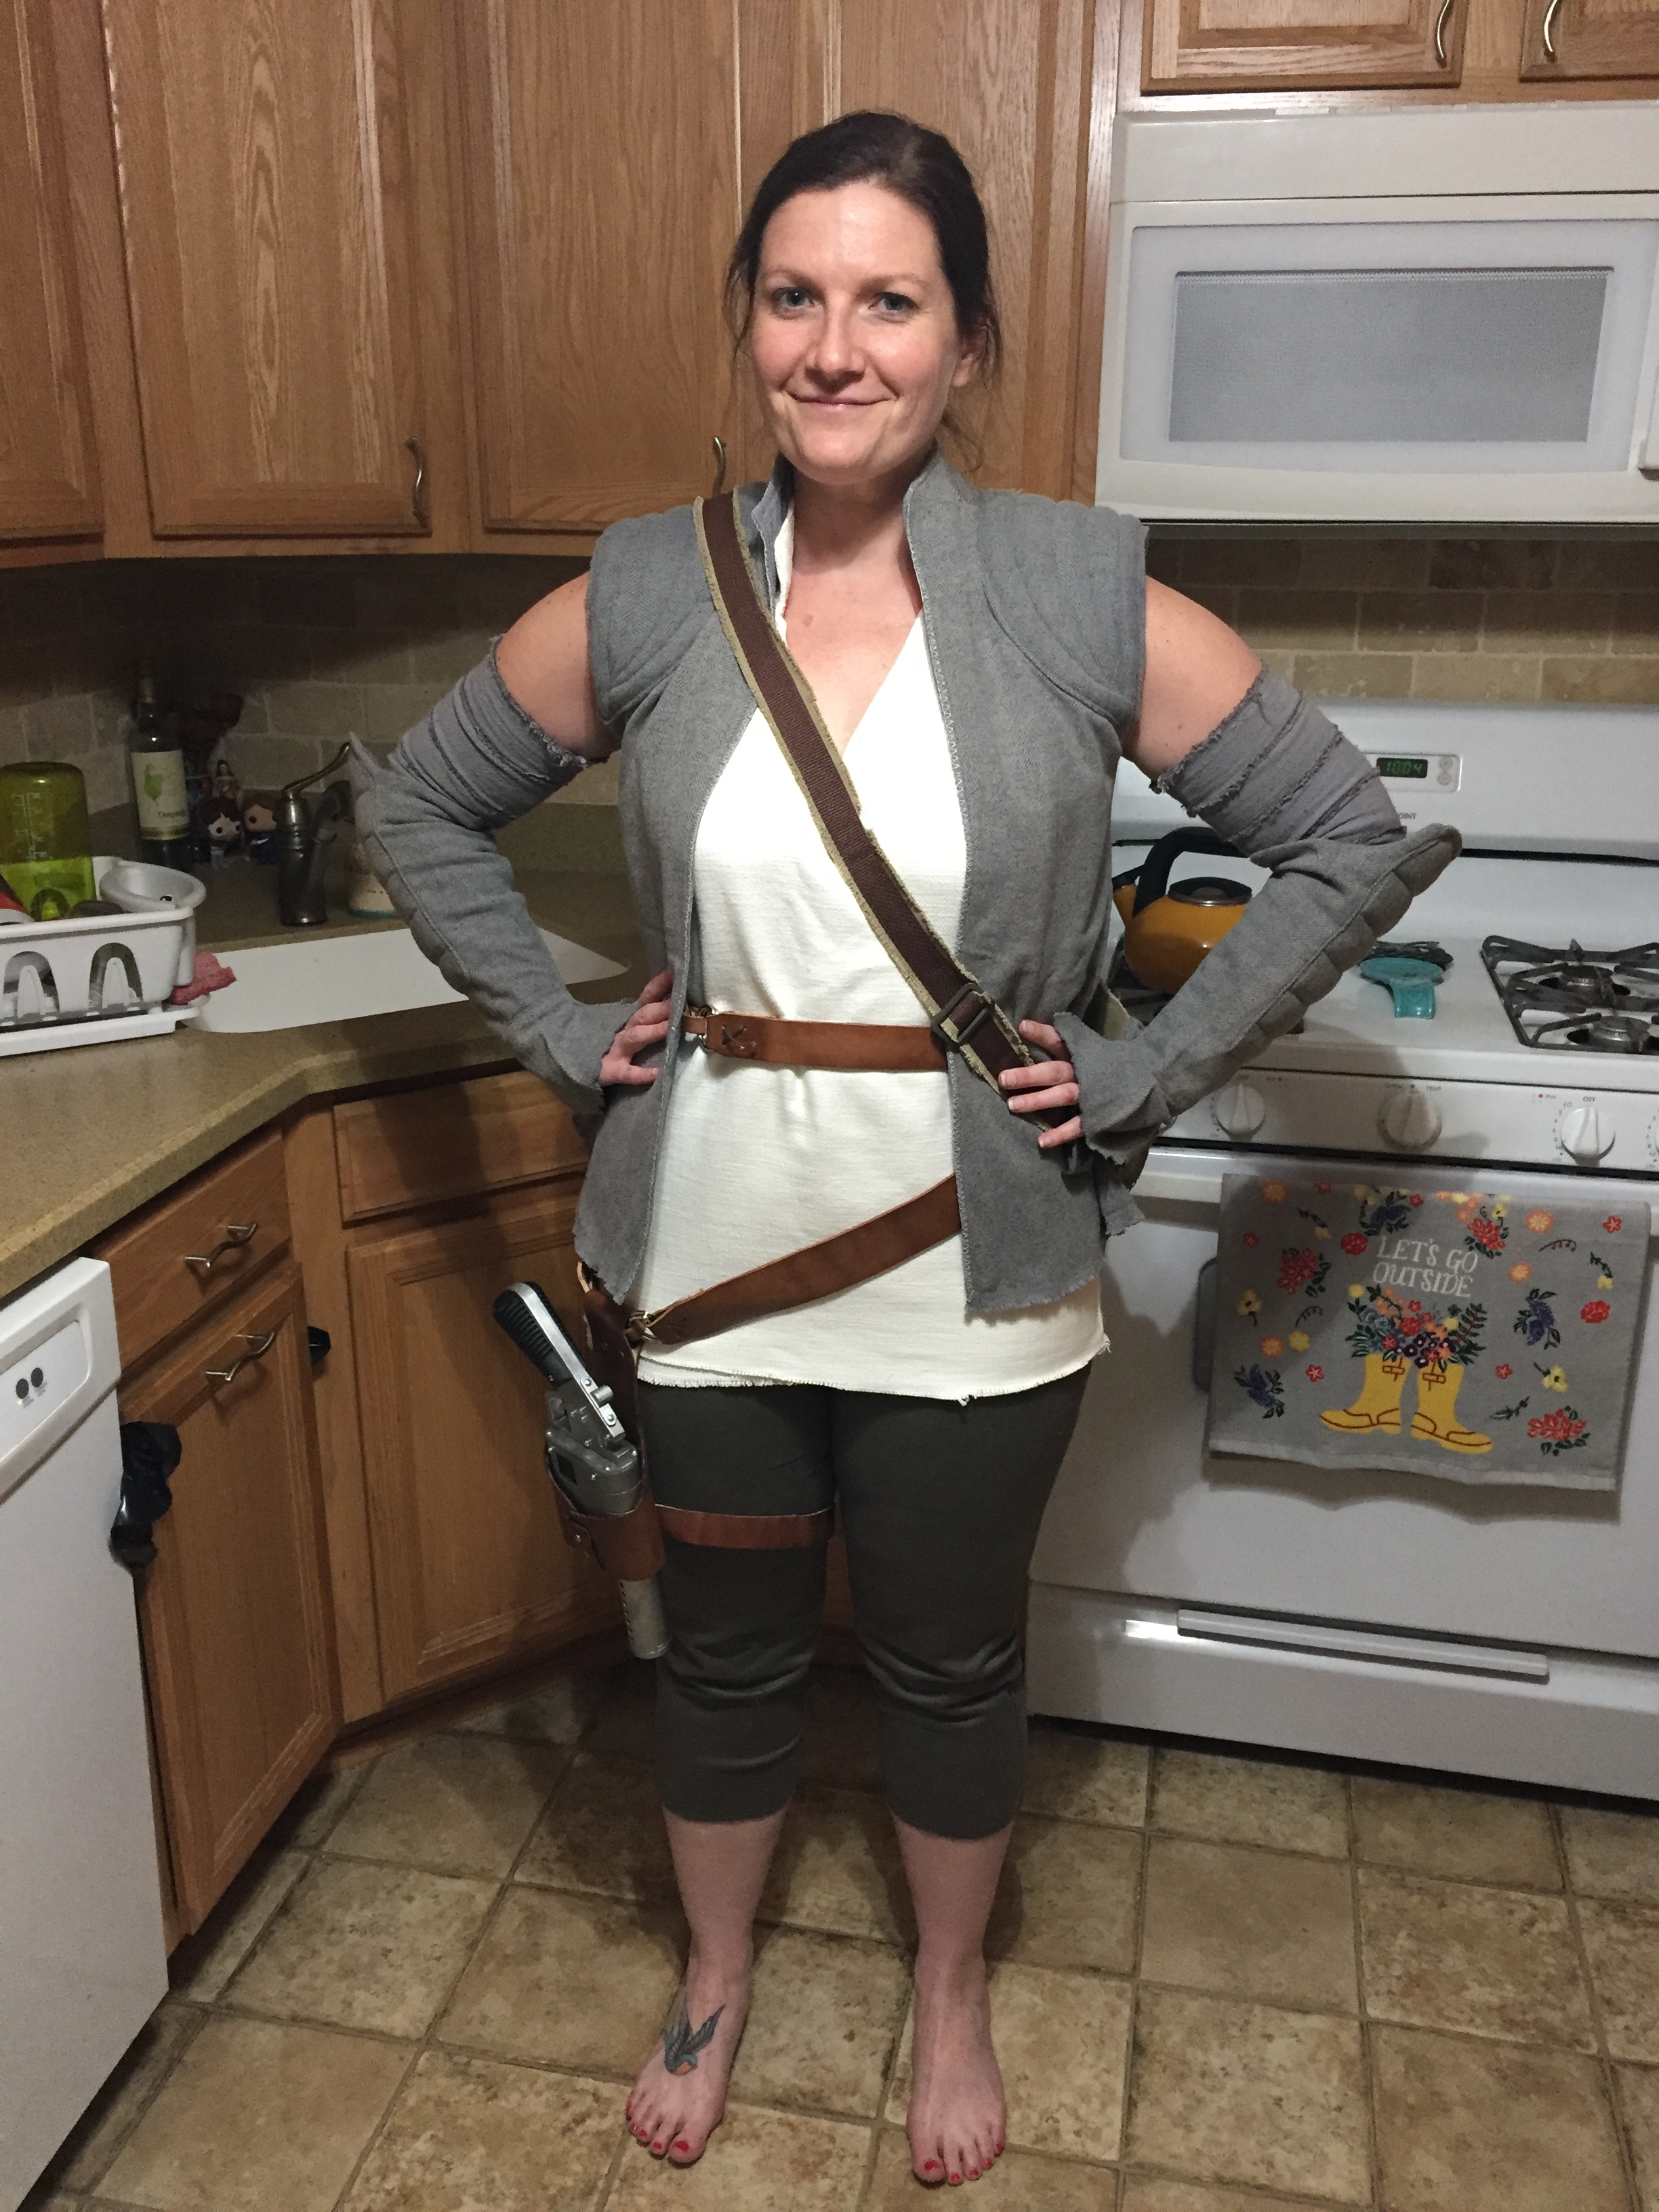
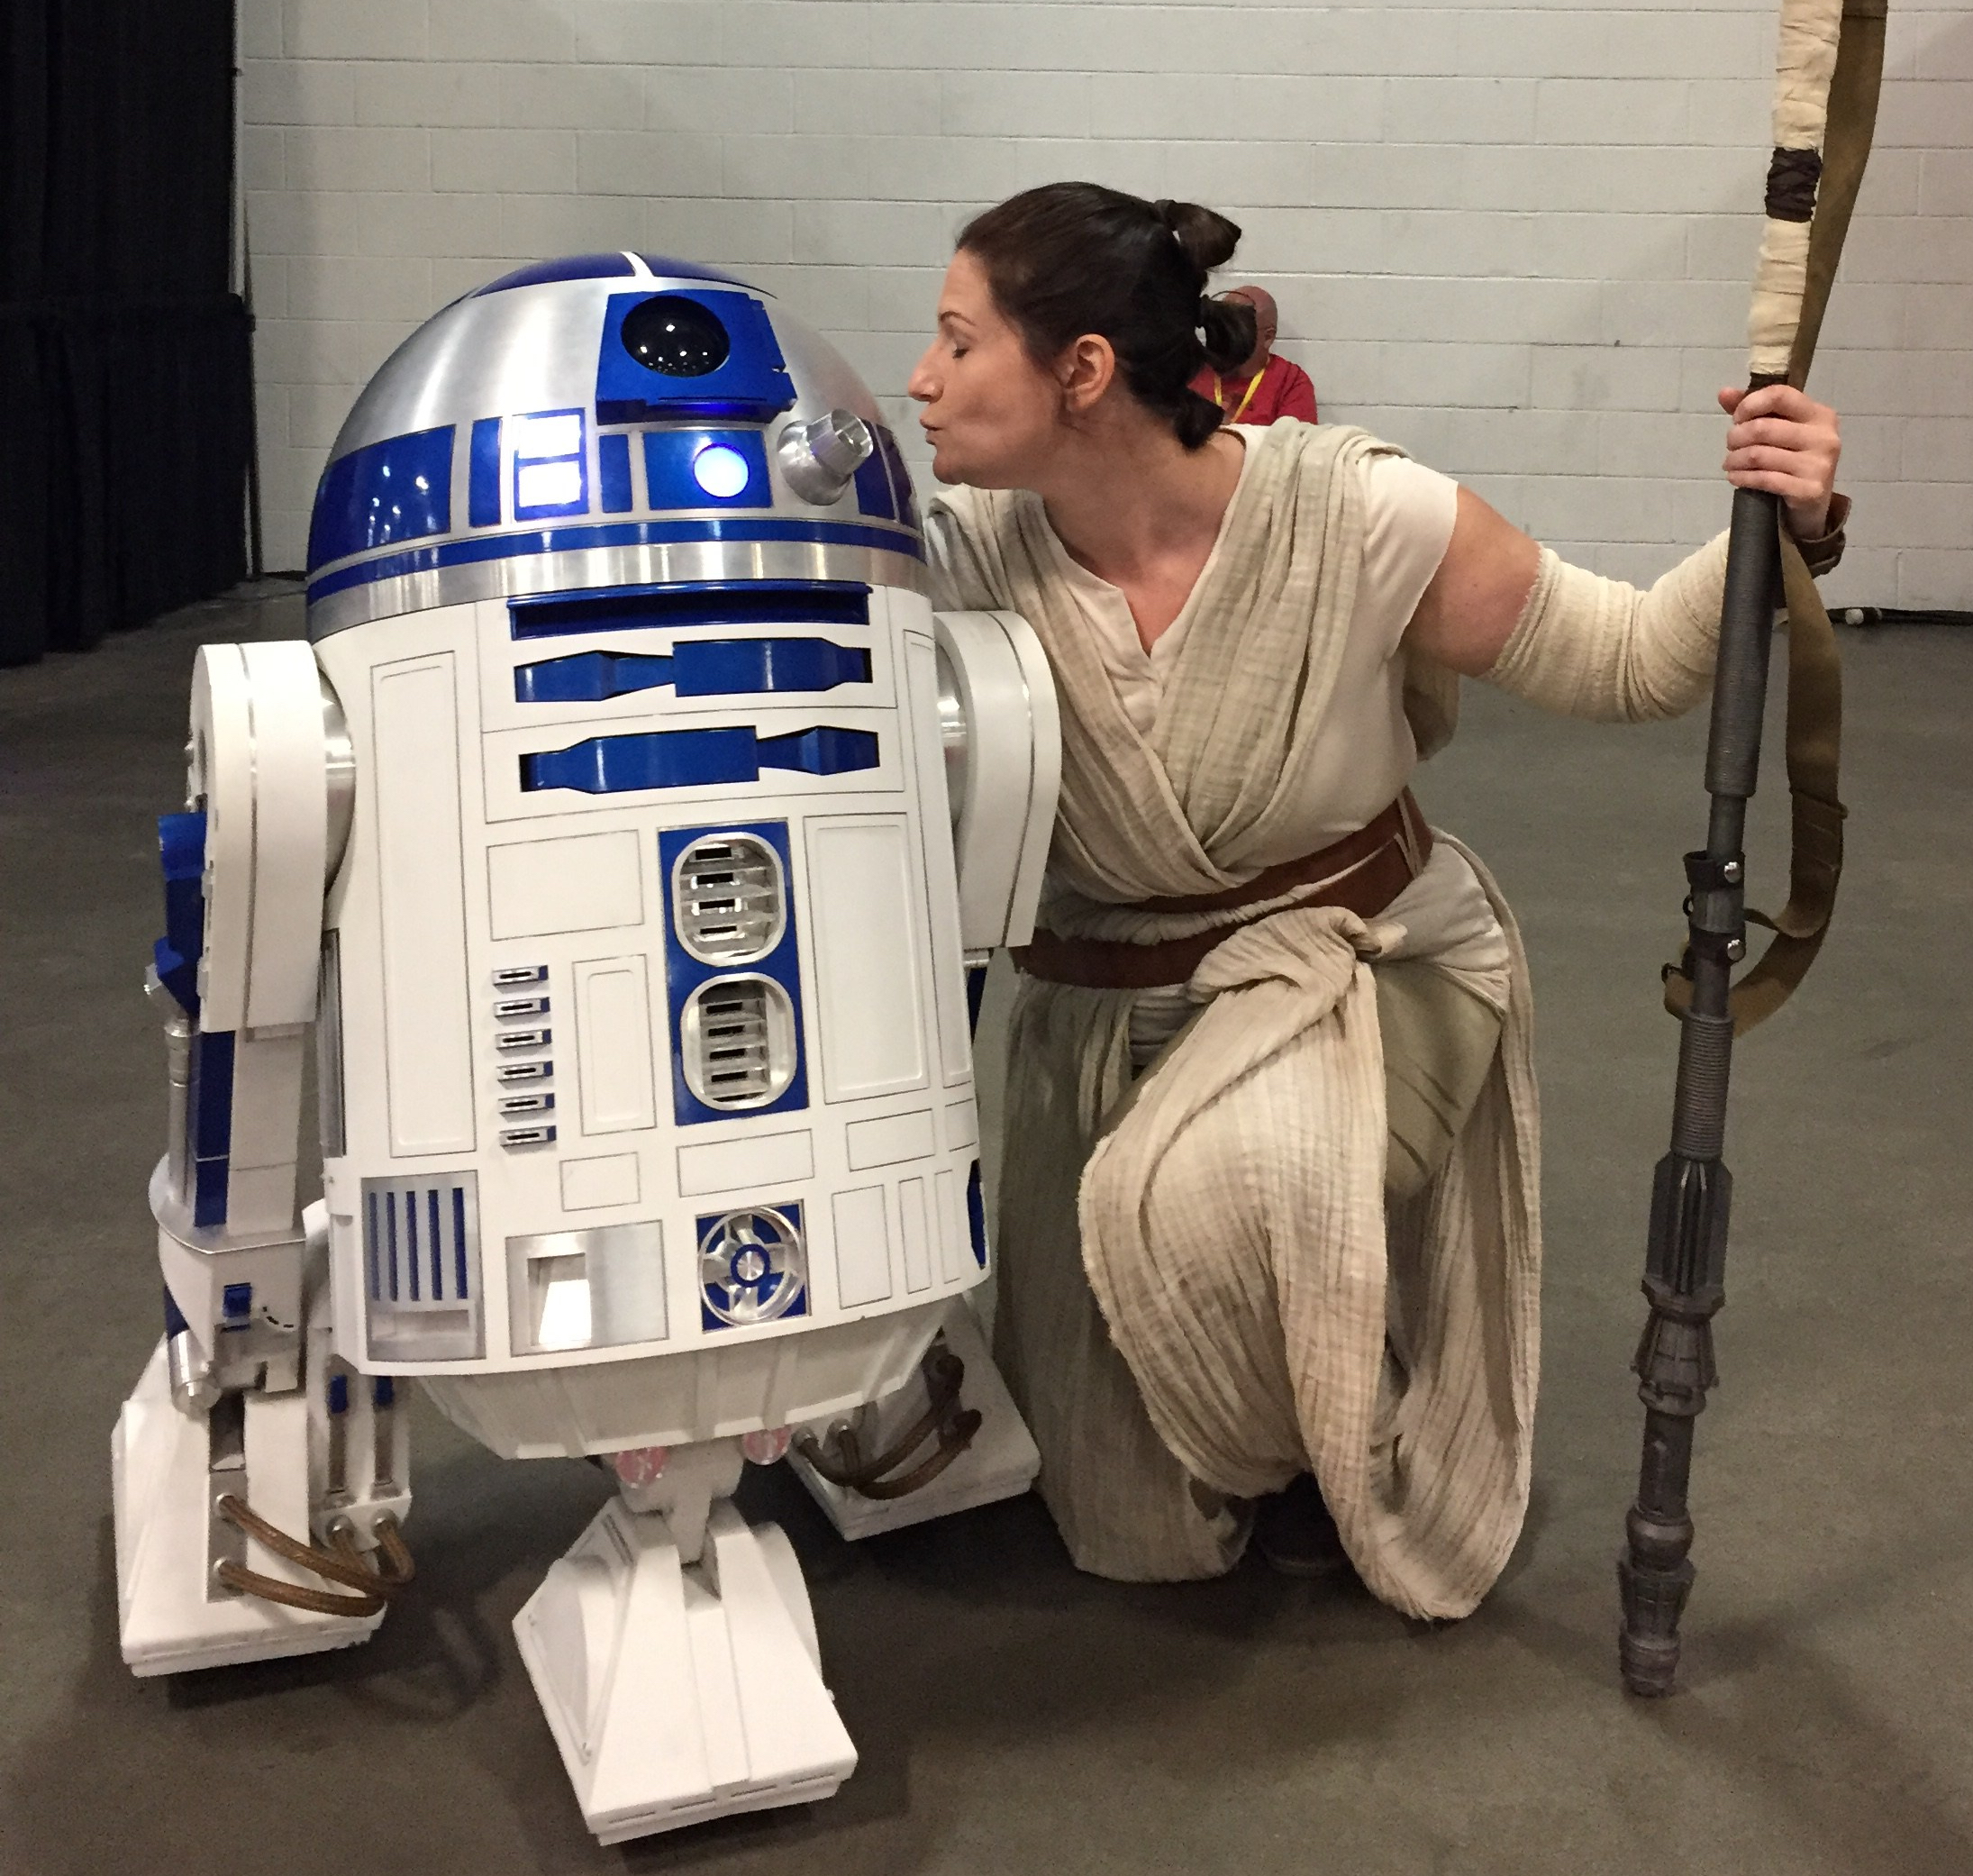
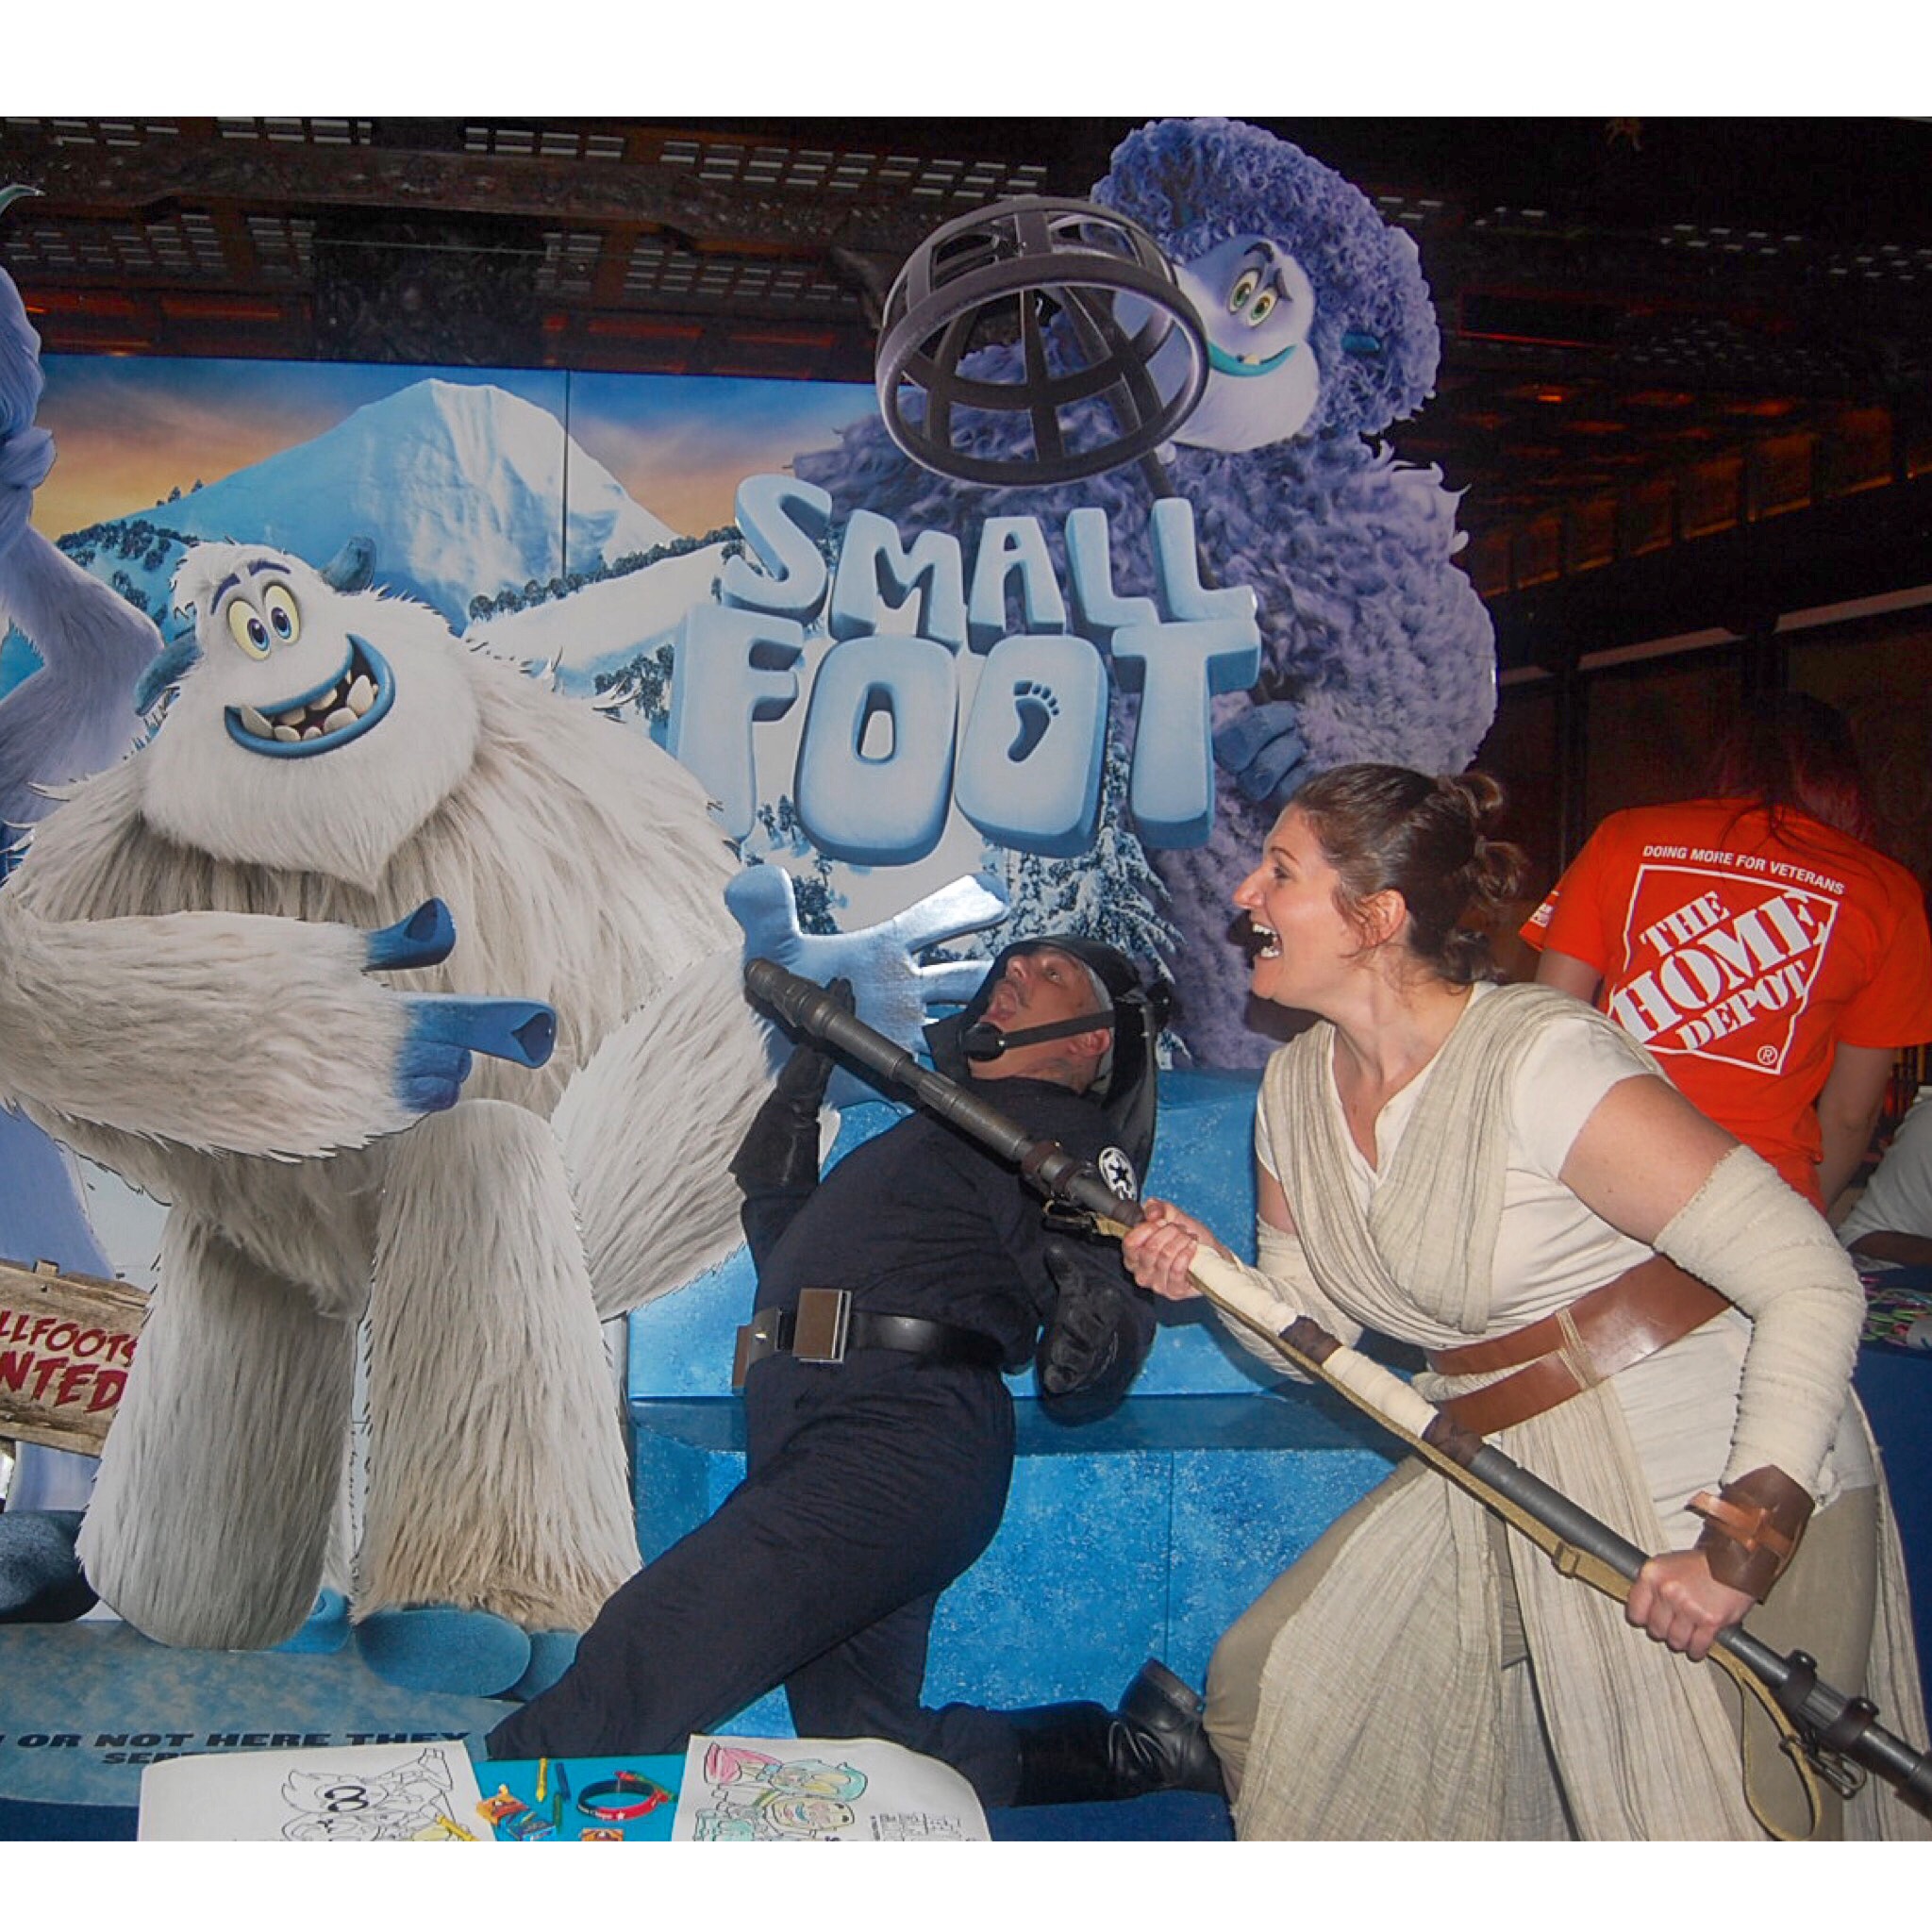
Full disclosure: I finished the pants AFTER NYCC, and wore my Resistance Rey without the kneepads (see above) to the con, but I finished the kneepads the week after NYCC when I was laid up with the ConCrud (TM), submitted the following weekend, and was approved within a few days.

The only other thing I had to do was tighten up the whipstitching on the undershirt literally eleven hours before we went into Manhattan for NYCC, but hell… what was one shirt’s worth of whipstitching when I’d done endless inches of it on my pants already? I was practically a professional seamstress!
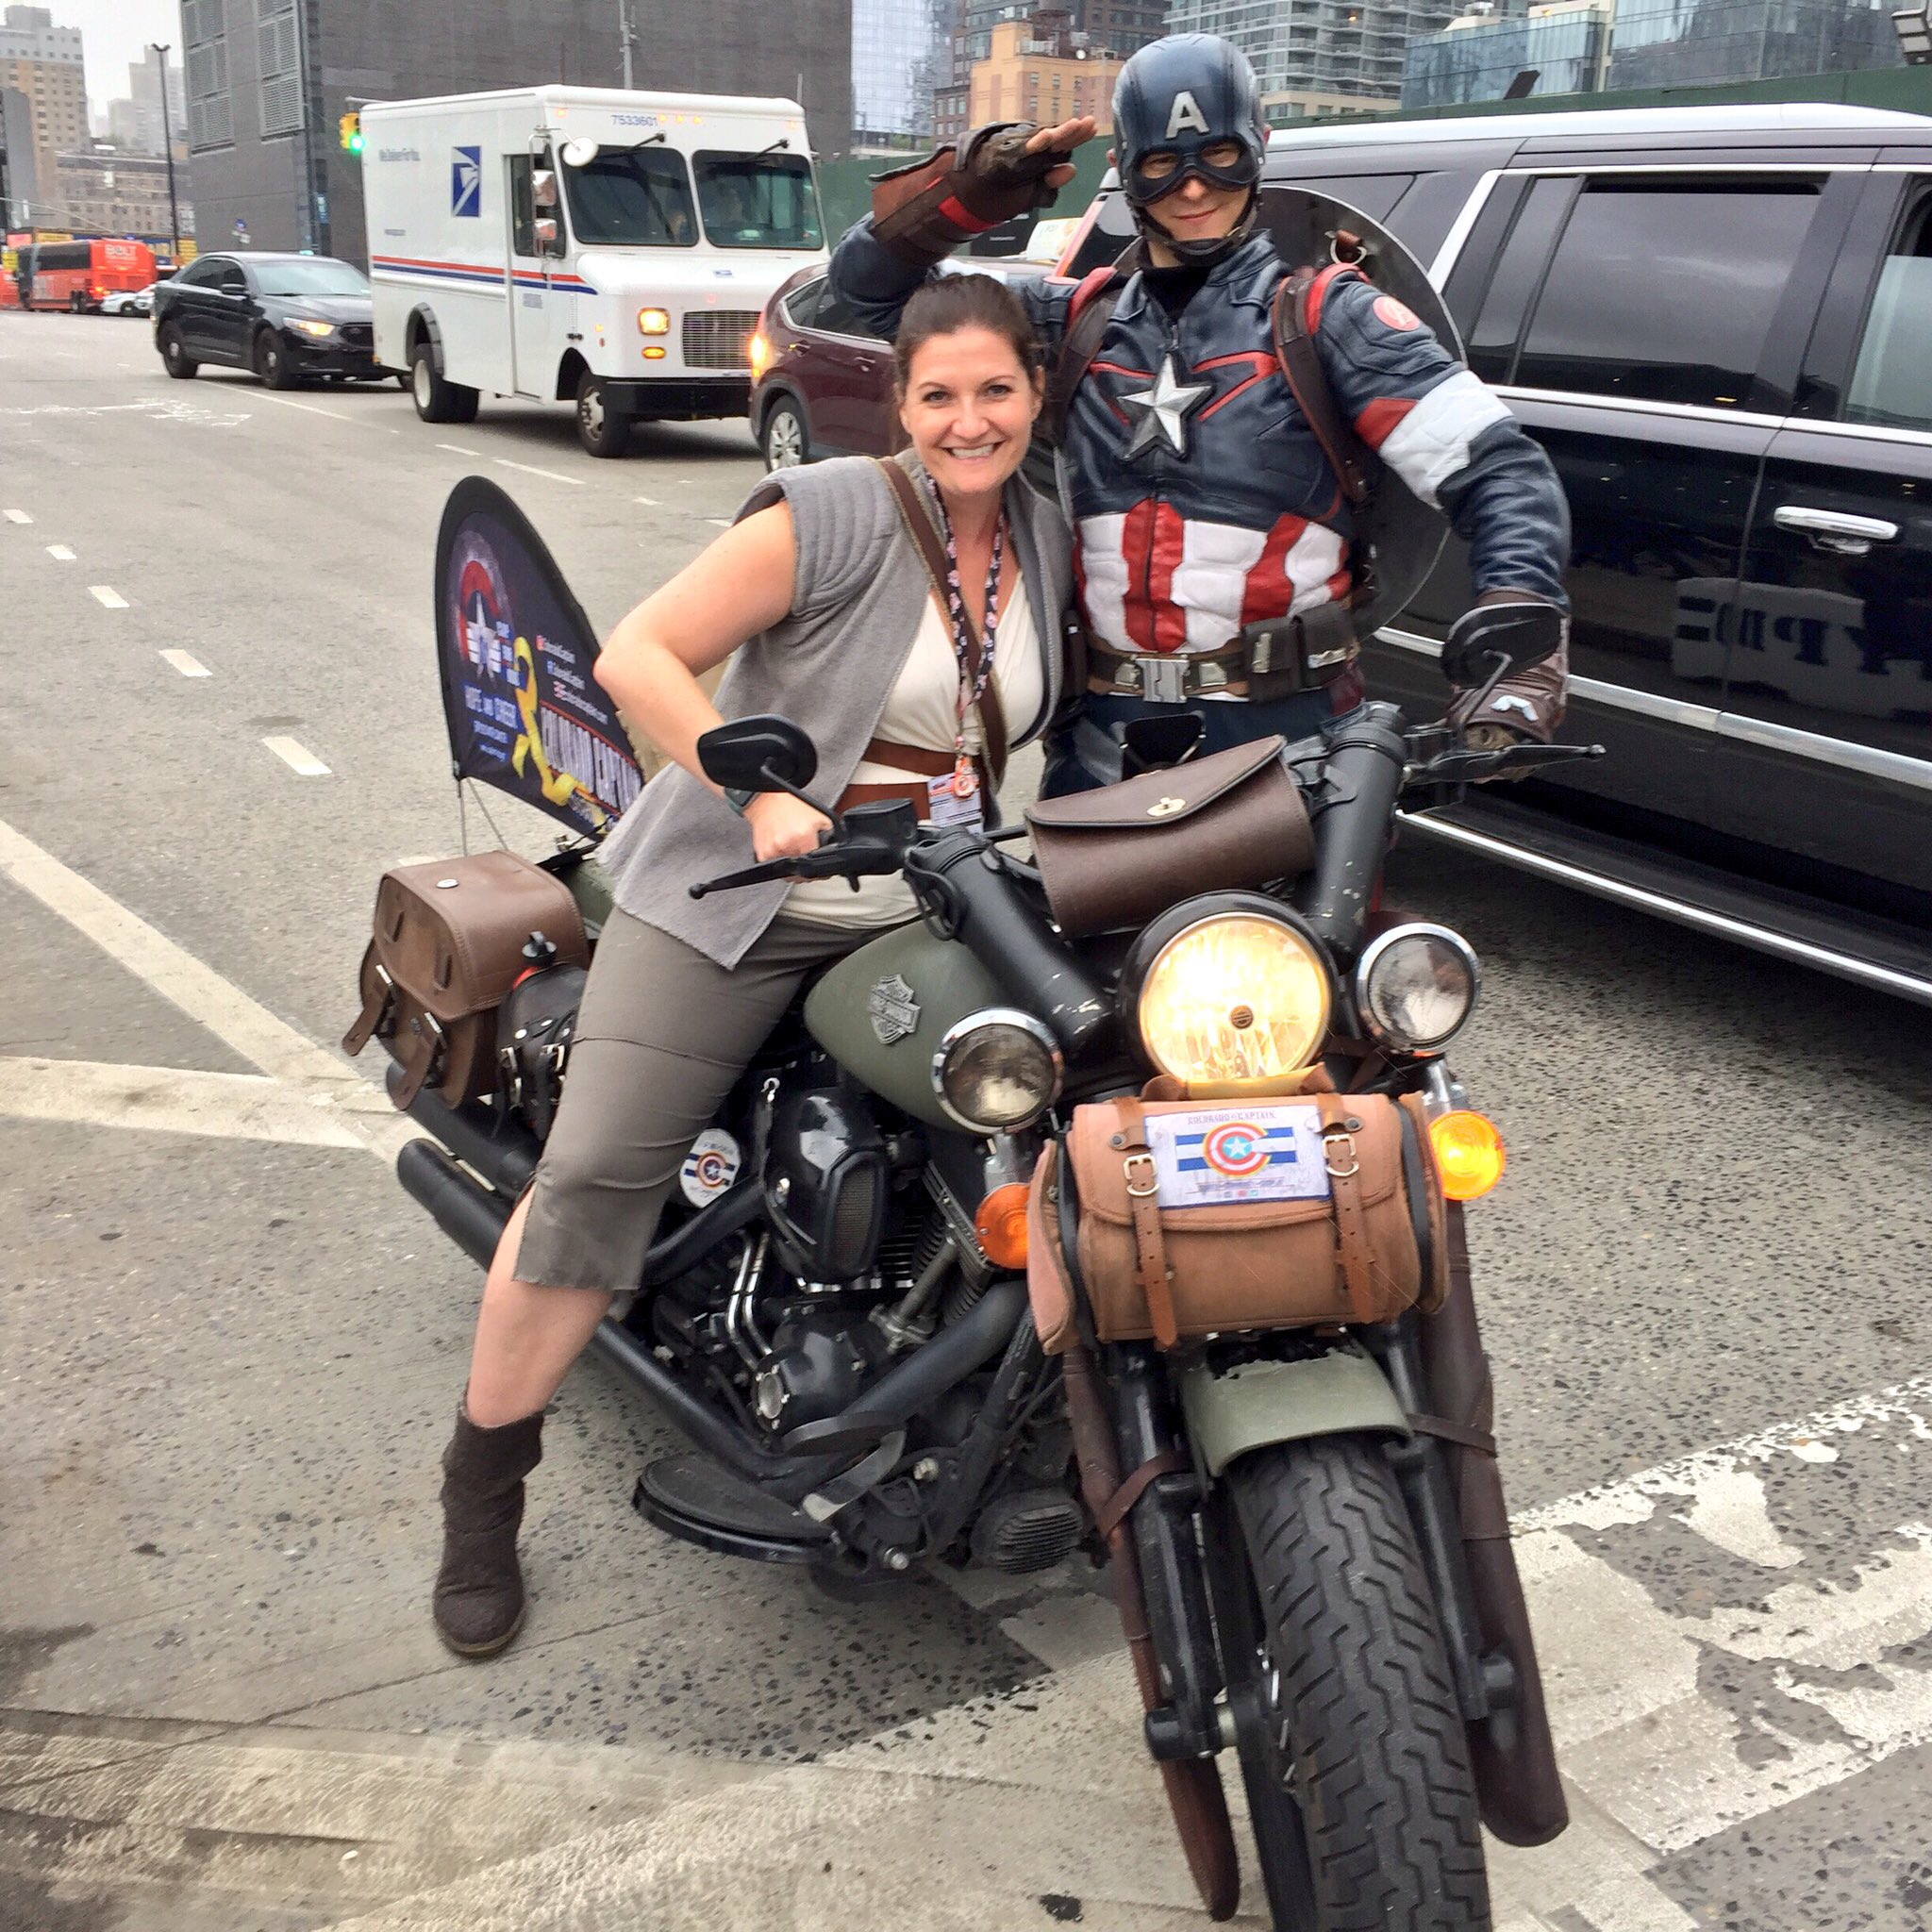
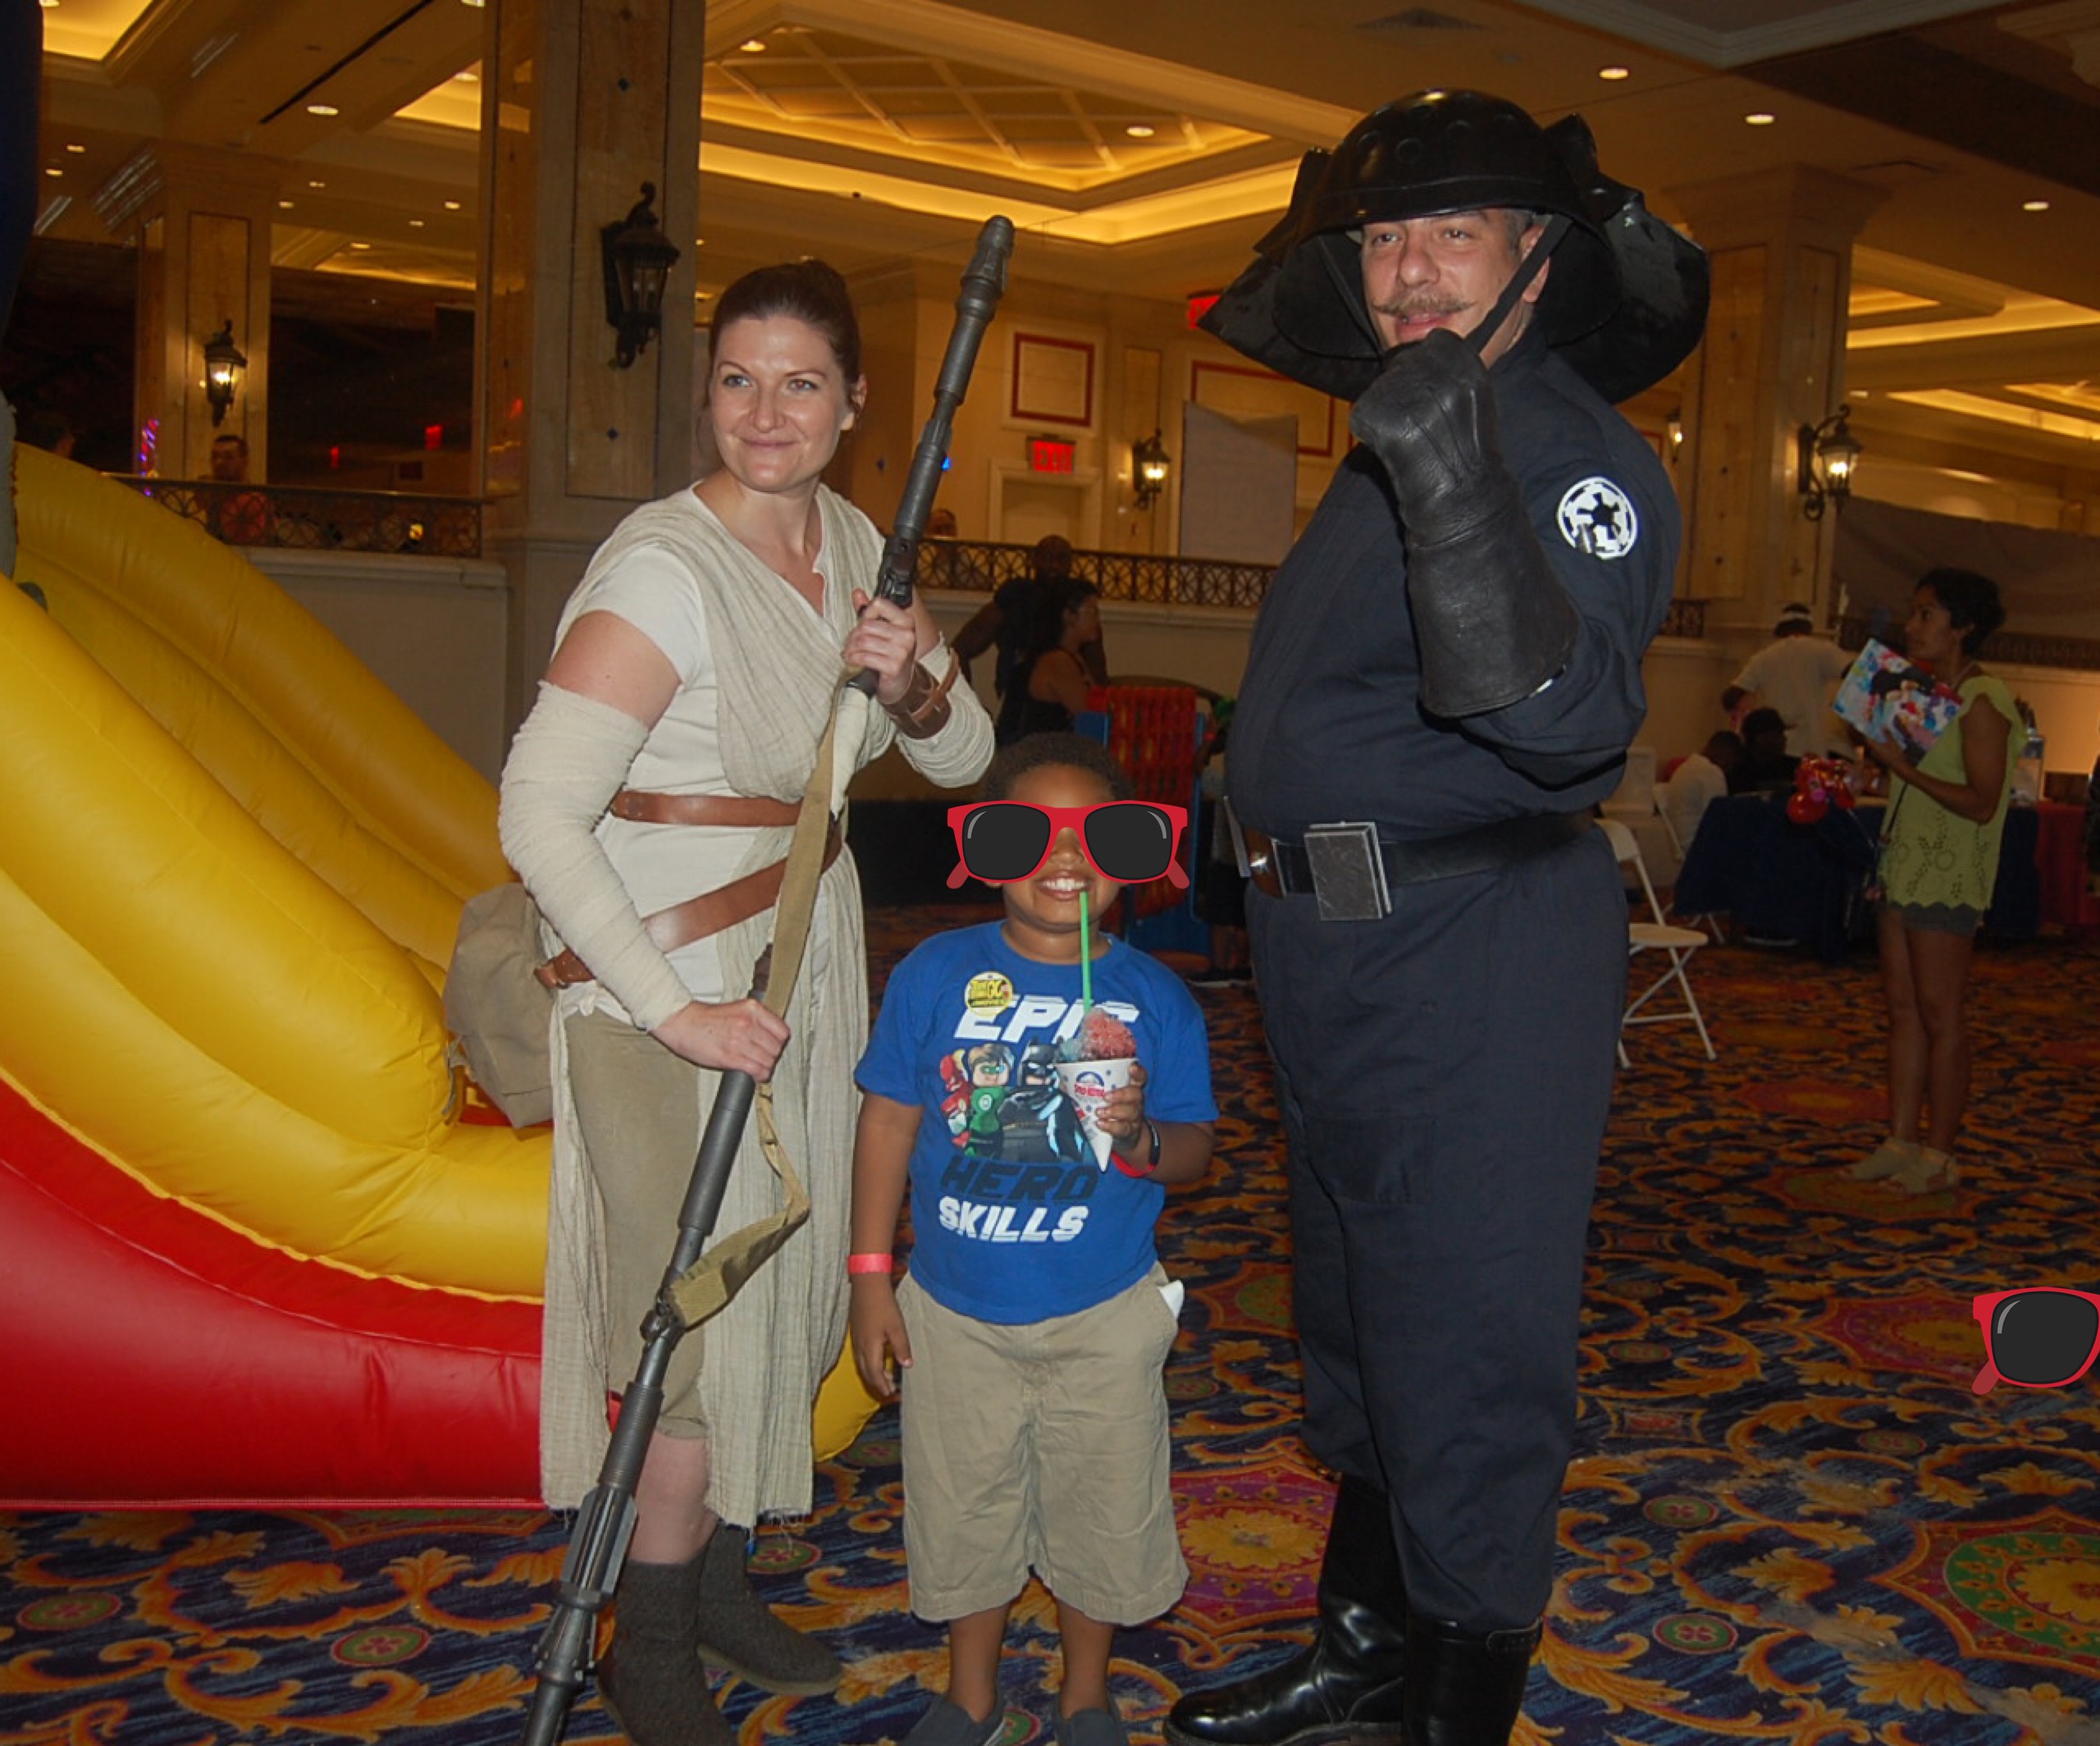
PS: Cap shouted “REY!” when he saw me and made me get on his bike for the pic, so if that doesn’t scream Mission: Accomplished, I don’t know what does.
And that about does it for my Resistance Rey build! In short, it was a build that I mainly commissioned and re-used my Jakku Rey belts and boots and staff for, but making the pants was a super time-consuming and confidence-building part of this costume that I don’t take for granted.
Does this mean I’m about to jump right into the Red Invasion Gown of my dreams? No, no it does not. BUT, it did give me the confidence to believe in myself when it comes to the work I do on these costumes, no matter how small or insignificant it might be in the grand scheme.

Making a Scavenger: Rey’s Hair and Makeup
OK so now that we’ve covered how to build Rey’s staff, outfit, tabards and accessories, we’re left with the finishing touches: hair and makeup.
I’ll be real: I’ve seen some girls go all out and do contouring and all that to try to achieve Rey’s facial structure and they SLAY.

I don’t do that.

Only because I don’t know how.
And also because I’ve found that kids just kind of go with it and don’t care if you’ve got the perfect Daisy Ridley cheekbones. Hell, I’m sure when they see me they know I’m not Daisy Ridley – or they see me and think Daisy Ridley really let herself go, because I am not close to her physically in any way, shape or form, aside from the brown hair.

Instead of driving myself crazy pre-troop, I focus on THREE things when doing Rey hair and makeup:
- A defined brow
- Highlighter (to simulate that desert sheen)
- Three buns
For makeup, I don’t stray too far from my everyday routine, but just add a few extra layers or extras.
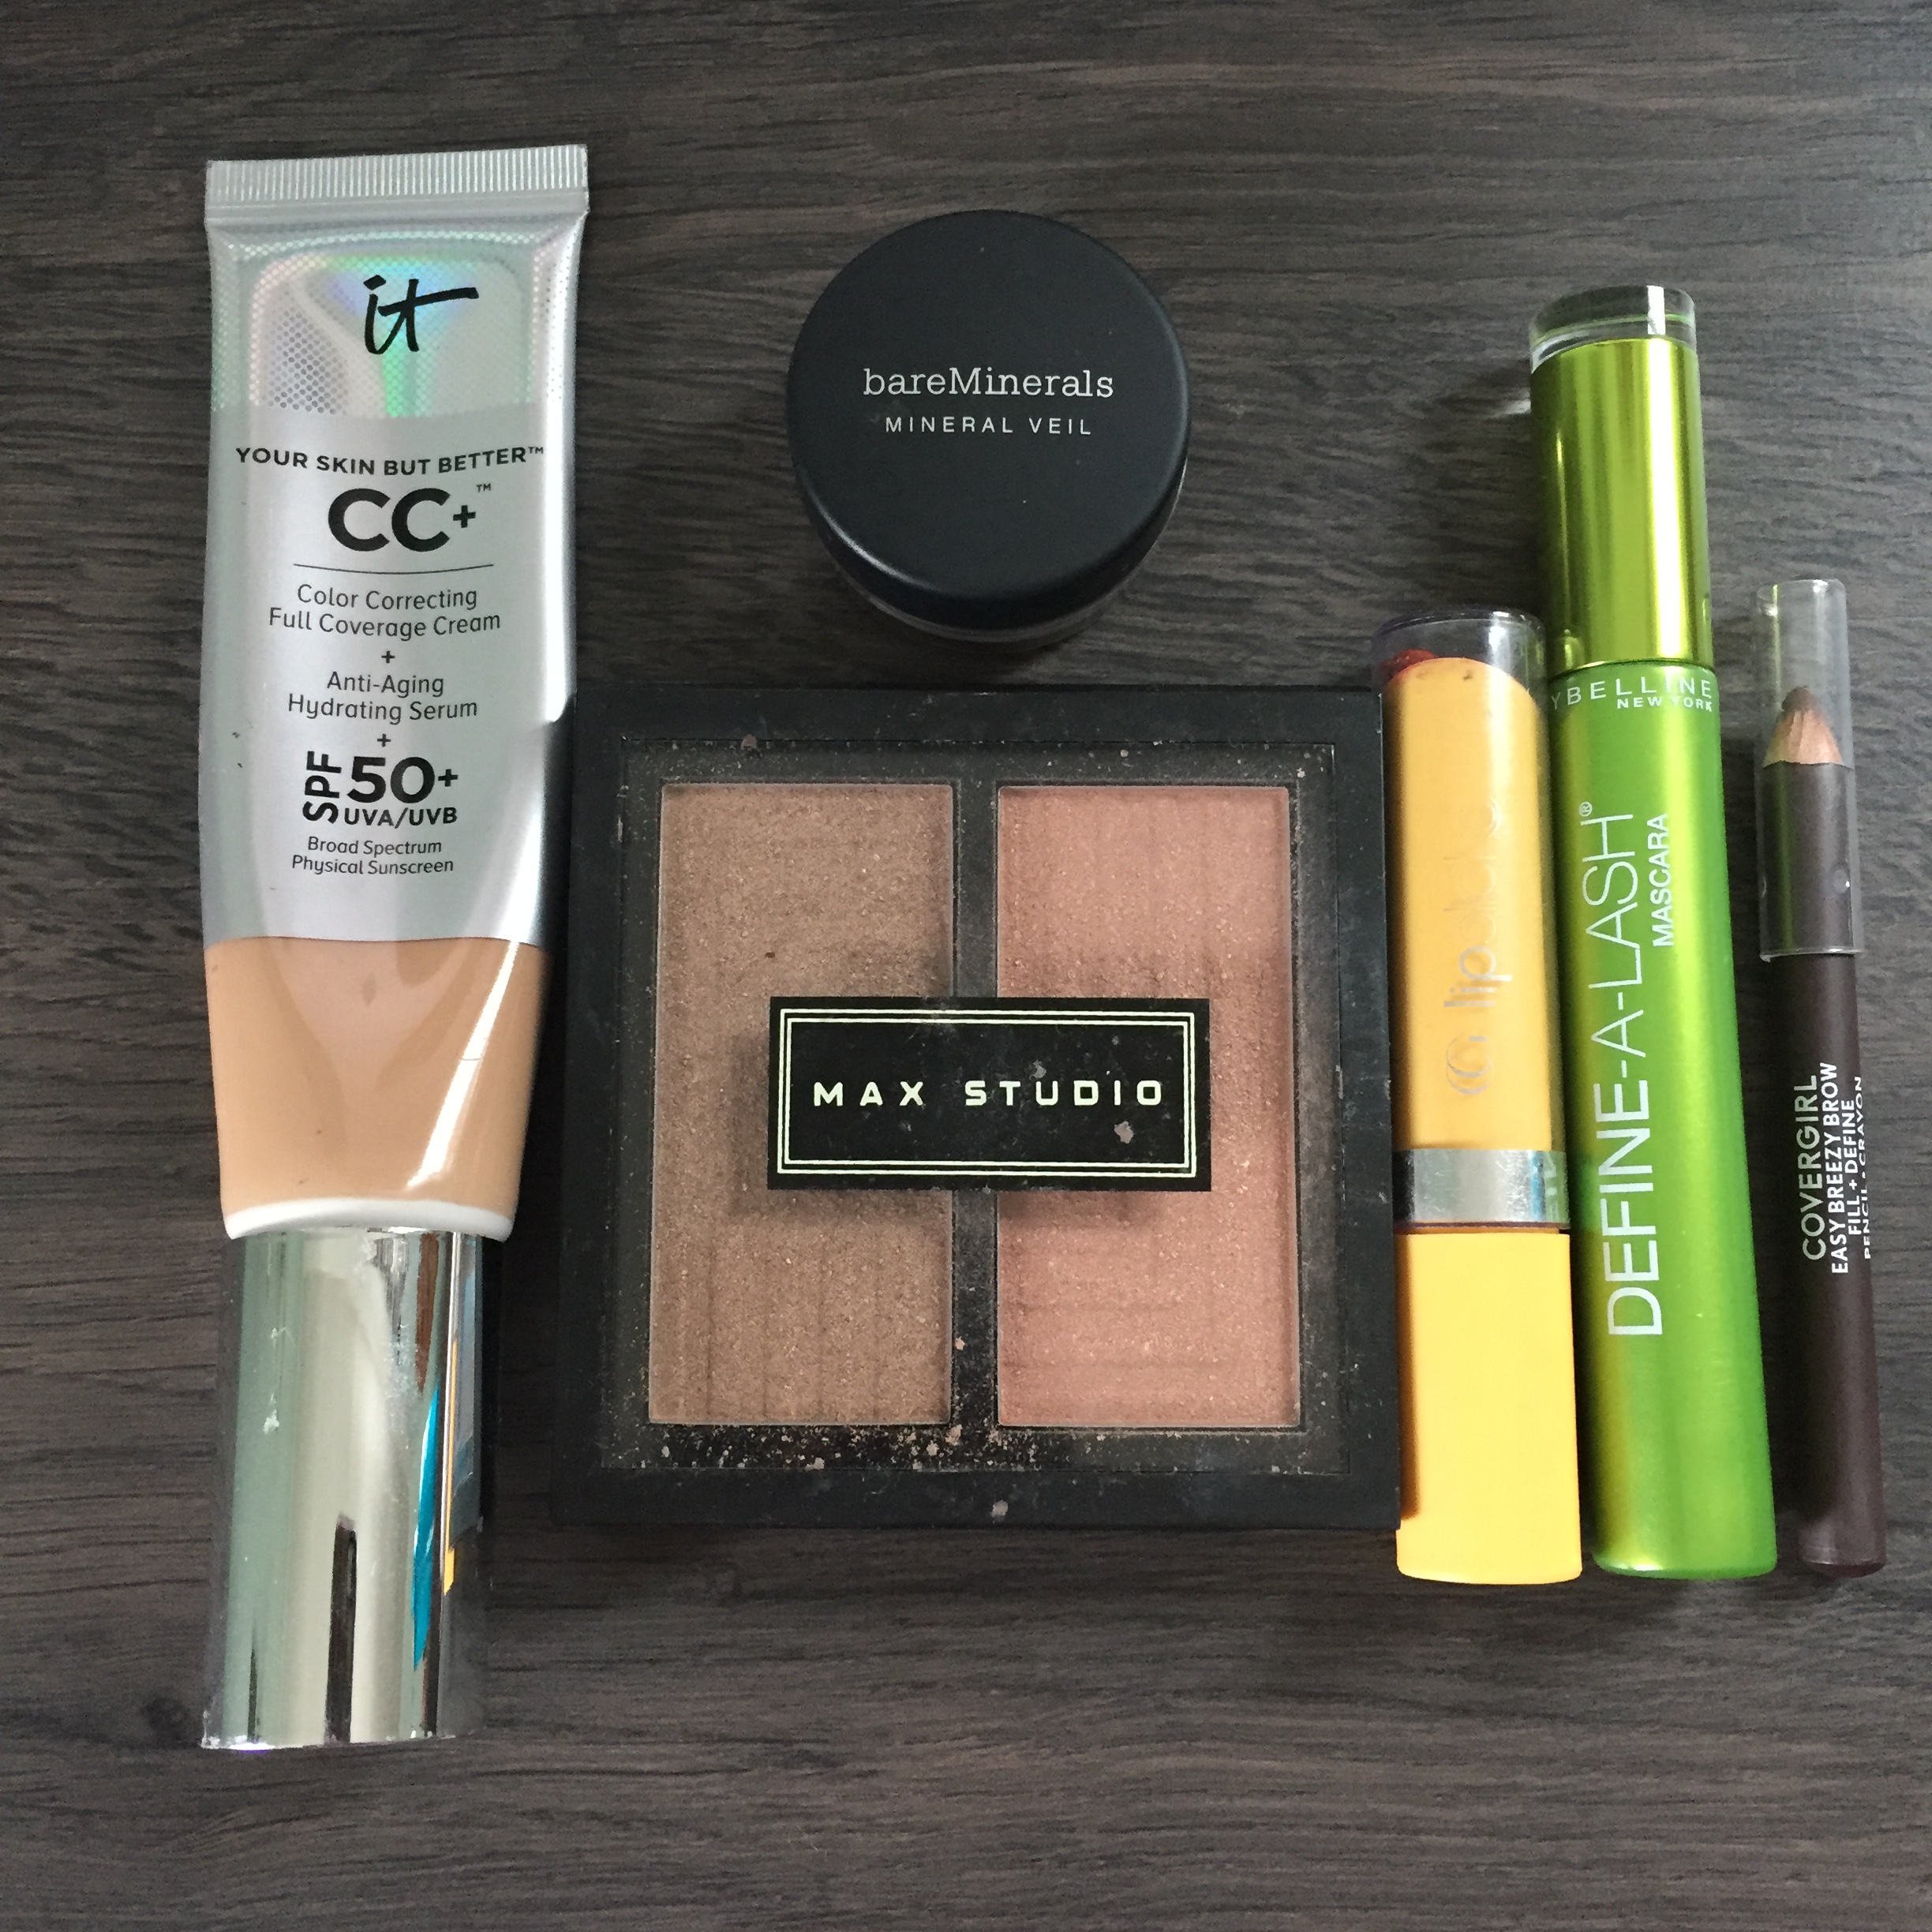
- First I start with my everyday foundation, IT Cosmetics CC+ cream in Light. It adapts to my skin so even if I get some color in the summer it’s not mask-like.
- I’ll pay some extra attention to my brows with my every day Cover Girl Easy Breezy Brow Pencil in Rich Brown. If I’m feeling extra, I’ll use a setting wax on them too.
- I’ve used Maybelline Define-a-Lash pretty much as long as I’ve HAD eyelashes, so I stick with that.
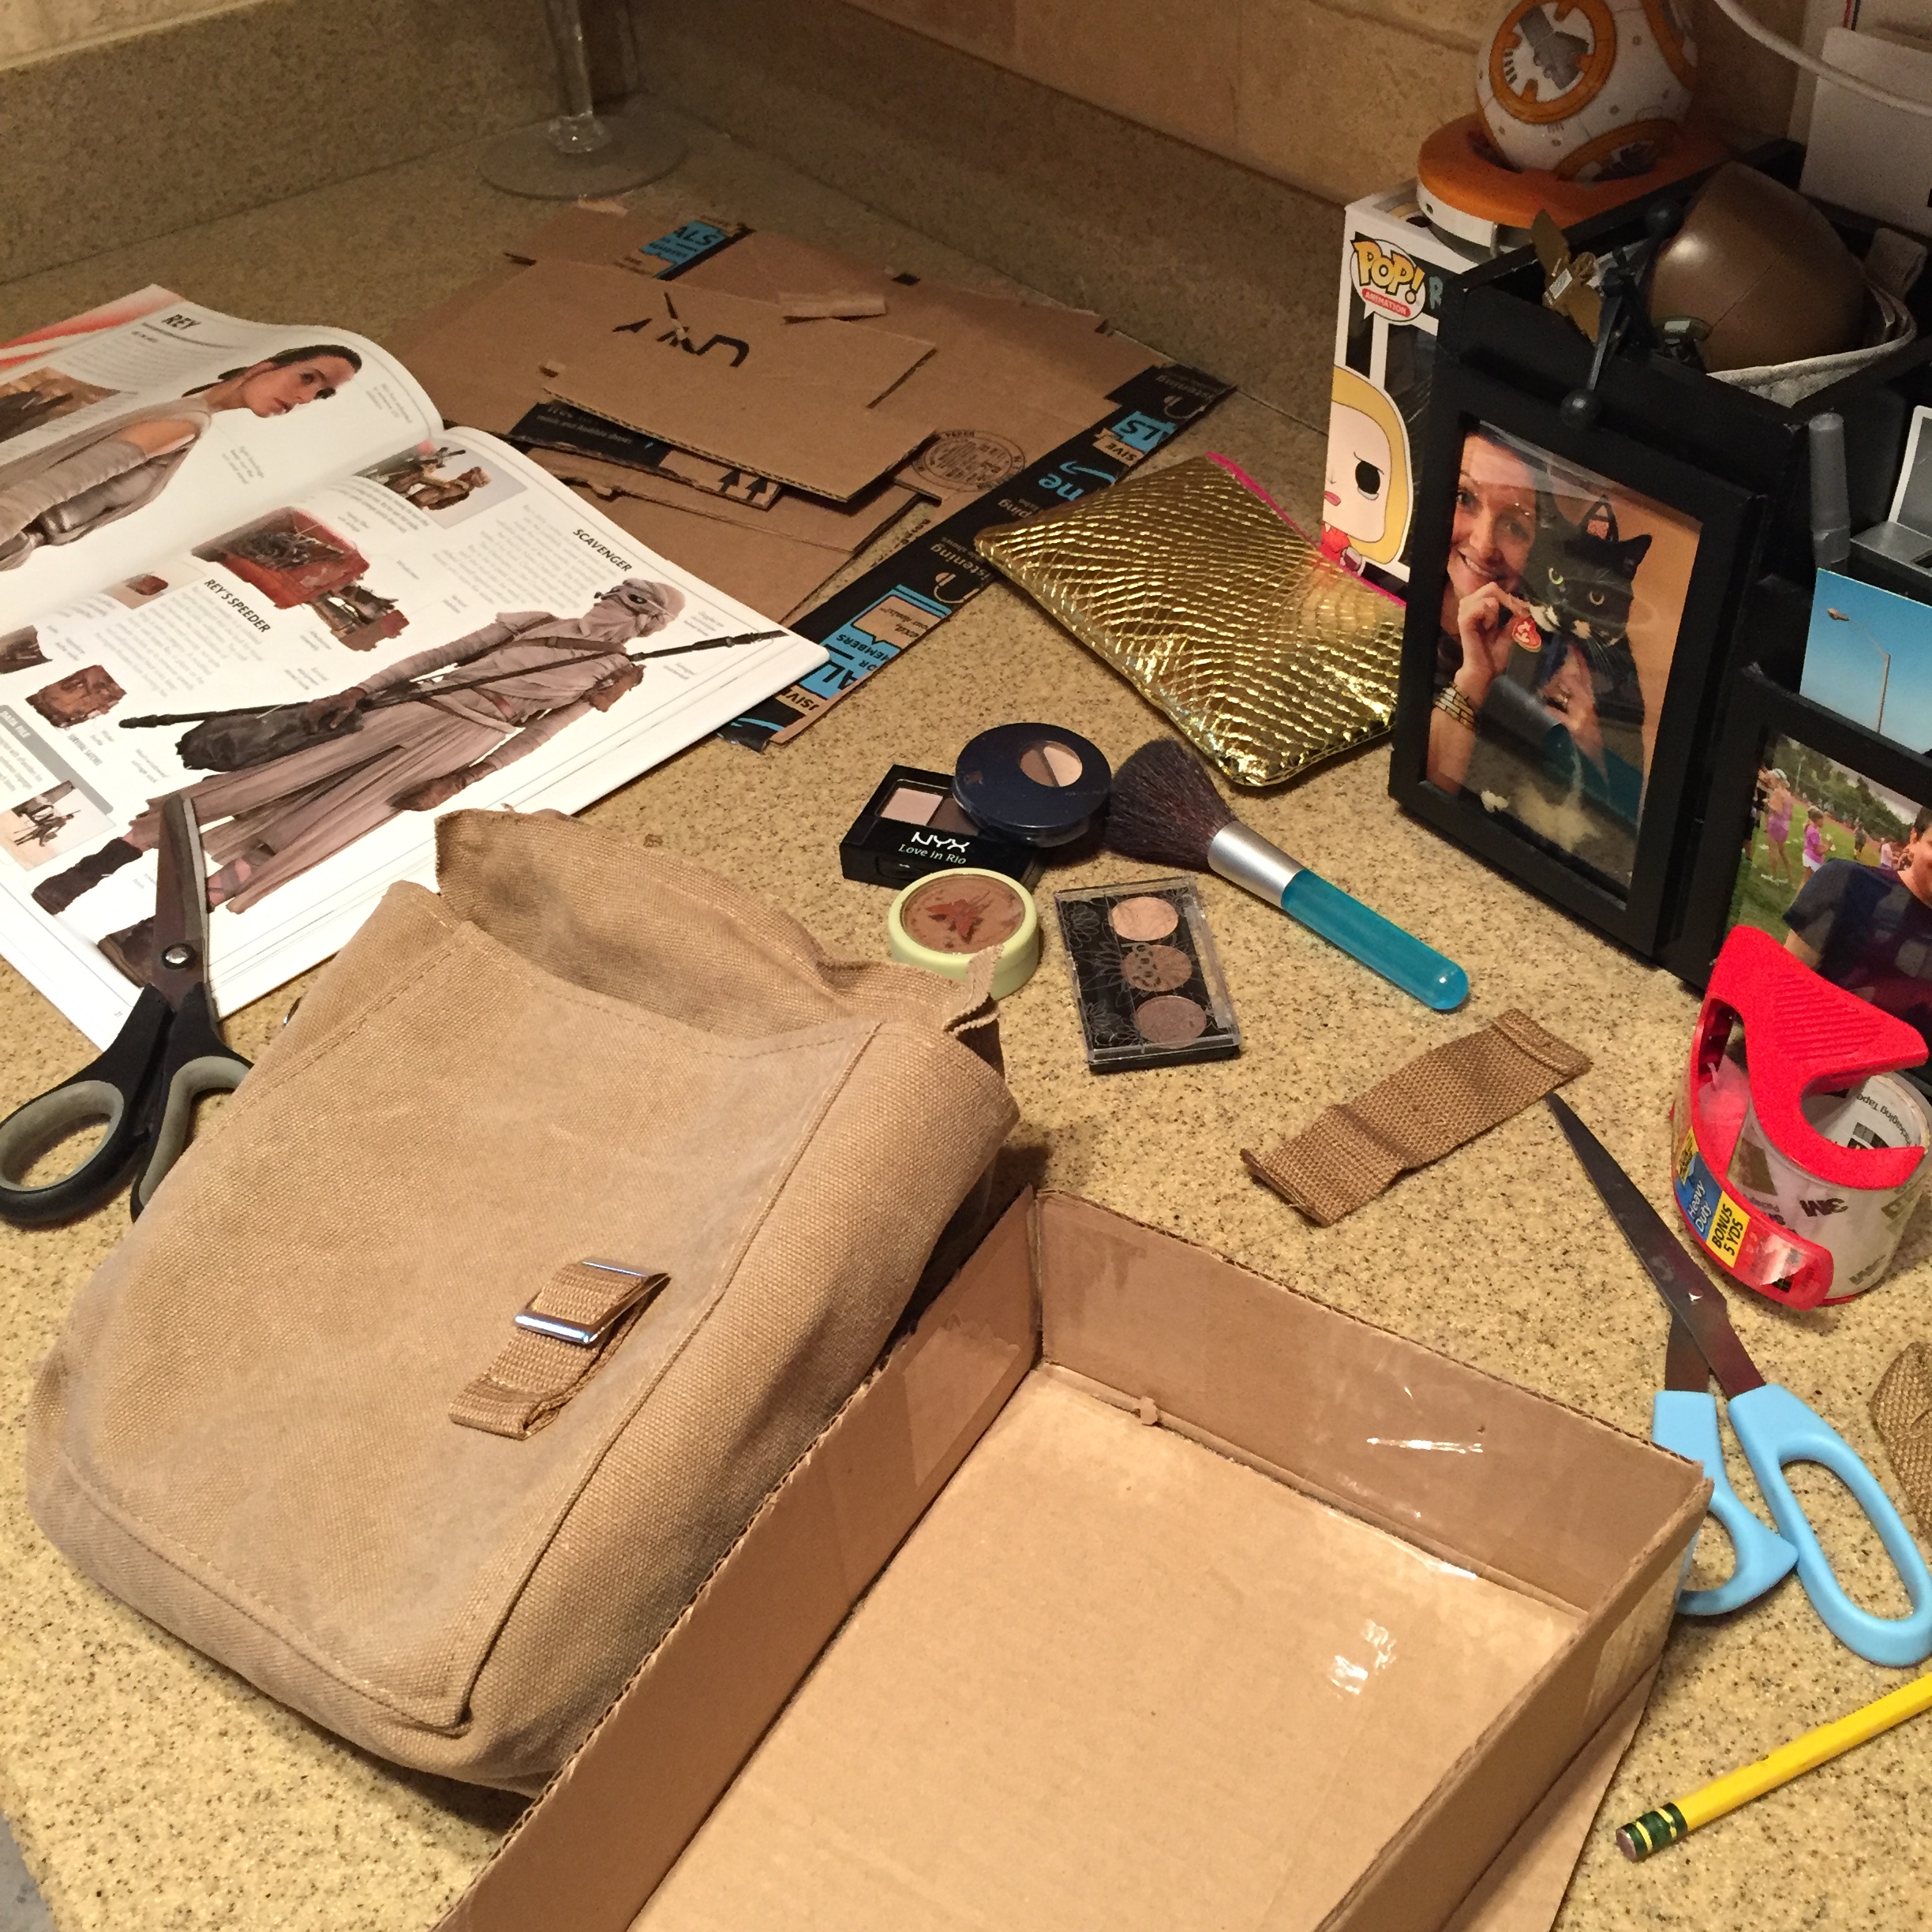
- I honestly don’t remember where I picked up the Bronze/Blush highlighter palette up there, but it’s my go-to when I want to be EXTRA, when cosplaying or on date night. I’ll dust some on my cheeks and forehead to simulate a little desert shine and tend to like the way it looks in photos (see above for this highlighter in action).
- For lips, I flip flop between just a swipe of chap stick for a natural look, and this old-as-hell Cover Girl Lip Slicks in Bronze Goddess. It’s a sheer, bronze-y gloss that just adds a slight pop of color that looks like I spent the day in the sun. Which, you know, Rey…
- When I’m all done I take a big brush and dust a light layer of my most prized possession: bare Minerals Mineral Veil. This is a finishing powder that I honestly didn’t know I needed until I got it for free with a Sephora purchase. The full size is ridiculously expensive and when this one runs out I will undoubtedly start a gofundme to get a full size version because it is that integral to my LIFE. It’s a basic setting powder that holds everything in place but it’s like… magic because it doesn’t add any color or a chalky look. It just… makes everything perfect. Which is helpful when I’m at a 7 hour troop where I won’t have time to check my look in a mirror every hour.

Although if Phasma’s around, I’ve got a walking mirror whenever I need it 😉
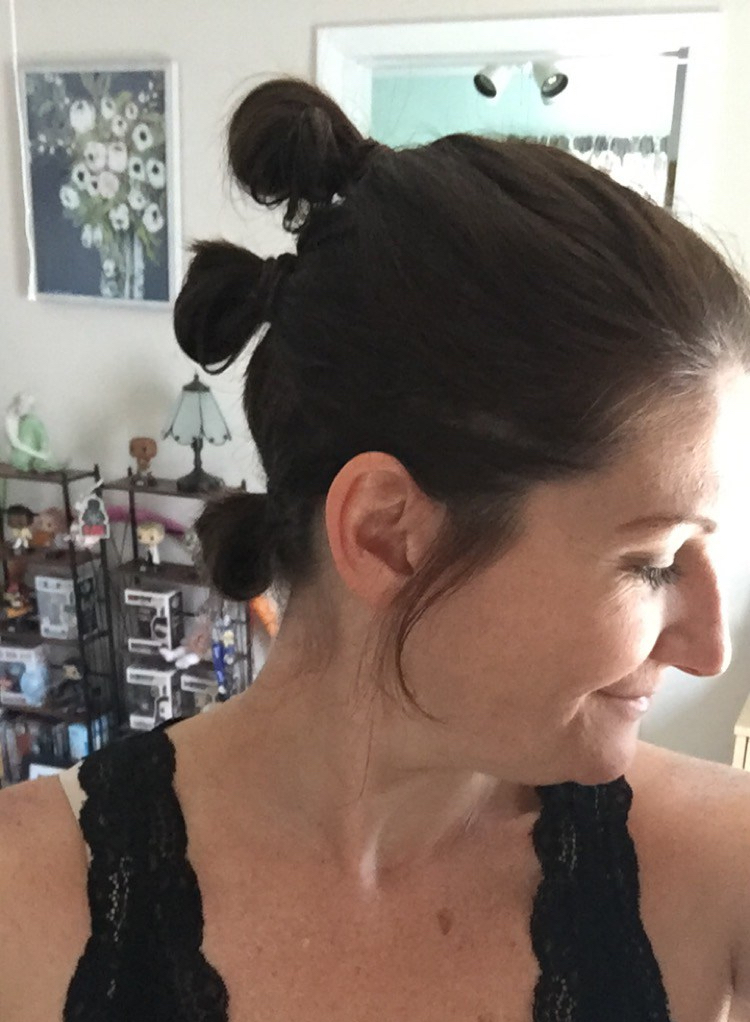
Once the makeup is done, I tackle my buns.
The three-knob hairstyle is by far the most iconic part of the costume, and I’ll be honest: I love it. I love that kids can emulate Rey’s look easily just by asking their moms to do their hair, and my heart leaps with joy when a little one with Rey buns bounces up to me at a troop and I get to exclaim “We have the same hair!!” and see their excited, proud smiles!
The thing is: I’ve got what I call Bun Luck(TM).
When I first started cosplaying as Rey, I had loooooong hair, in varying layers:

This made for incredibly difficult buns.

Even when I tried two buns, I wound up ripping a lot of my hair out when trying to take the buns down.

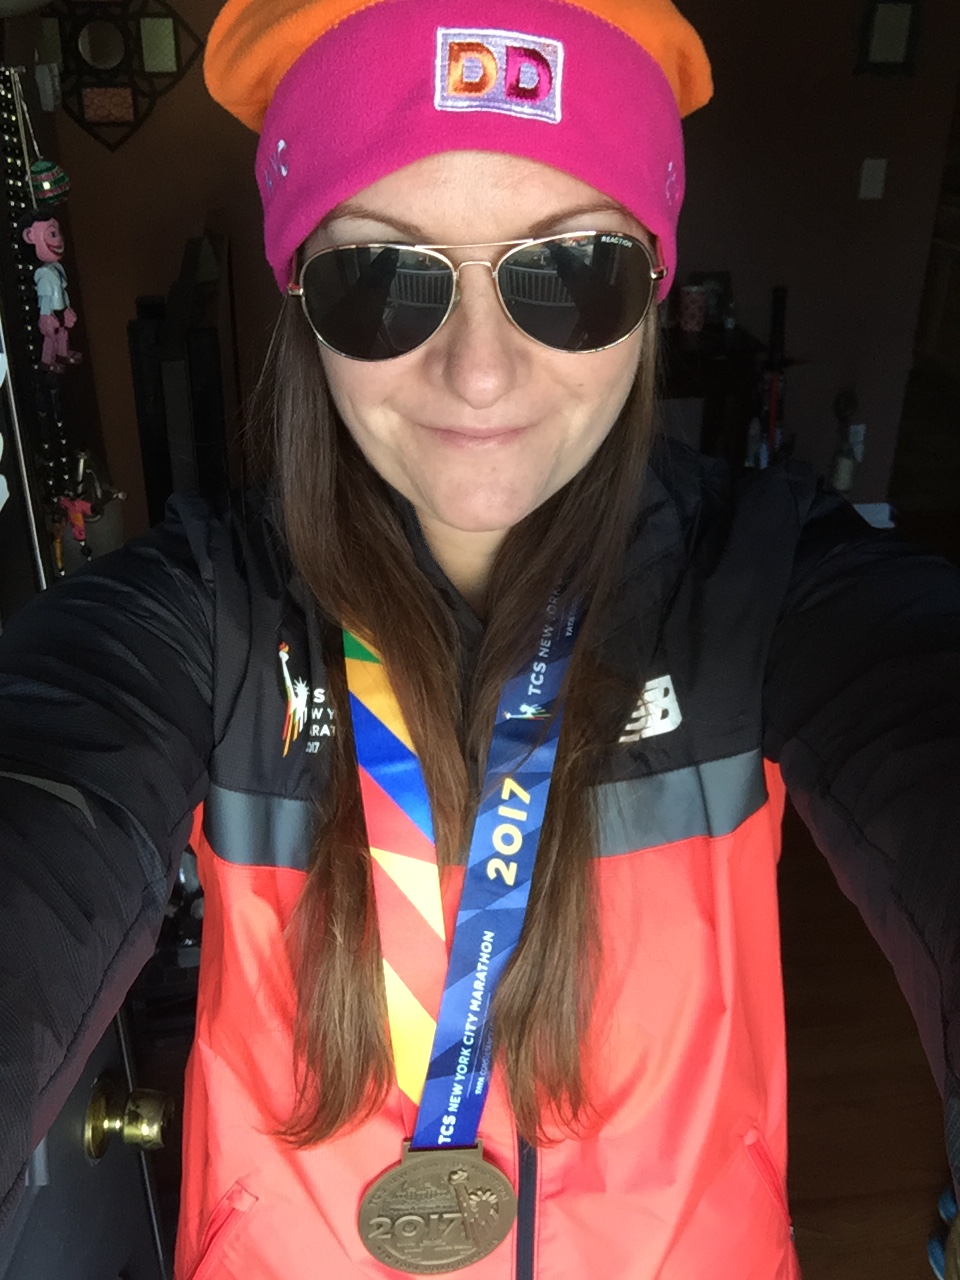
Halloween 2017: these took 30 minutes to put up and 30 minutes to take out.
For many reasons – easier buns being one of them – I chopped most of my hair off in January and have had mostly Good Bun Luck since then.


Aside from the day I took my Rebel Legion submission pictures (when it took me about 45 minutes and a near meltdown to get the buns in), I’ve been able to nail the buns on the first try EVERY TIME.

I figured out the trick early on to get the “biggest knob on the bottom” look: start with even less hair in the top bun than you think is right, and then build the next bun using what’s left, including the tail of the previous bun.
Then bun, wrap, repeat.
It took me a lot of practice, but that’s honestly all I can give you by way of advice. That, or make friends with a handler at a troop who just finished putting Rey buns in her little daughter’s hair and give her puppy dog eyes until she offers to do your buns.
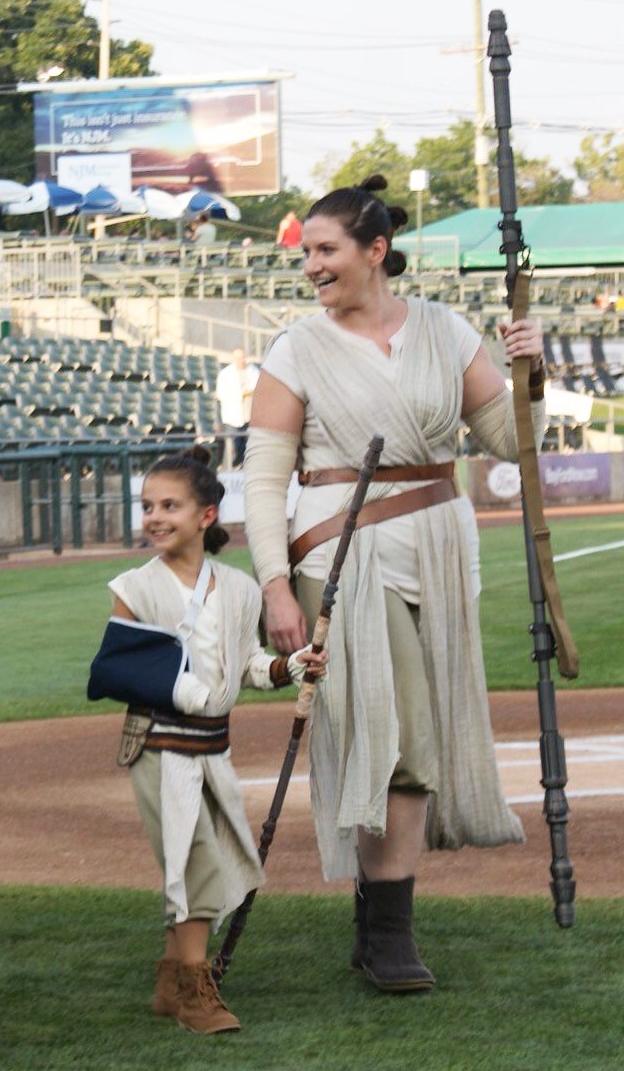
Seriously, we were the best Reys there, thanks to the Resistance Hairdresser:
And that wraps it up for my Rey build! I hope you enjoyed learning how I built my Rey and can’t wait to see what you create using my tutorials and advice!
Scavenge on! ❤
Making a Scavenger: Rey’s Accessories
With Rey’s staff, base outfit, tabards and arm wraps complete, it’s time for the finishing touches, or what I call the Four B’s: belts, boots, bracer and butt bag!
Belts and Bracer
I’ll start off by saying that I could have made these myself. But if I did, they’d look like junk and I’d probably be short a few fingers because I don’t know how to cut leather. SO I once again turned to the lovelies in the Rey Cosplay Community on Facebook, where countless talented creators with a passion for Scavenger Gear reside.
For my belts and bracer, I opted to work with one girl who had done a bunch of pieces for other group members, and I was not disappointed in the least. She took my measurements and built these babies to my size – and even combined shipping with my 3D Staff pieces since she lived near the guy who made them!

She also made the holster in case I wanted to go full Resistance Rey later on! (Spoiler Alert, I did.)

The best part: lovely personalized little notes that only I know are there 🙂
These are beautifully crafted and handmade leather, so I had to do a little breaking in if I’m honest. It was stiff at first but after a few wears and just twisting and rolling the leather around in my hands, it’s gotten softer and more pliable – and more weathered.
Boots
I’ve seen SO many talented cosplayers build their own Rebel Legion-approved Jakku Rey boots by modifying existing boots. They’ve saved TONS of money and created some really incredible things.
But much like the belts and bracer, I lack the talent and time to create such masterpieces. So I saved up some cash and sprang for the basically-screen-accurate-yes-they’re-licensed-and-approved Po-Zu Rey (formerly Piper) boots.
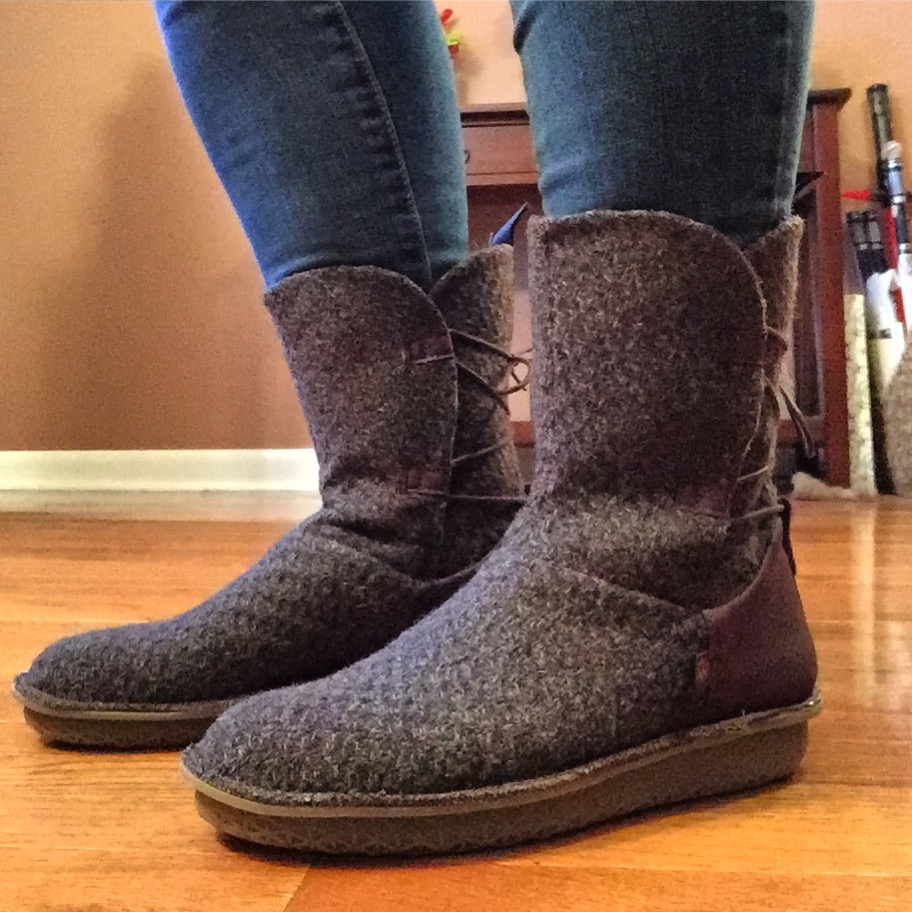
*Gollum voice* my precioussssessss
To be honest, these were actually a super wise purchase. I picked them up during one of Po-Zu’s insane sales so they were much cheaper than regular price, and I’ve worn them a HELL of a lot outside of cosplaying. They’re quite comfortable and vegan (if that floats your boat) and they’re adorable with skinnies and a long sweater… or casual day Rey 😉


So while I can’t take credit for making them, if you’re on the fence about getting them I can vouch for their comfort and quality!
Bag
While this is the final piece I’ll discuss making, Rey’s butt bag was actually the first piece I made. And I call it a butt bag with only the utmost respect – it genuinely is a bag that sits on her butt by way of the second belt, and is not to be confused with her “scavenger pack” which she’s seen with in the beginning of the film in “Full Scavenger” costume with head wraps and goggles.


She may be a scavenger, but the girl sure owns a crap-ton of BAGS.
I started out with this bag that I’d seen some other girls successfully modify.
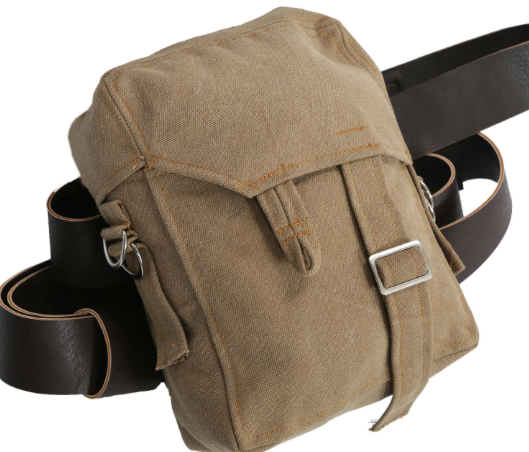
All told, it’s actually a pretty decent bag for the money, and requires little modifications that even a novice can do. Like I said – this was the first piece of my first real cosplay “build”, and I feel like it was a great place to start because it boosted my confidence in my skills.
It came with belts that I didn’t end up using, but it essentially had everything I needed, minus the black Alice clip and spare Square rings for the side of the bag, which I was lucky enough to get from another Rey in the Facebook group who had extras.
One day when I was in the throes of a nasty case of bronchitis, I finally decided to start this baby. And while it took me the better part of a day (and a few band-aids), I was so proud when I was done.

Here’s how I did it:
- attached black Alice clip to lower left with khaki thread
- removed random loop on top flap
- replaced D rings with screen accurate square rings
- re-positioned side tabs with new rings and re-sewed them on with space in the middle (secured with hidden hot glue too, shhh!)
- cut up a cardboard box and re-taped it to fit the inside of the bag and keep its shape (see photo above of that in progress)
- weathered with eyeshadow
And that was it! With just a few hours of mindlessly sewing while I sneezed and watched old episodes of Hannibal, I had a perfect Rey butt bag and I was ready to submit to the Rebel Legion!

Or SO I THOUGHT! (cue dramatic music by John Williams and tightly-edited action scenes interspersed with me crying in a bathtub surrounded by RIT dye).
Stay tuned for the harrowing tale of my first rejection and my comeback!
Making a Scavenger: Rey’s Tabards and Arm Wraps
So you want to make your own Rey cosplay? You’ve come to the right place!
First, take a look at how I built Rey’s staff and created her base outfit. Once you’re up to speed, let’s go into those “extra” pieces that make Rey’s costume so recognizable.
Tabards

To start, I had a bunch of gray gauze left over from my first version of Rey, so I figured if I just made them a little more brown, I could match everything.
Oh how wrong I was.
Not only did I not get the colors right, but I also mismeasured the fabric I had left. After I’d spent two full days of unemployment dyeing gauze with different mixes of dye, tea, and coffee, I tried them on and realized I needed about 2 more feet to get the length right:

At that point I had dyed everything so much that I wouldn’t have been able to get that color again in a million years, so I decided to start from scratch with a fresh batch of white gauze that I could dye to the perfect colors – and cut long enough to reach the right length.
Once I had them dyed and measured properly – again with a mix of different dyes and tea and coffee – I did some ninja stitching that ended up saving me TONS of time and fidgeting attached them to the shirt at the shoulders.
You see; so much of Rey’s look is strategically placing those stupid tabards in the right spot so they look effortless, but let me tell you – there is a LOT of effort involved in getting them just right!
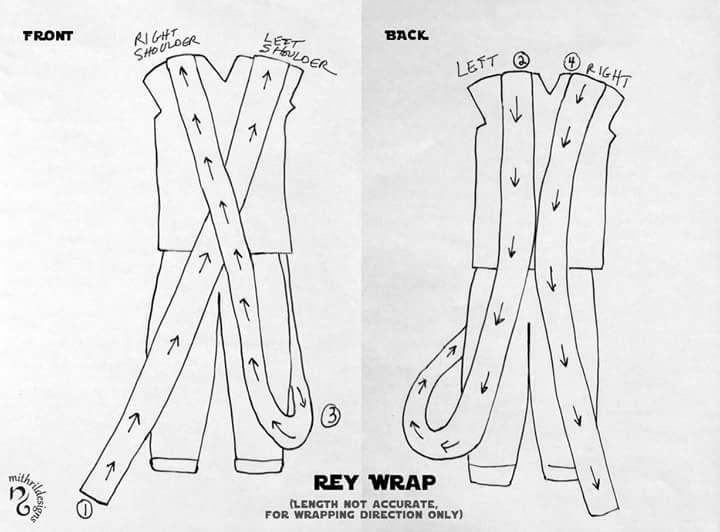
First I gathered the fabric at the shoulders and sewed them through with a few gathering stitches. To get them the right width, I threaded the needle and thread through the whole width then scrunched it up on my shoulder while looking in the mirror, and tied off the thread at the right width.
After the shoulders were shirred, I then draped everything at the right length and direction, then added a few stitches at the shoulder. This makes it easy to get in and out of the shirt and keeps me from having to re-affix them every time I get dressed.
Lastly, I put the whole thing on – belts and all – and fidgeted and futzed with the wraps until they laid just right. Then I sneakily safety pinned the spot where the fabric criss-crosses in the front and where they nearly connect in the back. The catch with these: the pins are hidden by the belts!

Once they were on, I finished them with some weathering courtesy of my trusty eyeshadow weathering technique I learned while working on the shirt. And I even mopped up some eyeshadow spills with pieces of tabard for the uneven splotchy look with some success too! The fun thing about Rey’s outfit is that it doesn’t need to stay CLEAN!
Arm Wraps
Yet another great thing about the Rey Cosplay Community on Facebook is that it’s international – meaning those UK Reys get all the good Boots wraps!
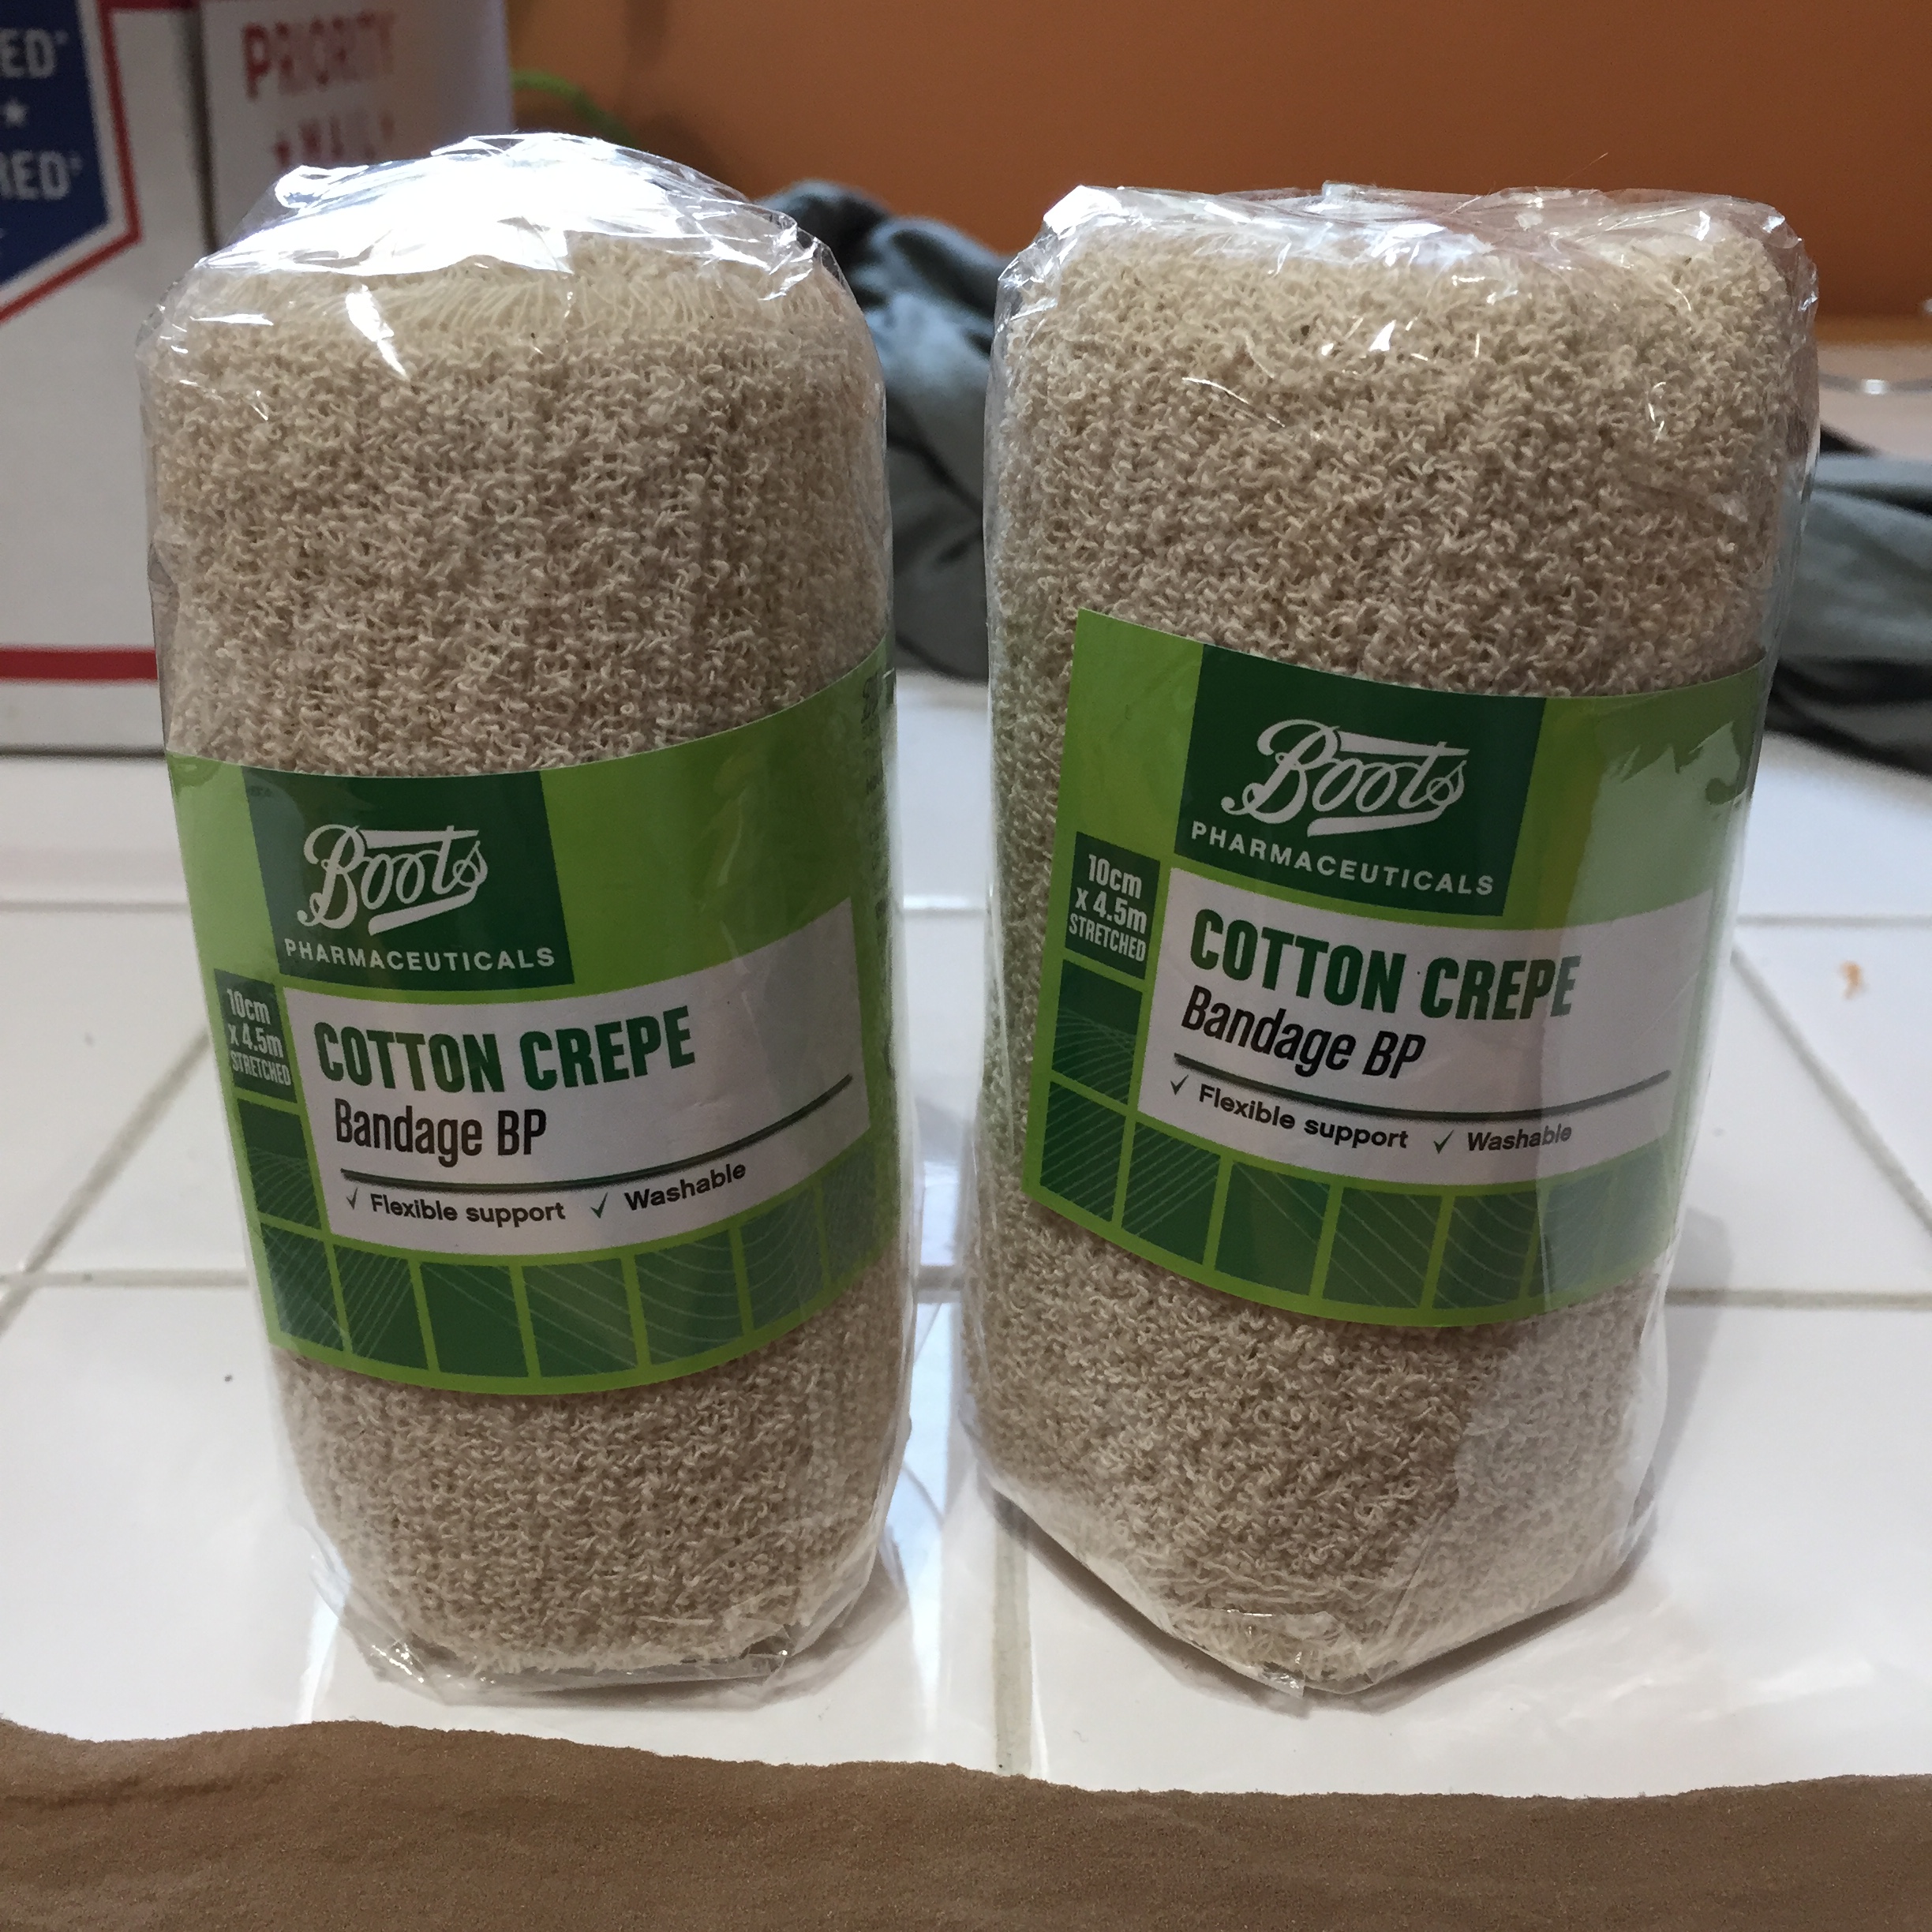
These are apparently the screen accurate wraps that Daisy Ridley wore in the films, and I have to admit: they are pretty badass and accurate.
To get them to look right, I discovered a tip from another Rey: Take Dollar Store knee high pantyhose and cut the toes out, then use them as makeshift compression sleeves which you tucked the edge of each wrap into and wind down the arm to the wrist then tuck the edge in.
While other Reys have used two wraps on each arm or cut one in half for more layers, I found success with just one wrap on each arm, with minimal gapping or slippage. The pantyhose act as a kind of grippy liner but don’t choke the life out of my not-very-toned bicep or create that unpleasant sausage-casing look that a full on compression sleeve would do to me.
Once they’re wrapped, I then take the same approach to weathering them as I did my shirt and tabards: a bunch of eyeshadow and a big brush. This ends up coating the edges just right. While I have to go back each time and re-apply the weathering, it actually adds to the rough and tumble kind of feel of the whole thing. Win-win!

Next, we’ll take a look at how I finished my Rey with the 4 B’s: bracer, belts, boots and butt bag!
Making a Scavenger: Rey’s Base Outfit
Originally I had considered mashing all of the soft pieces I created for Rey into one long post, but after I hit 1,000 words halfway through the pants alone, I decided to break them up into shorter posts so you’re not hit with a wall of words.

You’re welcome.
Before we start, let me make two notes:
ONE: There is a saying among Rey cosplayers that our girl’s outfit consists of “fifty shades of greige”, and let me tell you: this is one hundred percent true. Depending on what source material you’re looking at (movie stills, photos of the costume from traveling displays, the movie itself), the material changes colors, making it damn near impossible to perfectly match the original.
Having said that, the goal when dyeing your pieces should not be to match the screen-worn outfit, but for all of your pieces to match each other. That is, your pants need to be the darkest of the pieces, with the shirt being the lightest along with the arm wraps, and the tabards (the flowy fabric that drapes from her shoulders) is somewhere in the middle.
Now, if you’re just going for a con Rey and have no desire to go for Rebel Legion approval, by all means, GO NUTS. Get down with your greige self! But if you’re going for 100% screen accuracy, prepare for a lot of tears, a lot of wasted dyeing, and desperation on a scale you previously only thought existed in Jane Austen novels.
And TWO: f you’re building a Rey – Rebel Legion or not! – I HIGHLY SUGGEST you join the Rey Cosplay Community on Facebook. If I hadn’t joined the group, I never would have known where to even begin. This group has the most detailed files and lists and links, seriously. I have yet to find another costuming-focused group on FB with as many well organized resources. Go join. I’ll wait.
Good? OK. Let’s get started.
Shirt

To make Rey’s shirt, I started out with a recommendation from the Facebook group – there were 3 or 4 options, but at the time this one was the only one available, so I went for it. In hindsight, I could have easily gone a size or two smaller on the shirt (and wouldn’t have had to take it in on the sides like I ended up doing), but maybe when this shirt falls apart I’ll upgrade.
Either way, I started off with white and just dipped the shirt in a big pot of tea that I had brewed to add some brown to my tabards (more on those in another post). After the tabards were done, I tossed this pure white shirt in there for a few seconds and voila: perfect color.
But the shape was off because I bought it big, so I took in the sides, sliced the sleeves shorter and stitched the collar up ever so slightly so it resembled our girl’s busted up tunic even more:
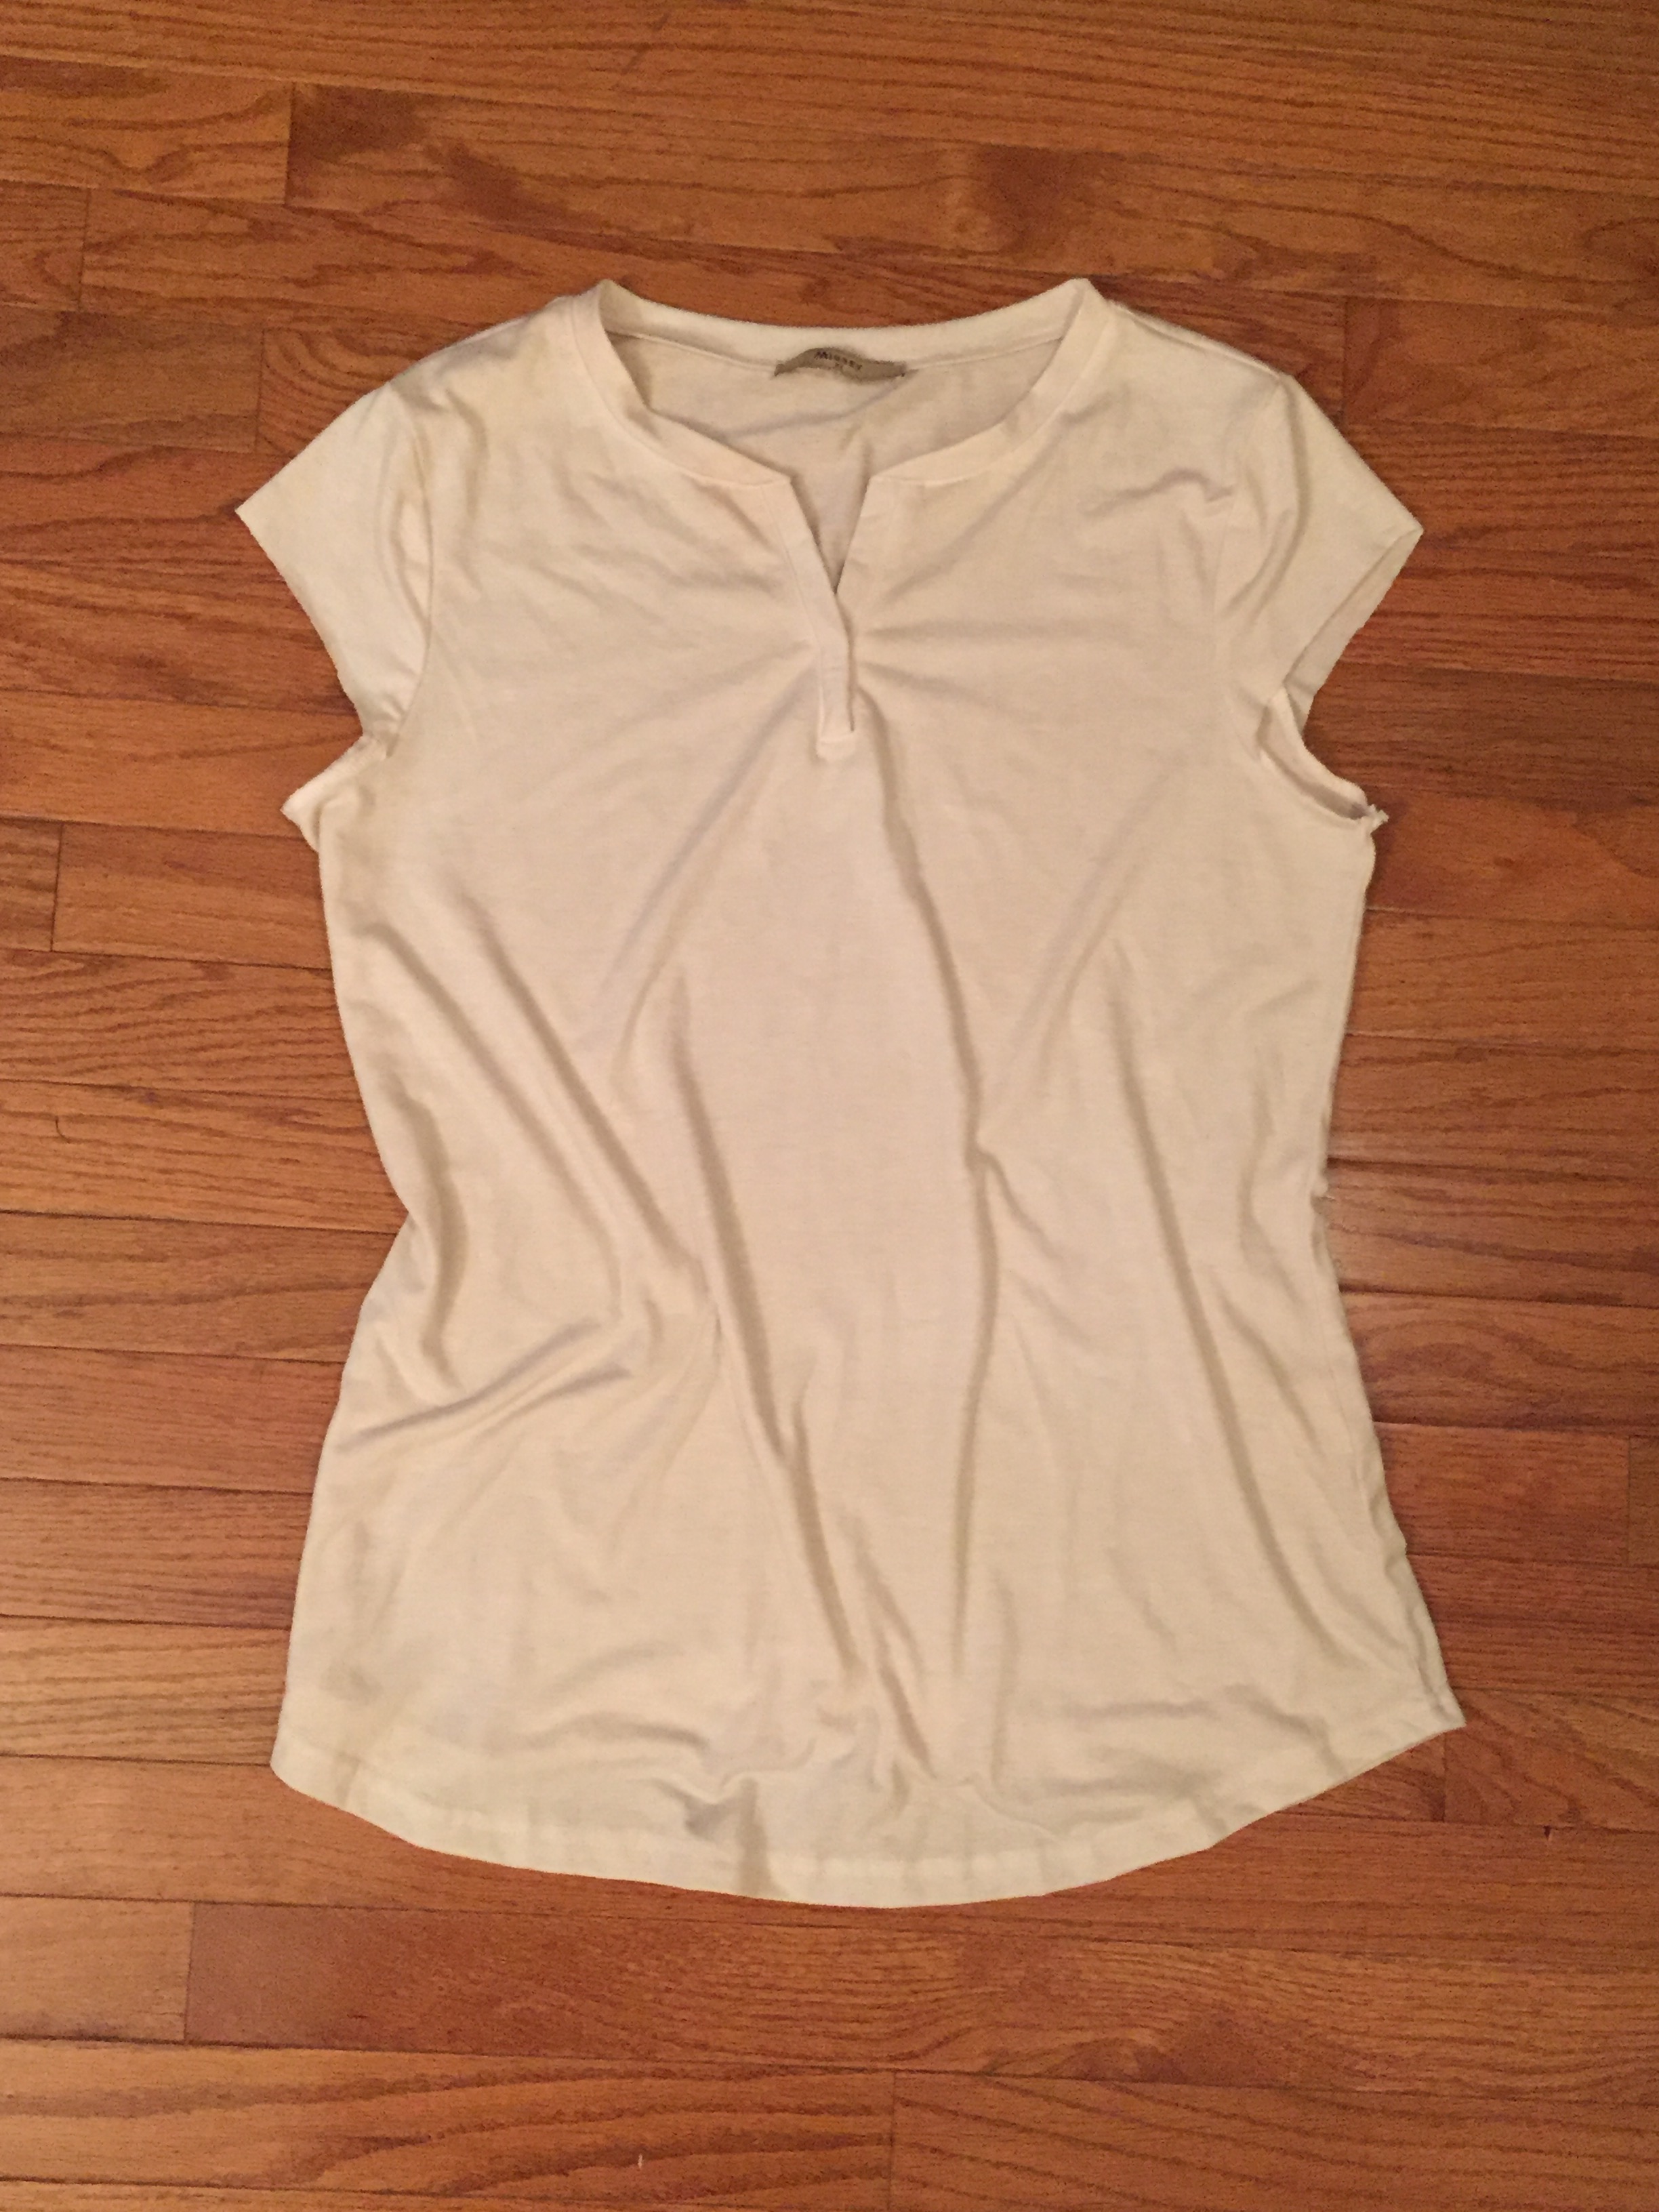
To finish it, I weathered it with brown and black eyeshadow and a big-ass makeup brush. It was surprisingly easy to get it looking kind of grimy within a few minutes!
Pants
Many girls in the Rey Facebook group had luck with these pants from Amazon. Because they were so cheap and wouldn’t require hemming, I got them in white first. I say first because I had to eventually re-dye them, but we’ll get there.
On dyeing day one, I had next to no idea what the hell I was doing. So when I first dipped my white pants into a bath of Sandstone and Frost Grey Rit dyes (according to the Rey Facebook group this was the concoction that worked for everyone), I took them out and screamed: as you can see on the left, they were basically blue/green and unusable.
Now, this was also before I DRIED the pants. For all I know, they would have been just fine if I’d waited for them to dry. But I panicked and immediately tossed them in a pot of dye remover… which gave them a permanent green tinge.
I’ll pause here to note that the dyes I used were specifically for synthetic fabric, which is what these pants are made of. But the ratio of colors was never really listed anywhere – it’s always “just eyeball it”, so I did. Depending on what fabric you use, you might be able to use regular Rit dye and get better results than me! The point is start slow and do not get discouraged.
At the time, I thought the pants (after drying) looked a tiny bit green, but because the colors all had to be relative to each other, I took a break and focused on finishing the tabards before I went back to the dye pot.
So stay tuned for my next post where I go into detail on how to make Rey’s tabards and arm wraps!
Jedi in Training: Building Resistance Rey
Before I even had my Rebel Legion approved Jakku Rey finished, I had already set my sights on my next costume:

Resistance Rey
When I first saw this costume at the end of The Force Awakens, I immediately gasped and thought: THAT is a costume I want to wear. But having been a member of the Rey Cosplay Community on Facebook for a few months, I’d seen the struggles these ladies went through while trying to get their vests and gauntlets just right.

But thanks to Jakku Rey, I had a LOT of the parts for this costume already: the staff, belt, boots, leg holster and even the blaster (which was totally a “tipsy on Etsy” purchase that I DO NOT REGRET). I needed, essentially, just a few pieces:
- vest & gauntlets
- gray gauze wraps (for under the gauntlets)
- wrap shirt
- pants
Considering I’d done my share of research and – let’s be real, creeping – on the folks who had built this costume before me, I was fairly certain I’d be able to commission most of it and give the pants a try on my own.
I didn’t dwell on it too often though; my Jakku Rey build took up most of my time, and my initial rejection after my pants were too green (more on that later) left a sour taste in my mouth for a minute. But instead of being a Petty Betty, I continued to watch and admire all those beautifully crafted vests and gauntlets from talented seamstresses in our group and thought “Maybe if I hit the lottery.”
Well, turns out I didn’t need the lottery – just a surprise bonus at work and a grateful Scavenger Sister who discounted her work to nearly half the usual price!
Wendy of Chic and Geeks is a real life ANGEL, you guys.
Seriously. Just look at that detail:

Not only did she NOT reach through the phone and slap me silly when I went bananas trying to figure out my measurements, but she created the vest, gauntlets, AND bag for me at an incredible price – AND she even threw in the gray arm wraps for me at the last minute!

They are so far beyond anything I could have created myself – seriously, my plan was to just wing it with gray gauze fabric and hope for the best. Instead, she wrapped, stitched, and color matched these babies to the whole outfit so I don’t have to waste another month of work on that “tiny” detail.

And don’t even get me started on the bag, and the gauntlets. Seriously. The attention to detail she has is second to none. I drool just looking at these things. Knowing that they’re here waiting for me just gives me the happies.
So now that I’ve got roughly 75% of the whole costume done, I’ve just got the shirt and the pants to do! The shirt I’m looking at commissions for at the moment, and the pants… well… let’s just say I have approvable pants and I’ve started on them. More on those in another post if and when I’m successful!
Basically I went from dreaming about wearing Resistance Rey in May to possibly having a Rebel Legion approved build by the time I headed to New York Comic Con that October!
How about you: what are you currently working on? Share in the comments!
Making a Scavenger: Rey’s Staff
The part of my costume that I’m most proud of, by far, is Rey’s staff. This is easily the first thing that every single person, old or young, male or female, notices when I’m trooping. I absolutely delight in the looks of awe when people ask to see it up close and hold it.

When I first planned my costume, I had considered not even building a staff; it isn’t technically required by the Rebel Legion for costume approval, after all. But after seeing photos of other badass Reys wielding their staffs at troops, and, quite frankly, realizing that I wouldn’t have anything to do with my hands, I decided to take the leap. And I am so glad I did.
Clocking in at about 6’4”, my staff is made of a 1” wooden dowel core, 3D printed pieces, spray paint, leather and fabric. It took me hours of painting and gluing and sawing spread across about four weeks. It’s solid, heavy, and thanks to the weathering technique I discovered when I sponged bronze paint onto the finished edges, looks super realistic.
To start, I knew from the Rey Cosplay Community group on Facebook that my options for the staff base were either a 1″ wooden dowel or a PVC pipe. Some that had gone that route said the PVC was bendy, so I opted for wood. After learning they don’t sell 1″ wooden dowels over 6 feet tall (and also conceding that I should probably be able to break the thing into two pieces for easy travel), I settled on two 4′ tall dowels that I shortened and connected with a little ingenuity and some help from my papa.

I’d seen many of my Scavenger Sisters succeed with 3D printed pieces from a variety of sources, and ultimately ordered my pieces from the father of one of the group members. Bonus: he lives near the talented woman who made all of my leather pieces, and she was able to ship everything together to save on costs! Sweet!

I’d heard horror stories of other Reys having to sand the hell out of their printed pieces and/or their dowels in order to get them to fit, but by some miracle, I did not. They slid right on seamlessly. And after some checking and re-checking of the handy-dandy color coded guide (in the photo above) and creating a cat-safe space for my pieces to dry in overnight, I had Gorilla Glued all the parts on and moved on to connecting them.
In Home Depot, I wandered the plumbing aisle in search of a metal connector set that I could attach to either end of the break in the middle. When an employee saw my furrowed brow and asked if he could help, I told him what I was doing. To his credit, he excitedly explained that I should probably go for plastic connectors because they’d be easier to anchor into the dowel by Dremeling screws through them and into the wood. BRILLIANT!

To start the process, I Gorilla Glued the connectors to the edges – they were 1″ connectors, but physics being what they are, of course they were larger than the dowel, and needed some stuffing and propping to keep from wobbling. The glue was really just extra insurance, after all, since I planned on using the Home Depot employee’s idea and also screwing them in. You can see the fabric stuffing sticking out in the photo above.


Once the glue had cured for a full day, I asked my dad if he could show me how to use his Dremel tool, and he obliged – in the half hour before we took him out for his birthday dinner! It was fun learning some new skills and working together with my dad to create this piece of my costume. He was so sweet, asking me if this was for “coz??” Turns out he’d asked his friends if they’d heard of this thing and misunderstood when someone explained to him what “cosplay” is. *squee*

The result still looked kind of janky, but later that week the weather finally improved and I was able to move onto the next step: painting!
This is another place where I learned from the Reys that had come before me. I was totally unaware of things like textured spray paint until I joined the group, but after one helpful Rey took a snapshot of all the paints she’d used in the layers of her build, I literally went to the spray paint aisle with that picture on my phone and grabbed all three cans.

I started with a black, then added a textured silver/gray, and lastly added another kind of textured paint with a dull sheen to it that ended up looking quite metallic.
To weather it, I experimented with some techniques before sponging bronze acrylic paint my father had lying around onto just the edges of the entire staff in uneven strokes. The result even had my mom asking me, “Wasn’t that wood a few hours ago? How is it rusted metal now??”
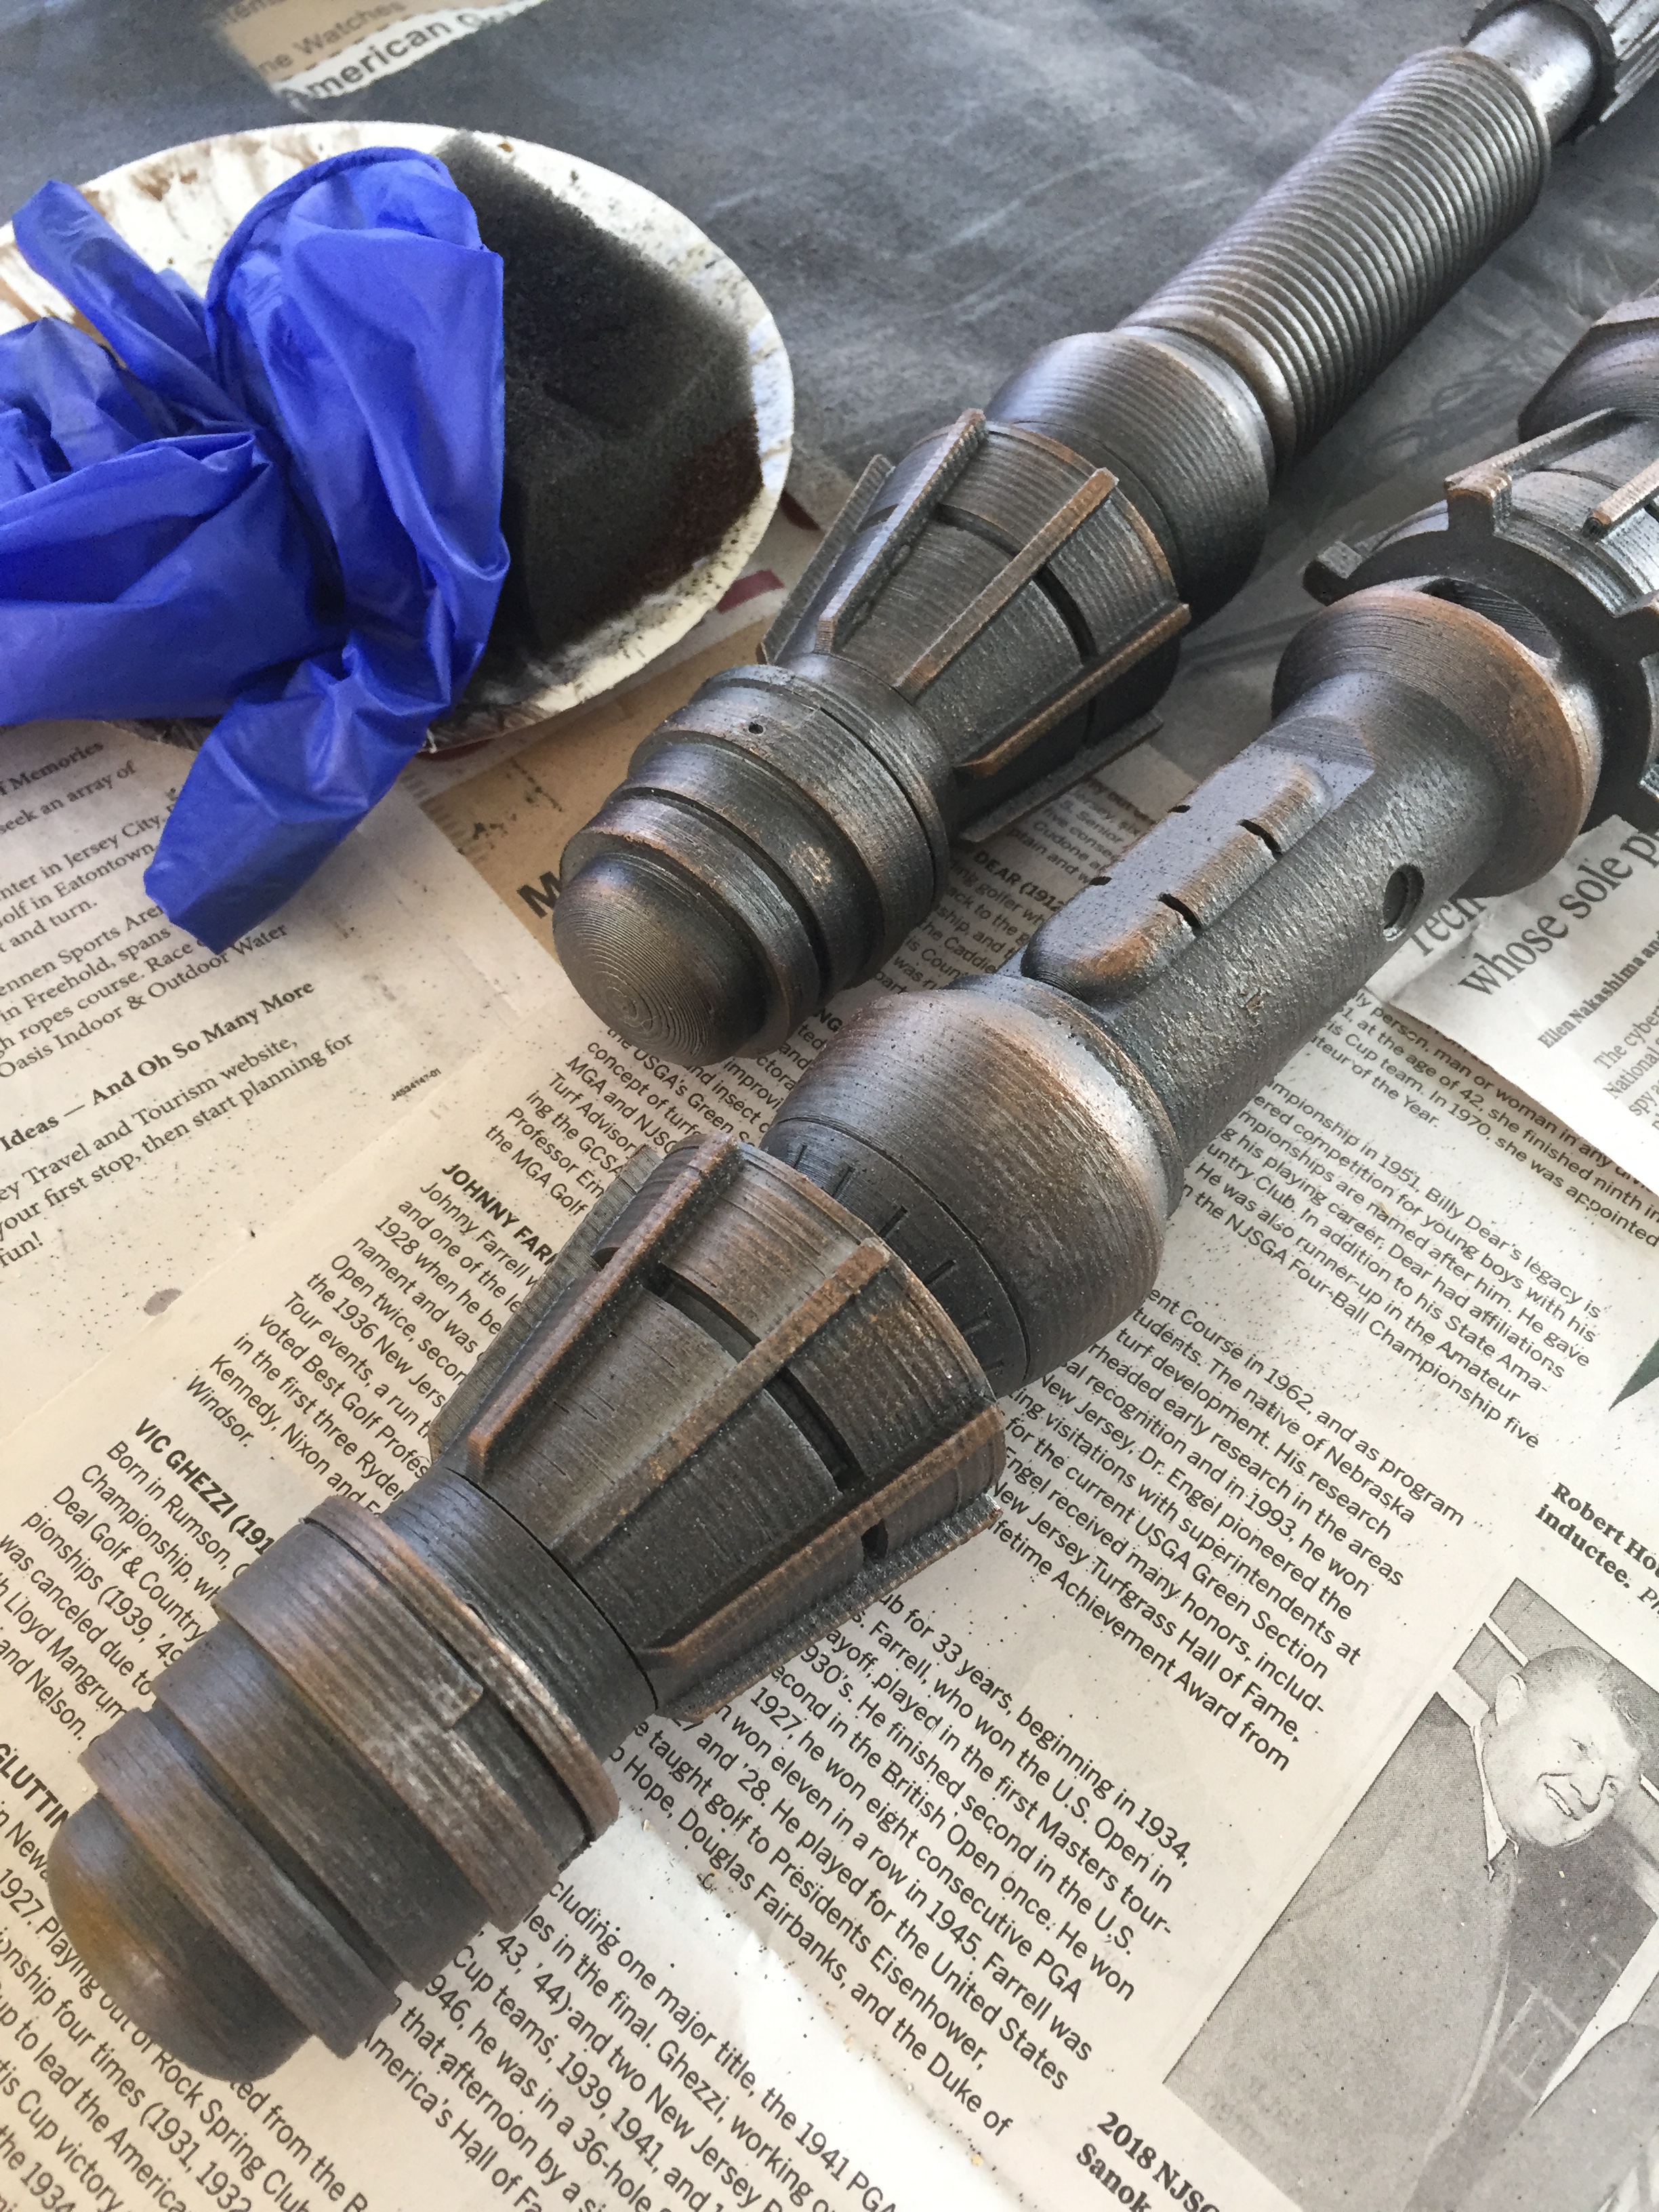
I was over the moon excited to have it looking so great. The only thing I had left to do was add the finishing touches of fabric, leather and the strap.
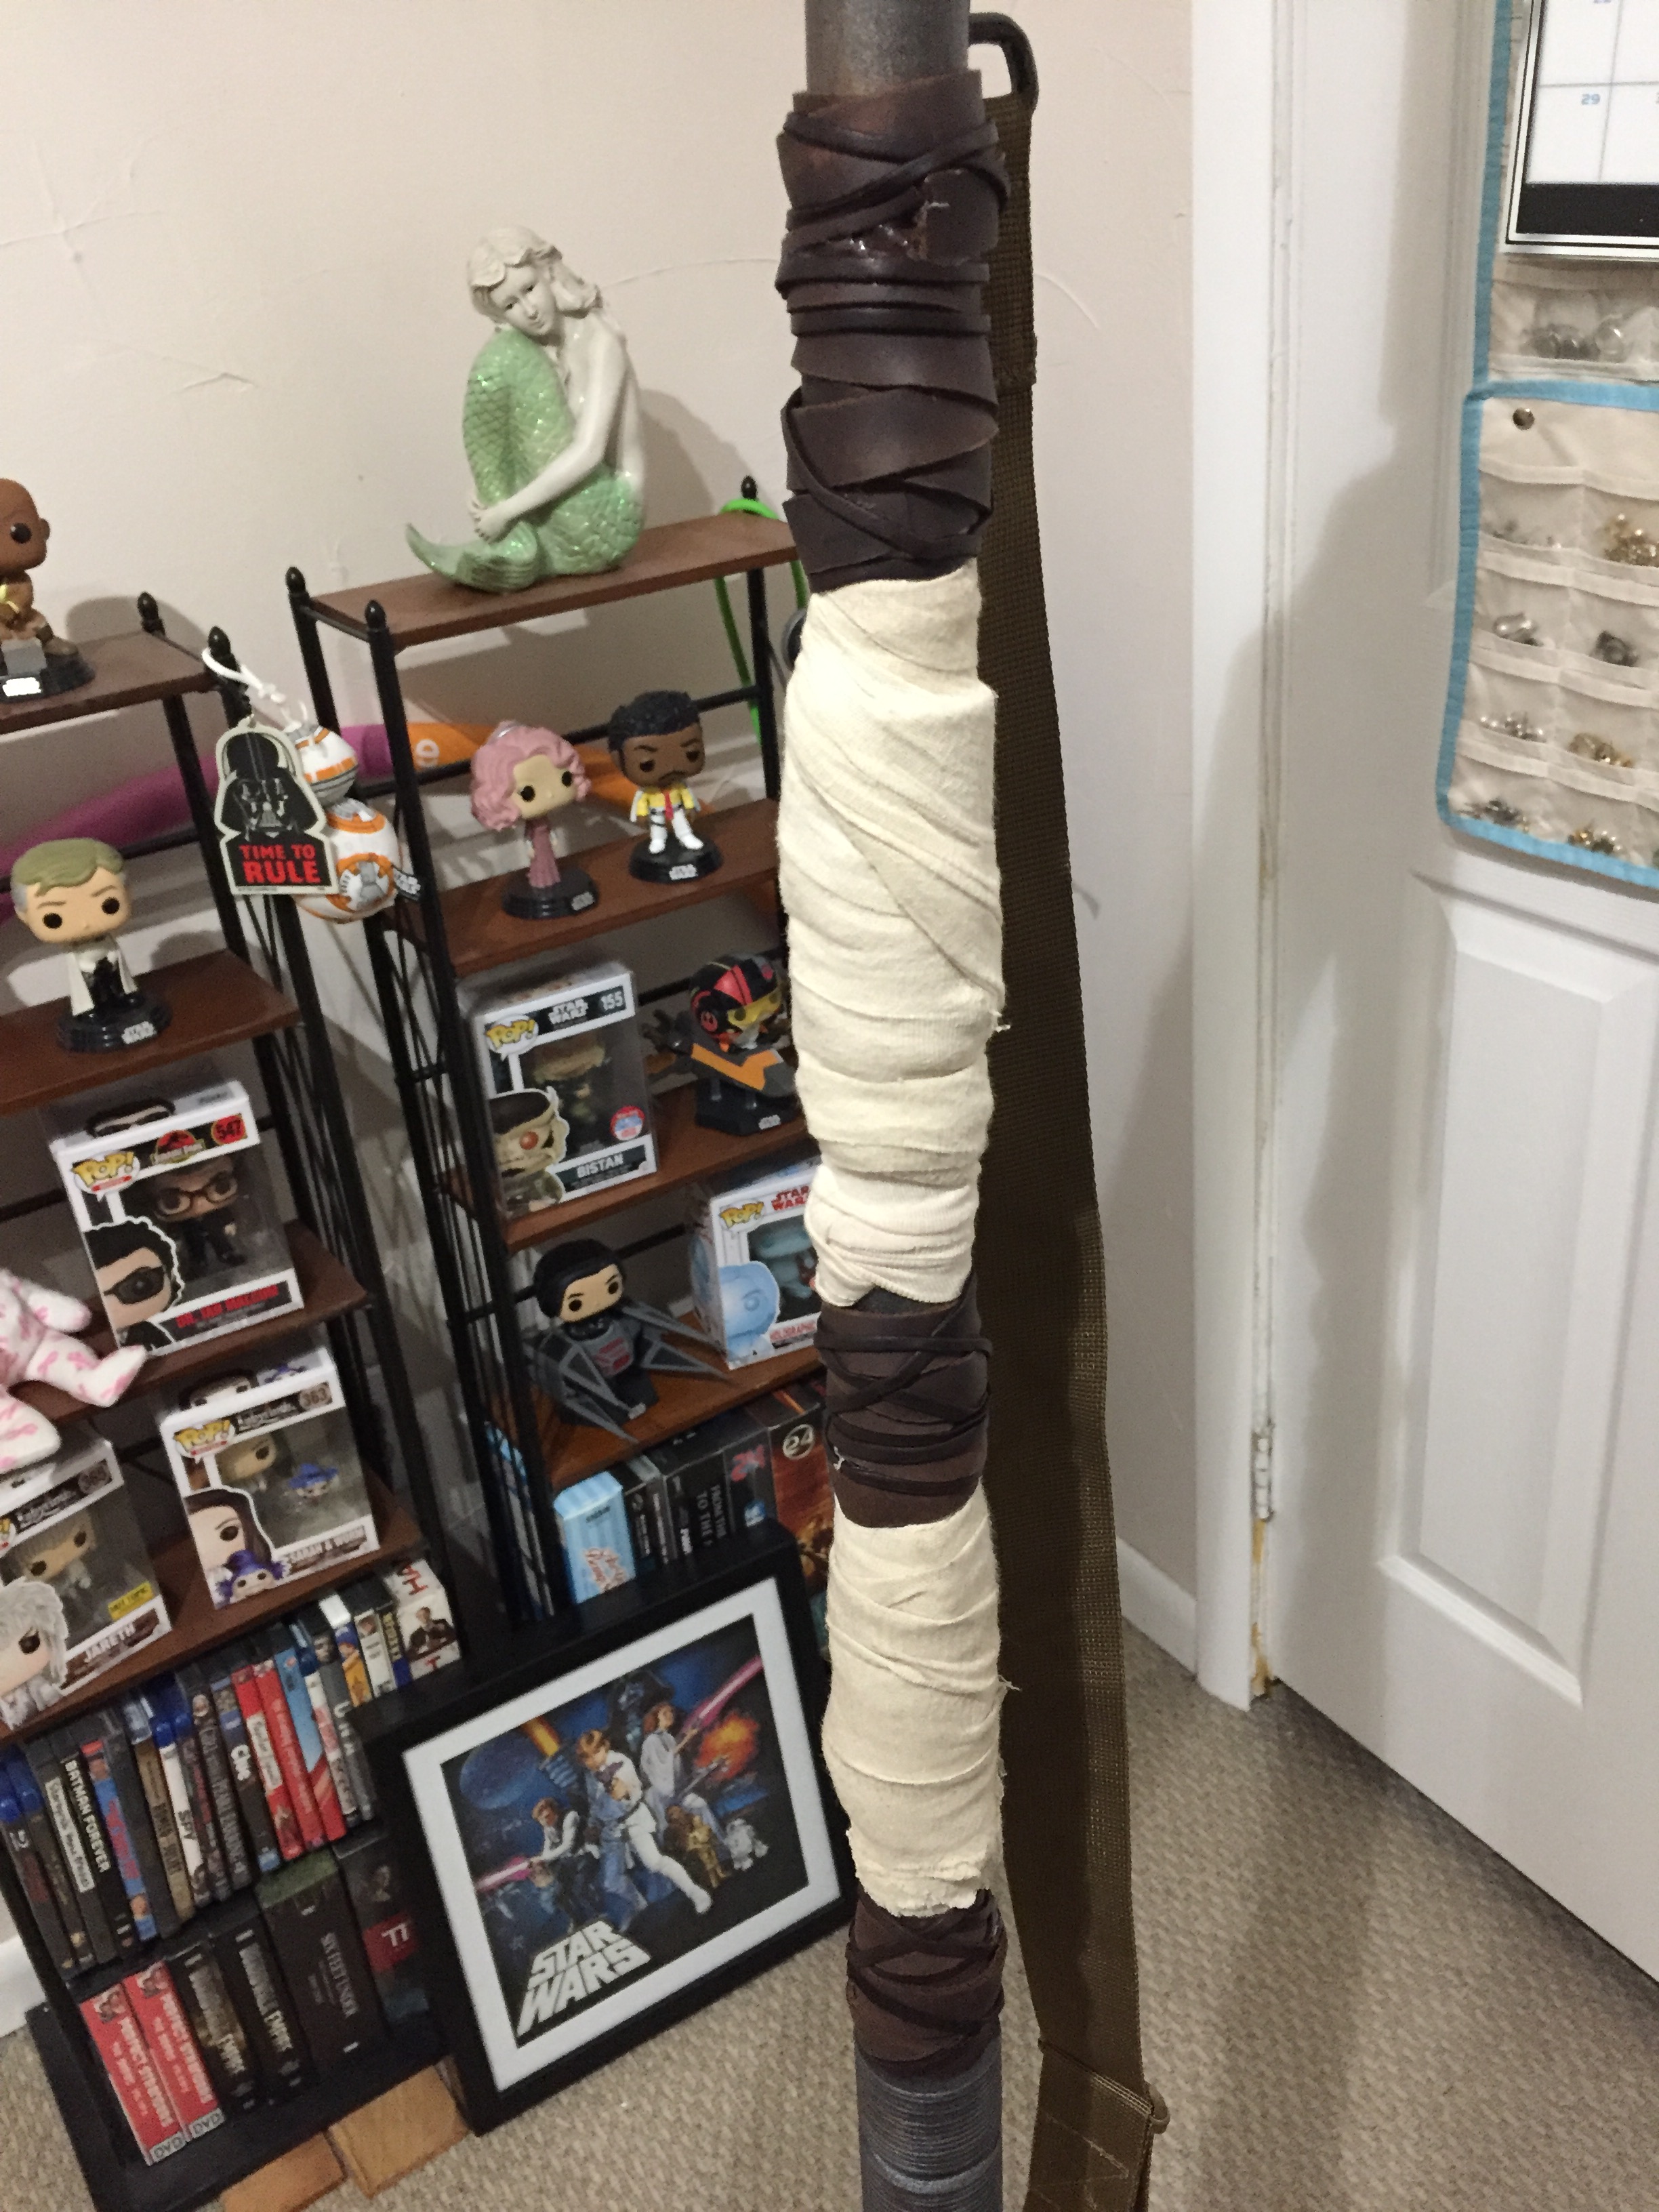
The fabric was just some were just some leftover gauze scraps I had lying around from my wrap dress and cutting the sleeves of my shirt. I used some movie stills as reference photos to find their placement within the 3D printed pieces and figured out a process of hot glueing the base, then wrapping, glueing, wrapping, and so on.
Note: The top fabric area conveniently hides the connector!
The leather was an easy find at AC Moore: two thicknesses of leather cording that I used the same process as the fabric: anchor, glue, wrap, repeat. Once everything was set, I busted out the eyeshadow and “weathered” the whole shebang by sloppily brushing brown and black eyeshadow all over the fabric.
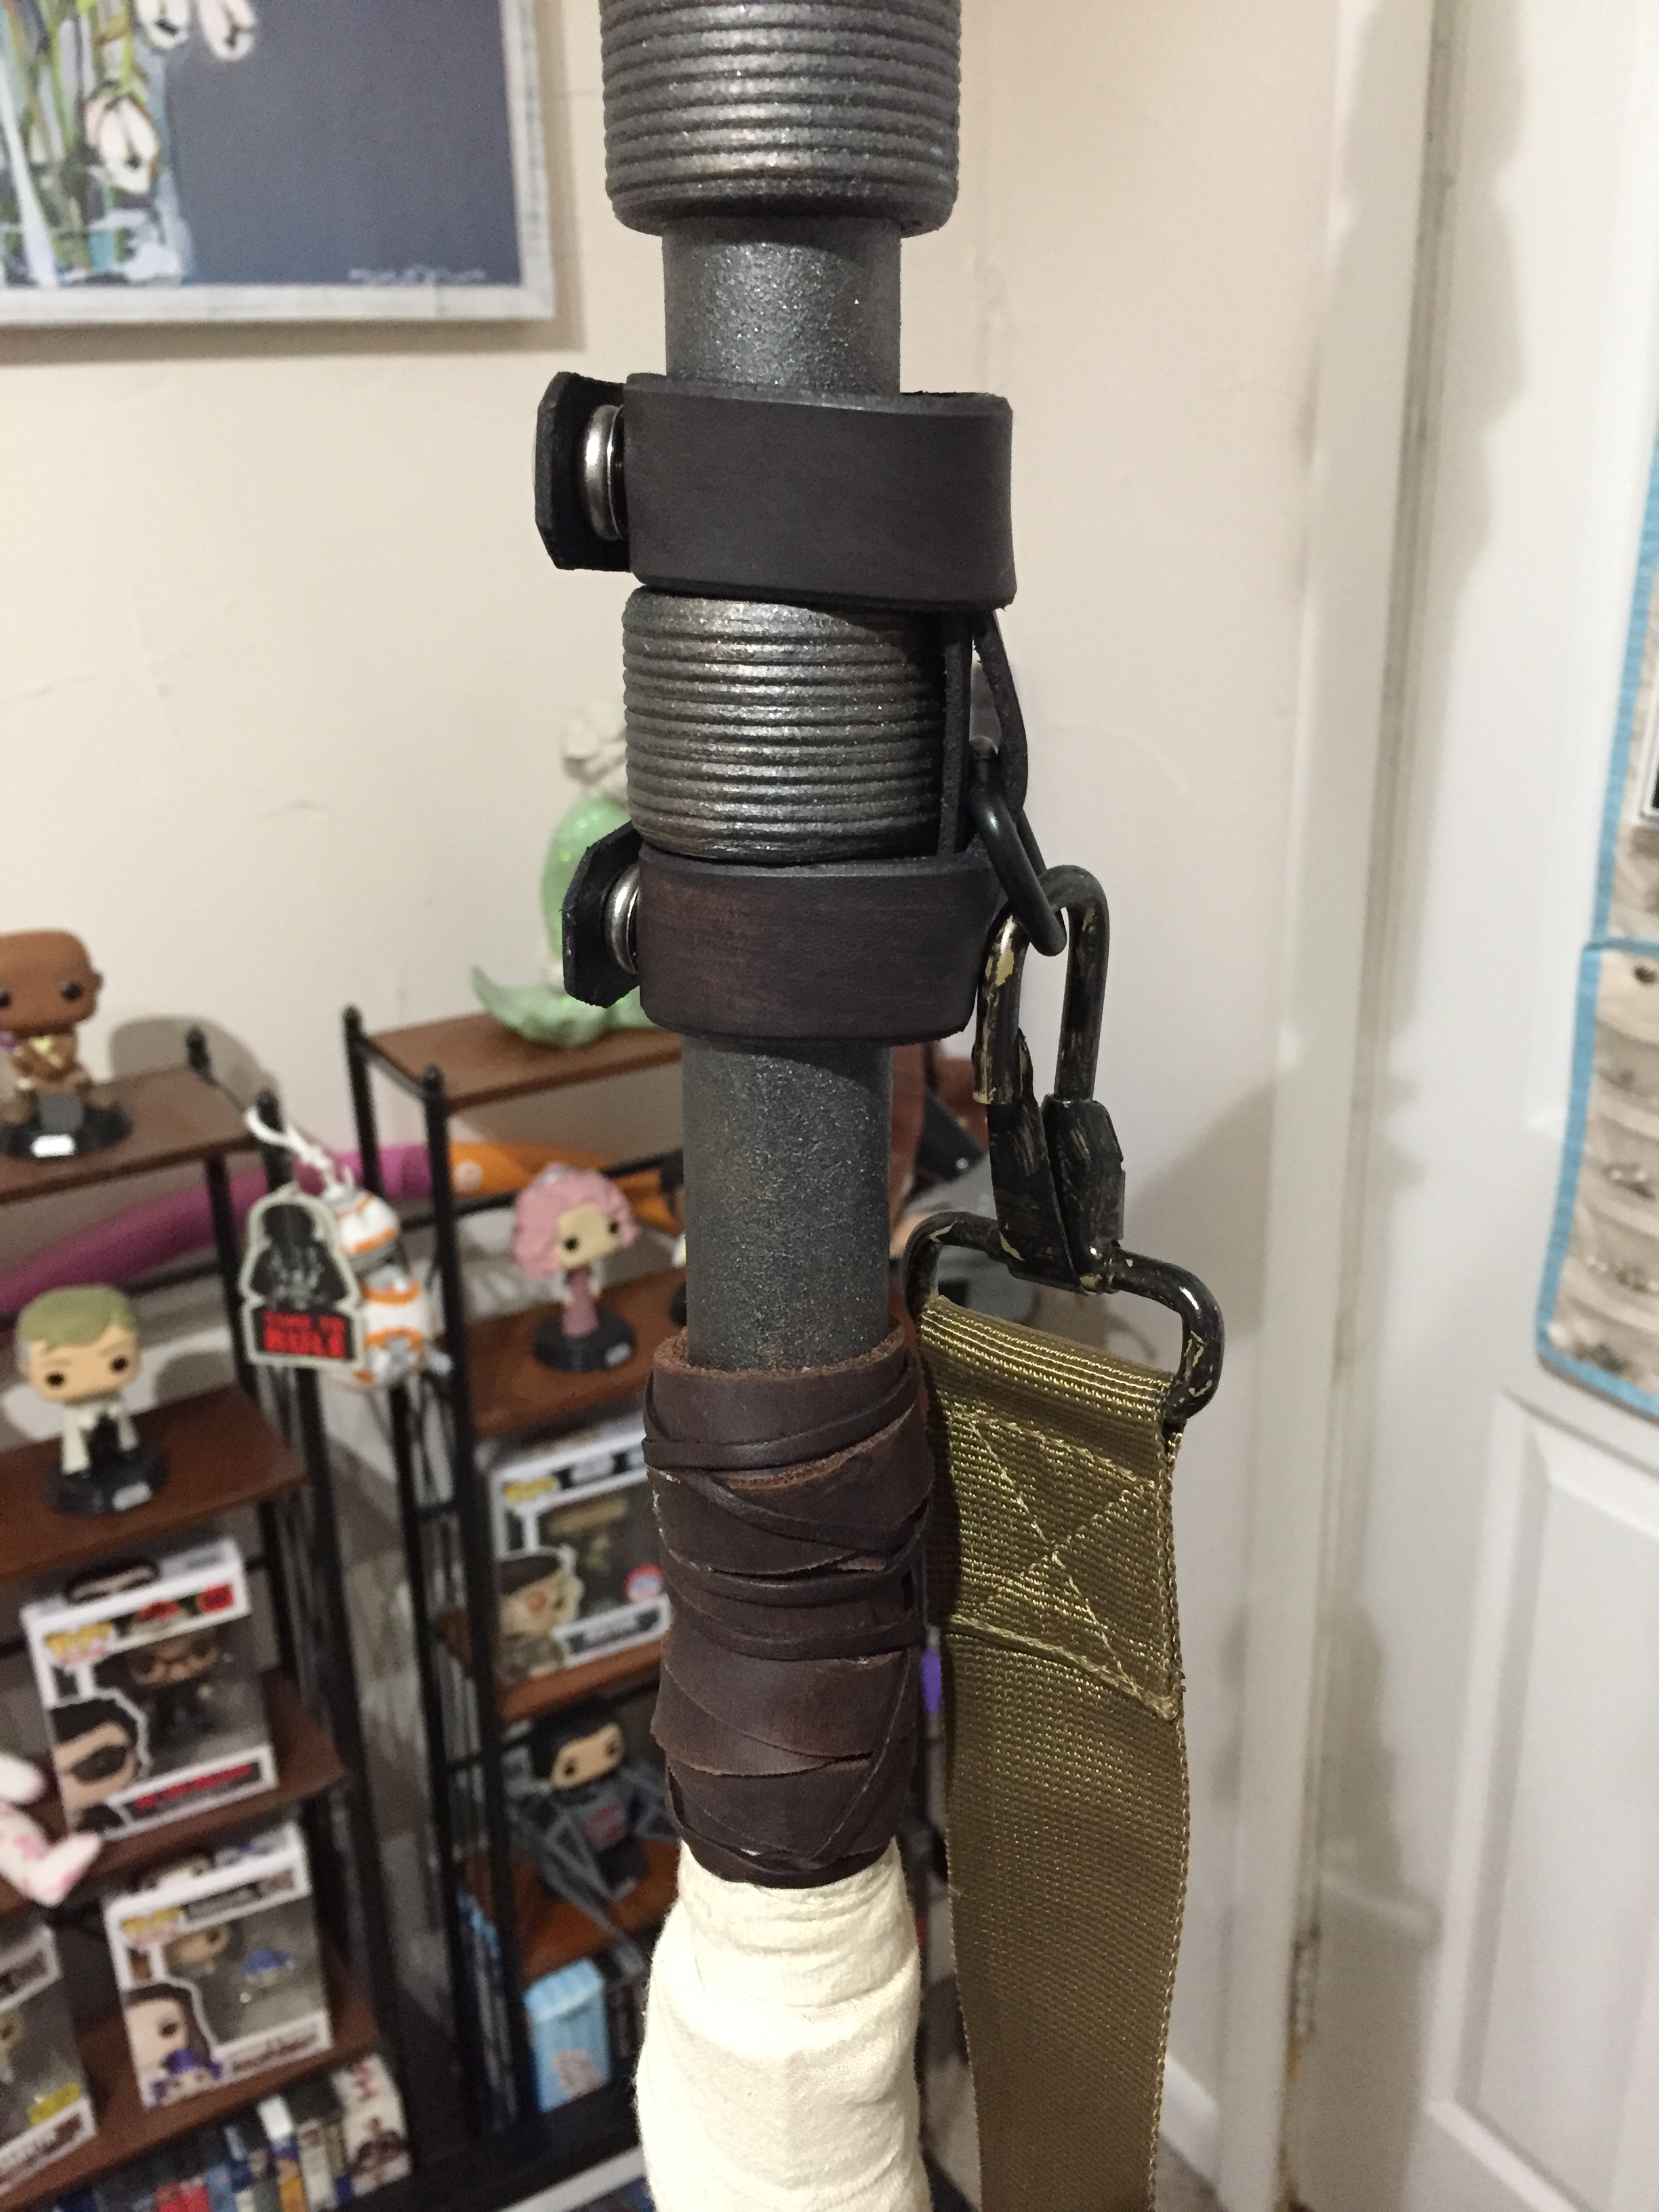
Finally, the strap was an Amazon purchase recommended to me – yet again – from other Reys who had been RL approved. The only thing I had to was paint the metal details on it with some black acrylic paint I had from old crafting projects, and purchased a pair of the handmade leather strap connectors from a fellow Scavenger Sister and *voila*!
 Finished staff!
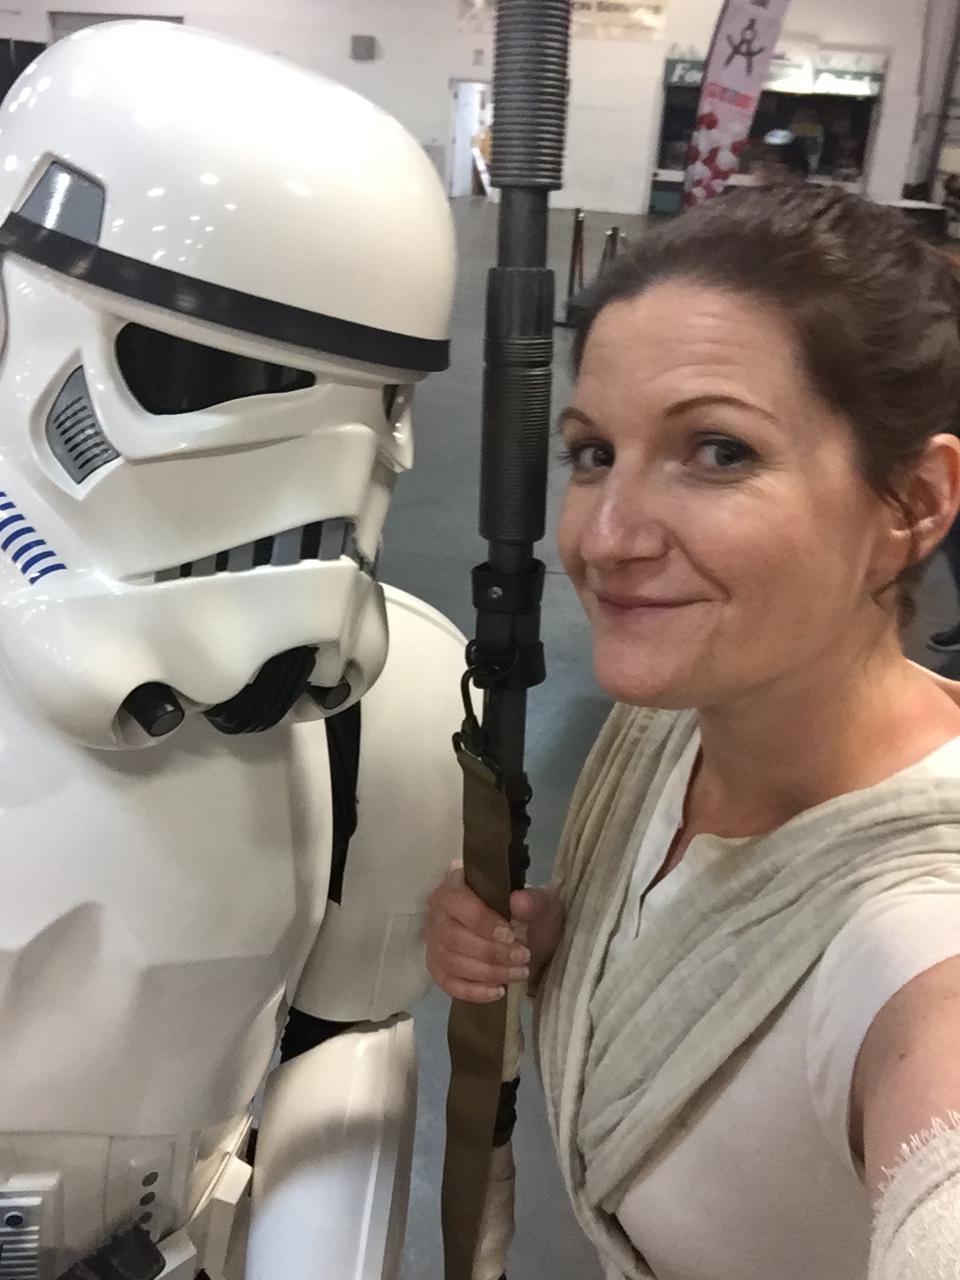
At my first troop, I walked into the changing area and found a handful of guys suiting up in custom-built Stormtrooper kits with dozens of pieces and insanely detailed craftsmanship – yet they stopped in mid-sentence when they saw my staff! These guys put weeks or even months into their armor, and they were oohing and aahing over my build? Talk about an ego boost!

Even Leia had to get in on the quarterstaff action!
After that, every person who showed up to troop with me that day had to get a good look at it. Every shy child who was too scared for a photo turned into a beaming Jedi-in-training when I’d whisper “Would you like to hold my staff?” and they wrapped a little hand around it while I held it safely above without them seeing. At a slower troop last weekend, I got into more conversations with passing adults about how I made the staff than I took photos with kids!
Ultimately though, I wouldn’t have it any other way. I am probably the least adept at tools, building things, and generally being handy. So this was a huge project for me and one that I’m super proud of. I’d wear the damn thing to work if I could. If I can build it, you TOTALLY can! Let me know how you fare if and when you take this project on, I’d love to see your progress!
