Originally I had considered mashing all of the soft pieces I created for Rey into one long post, but after I hit 1,000 words halfway through the pants alone, I decided to break them up into shorter posts so you’re not hit with a wall of words.
You’re welcome.
Before we start, let me make two notes:
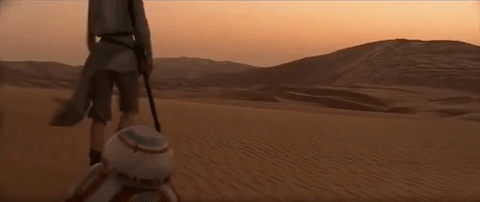
ONE: There is a saying among Rey cosplayers that our girl’s outfit consists of “fifty shades of greige”, and let me tell you: this is one hundred percent true. Depending on what source material you’re looking at (movie stills, photos of the costume from traveling displays, the movie itself), the material changes colors, making it damn near impossible to perfectly match the original.
Having said that, the goal when dyeing your pieces should not be to match the screen-worn outfit, but for all of your pieces to match each other. That is, your pants need to be the darkest of the pieces, with the shirt being the lightest along with the arm wraps, and the tabards (the flowy fabric that drapes from her shoulders) is somewhere in the middle.
Now, if you’re just going for a con Rey and have no desire to go for Rebel Legion approval, by all means, GO NUTS. Get down with your greige self! But if you’re going for 100% screen accuracy, prepare for a lot of tears, a lot of wasted dyeing, and desperation on a scale you previously only thought existed in Jane Austen novels.
And TWO: f you’re building a Rey – Rebel Legion or not! – I HIGHLY SUGGEST you join the Rey Cosplay Community on Facebook. If I hadn’t joined the group, I never would have known where to even begin. This group has the most detailed files and lists and links, seriously. I have yet to find another costuming-focused group on FB with as many well organized resources. Go join. I’ll wait.
Good? OK. Let’s get started.
Shirt

To make Rey’s shirt, I started out with a recommendation from the Facebook group – there were 3 or 4 options, but at the time this one was the only one available, so I went for it. In hindsight, I could have easily gone a size or two smaller on the shirt (and wouldn’t have had to take it in on the sides like I ended up doing), but maybe when this shirt falls apart I’ll upgrade.
Either way, I started off with white and just dipped the shirt in a big pot of tea that I had brewed to add some brown to my tabards (more on those in another post). After the tabards were done, I tossed this pure white shirt in there for a few seconds and voila: perfect color.
But the shape was off because I bought it big, so I took in the sides, sliced the sleeves shorter and stitched the collar up ever so slightly so it resembled our girl’s busted up tunic even more:

To finish it, I weathered it with brown and black eyeshadow and a big-ass makeup brush. It was surprisingly easy to get it looking kind of grimy within a few minutes!
Pants
Many girls in the Rey Facebook group had luck with these pants from Amazon. Because they were so cheap and wouldn’t require hemming, I got them in white first. I say first because I had to eventually re-dye them, but we’ll get there.
On dyeing day one, I had next to no idea what the hell I was doing. So when I first dipped my white pants into a bath of Sandstone and Frost Grey Rit dyes (according to the Rey Facebook group this was the concoction that worked for everyone), I took them out and screamed: as you can see on the left, they were basically blue/green and unusable.
Now, this was also before I DRIED the pants. For all I know, they would have been just fine if I’d waited for them to dry. But I panicked and immediately tossed them in a pot of dye remover… which gave them a permanent green tinge.
I’ll pause here to note that the dyes I used were specifically for synthetic fabric, which is what these pants are made of. But the ratio of colors was never really listed anywhere – it’s always “just eyeball it”, so I did. Depending on what fabric you use, you might be able to use regular Rit dye and get better results than me! The point is start slow and do not get discouraged.
At the time, I thought the pants (after drying) looked a tiny bit green, but because the colors all had to be relative to each other, I took a break and focused on finishing the tabards before I went back to the dye pot.
So stay tuned for my next post where I go into detail on how to make Rey’s tabards and arm wraps!

Pingback: Making a Scavenger: Rey’s Tabards and Arm Wraps | Rey of Sunshine
Pingback: Making a Scavenger: Rey’s Accessories | Rey of Sunshine
Pingback: Making a Scavenger: Rey’s Hair and Makeup | Rey of Sunshine
Pingback: Building Resistance Rey: The Pants | Rey of Sunshine
Pingback: Building Resistance Rey: The Pants | Jess Runs Happy
Pingback: Making a Scavenger: Rey’s Hair and Makeup | Jess Runs Happy
Pingback: Making a Scavenger: Rey’s Accessories | Jess Runs Happy
Pingback: Making a Scavenger: Rey’s Tabards and Arm Wraps | Jess Runs Happy